
For those who crave the thrill of adventure and the excitement of conquering rugged terrains, building an off-road truck is not just a hobby; it’s a passion that ignites the spirit of exploration. An off-road truck, equipped with the right components and modifications, can tackle the toughest landscapes while ensuring safety and reliability. In this guide, we’ll journey through the essential stages of transforming a standard truck into a formidable off-road machine. From selecting a solid foundation to prioritizing crucial upgrades like tires and suspension systems, every chapter provides insights that will empower enthusiasts, racers, landowners, and modification specialists alike. Dive into this detailed roadmap, and let’s embark on the journey to create the ultimate off-road vehicle that mirrors your adventure-seeking lifestyle!
Foundations First: Laying a Solid, Stock Base for an Off-Road Truck That Travels Far

Foundations First
Choosing the right base is not flashy, but it is the most cost-effective upgrade you can make. The heart of an off-road truck is the platform you start with: a four-wheel-drive chassis that uses a body-on-frame design and a low-range transfer case. This combination gives you the structural strength to handle rough terrain and the mechanical leverage to power through mud, sand, and rocky sections without bending or twisting the vehicle beyond recognition. Early decisions about the base set up everything that follows, because a reliable stock platform allows you to allocate your budget toward real improvements rather than constant repairs.
When evaluating candidates, the frame and chassis demand careful scrutiny. Look for a clean, rust-free rail with no obvious signs of severe corrosion. Avoid trucks with major welds or obvious structural damage, because repairs on a frame are expensive and can compromise safety. A pre-purchase inspection should include service records, fluid levels, and a general sense of how well the vehicle has been maintained. A stock platform that has been cared for will reward you with fewer headaches and more learning opportunities on the trail. Take time to note any signs of age in bushings, joints, and mounting points, because these components set the ceiling for how far you can push the vehicle before it invites a failure.
Stop and picture your plan: you want to spend your dollars on traction, protection, and reliability rather than chasing cosmetic upgrades. A clean entry-level vehicle lets you spend money on riding, not on fixing it in the garage. You’ll hear this echoed in credible guides from the community, and it’s a practical reminder to stay focused on the long road ahead. With that mindset, you can resist the urge to chase the perfect looking build and instead hunt for a solid, original vehicle that has proven service history. This is not only prudent but essential if you are building your first off-road machine on a constrained budget. A solid, stock platform also gives you a reliable baseline for evaluating upgrades as you gain experience, which reduces the risk of incompatible parts or unnecessary expense.
With the base secured, you set the pace for the rest of the build. The first practical upgrade should be the tires, chosen to fit your anticipated terrain. Tires are the single most influential factor in off-road performance. The right all-terrain or mud-terrain tire, sized to fit without rubbing, unlocks traction that makes climbs possible and sand more navigable. In practice, many builders settle for 16–18 inch wheels as the sweet spot for a starter truck. Larger tires bring more ground clearance but alter gearing, speedometer accuracy, and fuel economy, so plan a careful calibration if you decide to go bigger. The goal is traction with a drivetrain that remains reliable and predictable rather than overwhelmed by chunky rubber. Don’t overlook wheel offset and backspacing, which influence clearance and rub on suspension travel; measuring these early helps you pick tires that fit your fender lines and wheel wells without surprises on the trail.
Even before you pull the trigger on a tire upgrade, plan for air management and proper inflation practices. Lowering tire pressure on soft surfaces improves grip, but you must stay within manufacturer-recommended minimums to avoid bead and rim damage. A portable air compressor, a quality gauge, and a few valve tools are compact, practical, and cheap relative to a tow in the backcountry. Remember, the objective is not simply to run larger tires but to run tires that you can manage confidently in the terrain you intend to explore. Pairing this with a simple, robust setup keeps maintenance straightforward and reduces the chance of a mismatched system failing on a remote trail.
Once the base is sound and the tires are selected, attention shifts to safety gear and recovery readiness. A basic recovery kit can mean the difference between hours of downtime and a smooth return to the trail. Invest in front and rear recovery points rated for your vehicle’s weight, a capable winch rope or strap, two soft shackles, a tree saver, gloves, a shovel, and lightweight traction boards. The kit should be organized in a labeled box and stored where you can reach it quickly in an off-road moment. Avoid improvised setups using flimsy hitch hardware; the reliability of recovery gear matters as much as the gear itself. Keeping the kit in good condition—checking straps for fray, shackles for integrity, and boards for cracks—prevents minor issues from becoming show-stoppers on the trail.
Underbody protection further fortifies the foundation. Bolt-on skid plates protect the engine, transmission, transfer case, and fuel tank from rock strikes and trail debris. They simplify oil changes and inspections and, crucially, keep you moving on long days in remote places. In early stages, avoid heavy steel bumpers that add weight and complicate handling. Function should guide form at this stage, with an emphasis on protecting critical components rather than adding bulk that saps performance. If you later add side protection, keep it lightweight and mountable so you can service components without wrestling with the entire bumper assembly.
Supportive steps come next: gradual suspension improvement and careful alignment. You don’t need a dramatic lift out of the gate. Start with fresh shocks and struts, replace worn bushings and ball joints, and consider a mild lift if required by the terrain you expect. Whatever changes you make, have the vehicle realigned by a professional to keep CV angles and driveshafts within reasonable limits. The wrong angles place extra stress on the drivetrain and accelerate tire wear, turning a simple upgrade into a maintenance nightmare. Again, patience pays: make small, measured changes and test them on familiar routes before taking the truck to more demanding terrain. If you pay attention to alignment and driveline angles now, you’ll avoid costly symptoms later when you push into more extreme environments.
All of this rides on a bedrock of preventive maintenance. Before any modification, set a baseline that ensures the current hardware can handle the new demands you’re about to place on it. Change the engine oil, coolant, brake fluid, differential fluid, and transfer case fluid. Replace air and fuel filters, inspect belts, and check the battery’s health. This routine may feel tedious, but it is the quiet guardian against breakdowns that could strand you miles from help. Regular maintenance creates a stable platform for upgrades and becomes the backbone of long-term reliability. Tracking service dates and keeping service records helps forecast future costs and prevents slipping into a cycle of unexpected failures.
To deepen your understanding of how the mechanical foundation translates into on-trail performance, consider the practical guidance offered by a focused resource on diesel fundamentals. It presents a clear, step-by-step approach to keeping core systems in balance and helps you connect the dots between routine maintenance and off-road capability. Mastering Diesel Mechanics: A Step-by-Step Path to Success.
Electrical systems, while not glamorous, demand discipline. For any extra accessories—lighting, air compressors, or sensors—build the circuit around a robust fuse block and relays. Run wires through rubber grommets, ground them to clean paths, and label circuits. A simple, well-organized harness reduces the risk of shorts and makes troubleshooting feasible in remote spots. For a first build, skip the complex dual-battery arrangements; start with a reliable starter battery, sensible wire routing, and a tidy fuse-and-relay plan. A clean electrical backbone helps you avoid hours of pain later. If you decide to expand the electrical system later, this groundwork will save you from a cascading maintenance headache rather than a single fix.
Finally, invest in knowledge as your most valuable upgrade. Skills—terrain reading, throttle control, and recovery technique—translate into real-world gains in safety and confidence. A beginner course or a local trail group can accelerate your learning curve and keep you from overreaching with a fragile setup. Practical instruction reduces risk and often reveals a few simple, repeatable habits that keep you moving through difficult sections with more control and less stress. The most reliable builds are those that evolve with the driver—the truck becomes an enabler of your growing skill set, not a monument to premature mischief.
As you wrap these ideas into a coherent plan, notice how the foundation frames every subsequent choice. With a solid base, you can iterate in a controlled, affordable way. The emphasis on reliability, then capability, mirrors the step-by-step approach many builders recommend: start with the strongest, most flexible platform, then layer on traction, protection, and system reliability. This approach keeps you out of garage repair cycles and toward real time on the trail. A patient, foundation-first mindset also helps you interpret future upgrades as tools rather than toys, ensuring every dollar spent increases your confidence and your reach on challenging terrain.
To bring the chapter to a natural close, a reminder about resources that reinforce the foundation, including an external perspective on budget-friendly off-road builds. For those curious about holistic, affordable build strategies, you can consult the external guide from YouJia that emphasizes the primacy of a solid base and prudent upgrades. External resource: https://www.youjia.com/offroad-truck-guide-2026
Rugged Ground, Gripping Tread: Mastering Tires and Ground Clearance to Build an Off-Road Truck
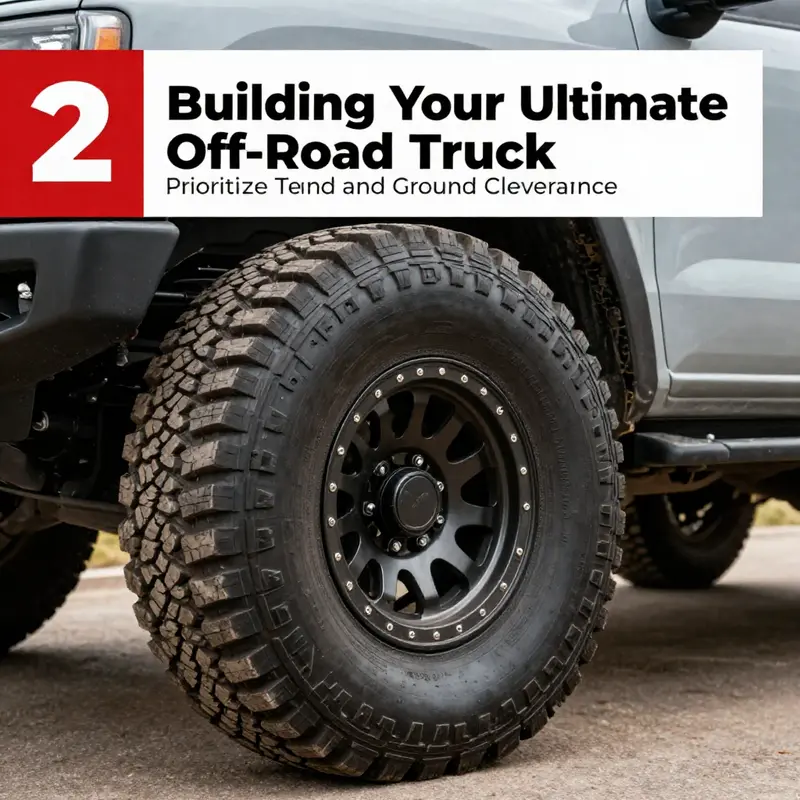
When you set out to build an off-road truck, two elements rise above all others in priority: tires and ground clearance. They are the vehicle’s first and last line of defense on rough terrain, the points that translate planning into progress and obstacles into learning opportunities. Everything else—heavy suspensions, fancy protection, or powerful upgrades—depends on these two foundations behaving reliably in a variety of environments. The aim is not to chase extreme specs from the start, but to cultivate a setup that remains predictable, controllable, and safe as you grow more confident in the wild.
Tires are the single point of contact between your truck and the world beneath it. Their role cannot be overstated. For a mixed driving schedule that includes pavement and dirt, all-terrain tires provide a balanced compromise. They grip reasonably well on gravel and damp forest roads, yet ride with a tolerable level of comfort on asphalt. If you expect frequent mud, deep sand, or rocky trails, the choice shifts toward more aggressive tread designs. Mud-terrain styles bite hard in soft terrain but can be talkative on pavement, increasing road noise and wearing faster. Highway-travel or road-oriented tires are not suitable for serious off-roading and should be avoided when the goal is genuine capability. These decisions live at the heart of a truck that can handle both the everyday commute and the more demanding expeditions you envision.
Beyond the type, the general characteristics of the tire matter as much as the category. The right setup respects your truck’s weight, wheel wells, and gearing. Size matters, but not at the expense of clearance or steering geometry. For beginners, a wheel diameter in the mid-range—think 16 to 18 inches—often provides a practical balance. Larger wheels can fill the wheel arches with a bold look, but they also alter gearing, fuel economy, and the accuracy of the speedometer. If you go bigger, plan for recalibration and possibly a drivetrain check to ensure the changes don’t stress components that are not yet prepared to handle them.
Load and speed ratings are not just marketing numbers. They indicate how much weight the tire can bear and how fast it can safely run under load. Matching these ratings to your vehicle’s weight distribution is essential. Under-rating a tire invites heat buildup, uneven wear, and unpredictable handling, especially when you are negotiating rock steps or climbing a loose slope. Overrating can leave the tire with too little deformation under load, reducing grip in soft ground. The goal is harmony: a tire that can support the truck’s weight without sacrificing traction or stability across the terrain you actually encounter.
Tread design is another crucial factor. Reinforced sidewalls resist punctures when you brush against thorny brush or sharp rocks. Deep sipes help with traction on slick surfaces, and well-formed tread blocks promote self-cleaning, which matters when mud clings to the rubber. The geometry of the tread also influences breakaway behavior in deep sand and how the tire edges bite into a rock face. A tire that maintains grip across a spectrum of conditions reduces the need for sudden throttle application or abrupt steering corrections, which in turn lowers the risk of losing control on tricky sections.
Pressure management is a practical tool you can use without dramatic overhauls. Lowering tire pressure increases the contact patch and the tire’s ability to conform to irregular surfaces. In sand, mud, or loose rock, this can mean the difference between a stuck moment and steady progress. A portable air compressor, a solid tire gauge, and a few valve tools are musts in a capable setup. But there is a boundary. Go too low, and you risk bead failure or rim damage. Always stay within the manufacturer’s minimum pressures for your tire and wheel combination, and adjust cautiously based on terrain, temperature, and load. The goal is to tune pressure to the surface without inviting flats or rim strikes on an unseen obstacle.
Ground clearance stands as the other pillar that supports off-road capability. It is defined as the distance from the lowest part of the vehicle, excluding the wheels, to the ground when the vehicle is fully loaded. A higher clearance helps you clear rocks, logs, and fallen branches without scraping the undercarriage. It also affects your approach to obstacles, breakover angles, and the angle at which you meet declines. The blanket statement is simple: more clearance equates to more options. Yet the practical balance matters just as much. Increasing clearance often raises the center of gravity, which can alter steering response and handling, especially on loose or slippery surfaces. Any change that alters the chassis geometry must be approached with care and, ideally, professional input. Elevation should be earned back with reassurance in suspension alignment, not by brute force.
Lift kits are the most common route to greater clearance. They offer a straightforward way to gain height, but they come with consequences. A larger lift can magnify leverage on shocks, affect axle articulation, and change the geometry of control arms. It can also worsen on-road handling if the vehicle becomes top-heavy. The recommended path is to pursue a modest lift initially and validate how the truck responds on a few dirt tracks or desolate roads before moving higher. Any lift should be installed with a precise alignment, because improper angles quickly accelerate tire wear and drivetrain stress. In tandem with a lift, underbody protection remains important, but the order of operations matters: prioritize functional protection and safe clearance before chasing a stout appearance.
Complementary choices round out the clearance story. Skid plates and protection should shield the engine, transmission, and fuel system from impacts without adding unnecessary weight. Side steps can serve a protective role on narrow trails, acting as a brace against rocks while providing a foothold for entry and exit. The instinct to mount heavy bumpers early should be tempered by the reality that weight and approach angles matter for obstacle clearance. The objective is a layout that preserves ground clearance while maintaining control in narrow, unfamiliar passages. The interplay between tires and clearance is not a simple tug of war; it is a balance that unlocks a wider range of terrain without compromising safety or reliability.
As you plan upgrades, think through the downstream effects. Bigger tires alter gearing and throttle response. A higher vehicle stance changes the dynamic of wheel articulation and can shift weight transfer during cornering on uneven surfaces. These are not purely theoretical concerns. On a forest road or a rocky ledge, the tire’s bite and the truck’s ability to place its weight precisely determine whether you advance, back out, or call for a recovery. The most effective approach is to start with reliable, terrain-appropriate tires and a conservative increase in clearance. Let the initial gains prove themselves in real-world runs, then decide if further suspension work or protective upgrades are warranted.
Maintenance and habit reinforce the gains you make with tires and clearance. Regular tire checks should become as routine as oil changes. Rotate tires to even out wear, monitor tread depth, and ensure the bead seats remain intact as you apply lower pressures on soft ground. After any lift or substantial adjustment, recheck alignment and steering geometry. A truck that is aligned and balanced will handle the roughness with less drama and less risk of a sudden miscue. The discipline of careful maintenance underpins every strategic decision about tires and clearance, turning potential into reliable capability rather than a one-off thrill.
Finally, readiness includes training and experience. Enroll in an introductory off-road course or join a local trail group where you can practice throttle control, vehicle placement, and recovery techniques. The most capable off-road drivers rely on skill as much as equipment. The terrain will test your decisions, your line choice, and your ability to read traction changes as you climb, descend, or sidestep an obstacle. Tires and ground clearance are the tools you use to translate skill into progress. The rest—your judgment, your calm, and your deliberate practice—comes with time spent on the trail. As you grow, you will refine your tire pressures for different surfaces, adjust your approach to improving clearance, and learn how to maintain momentum without overrelying on brute force.
In practice, the road to a capable off-road truck is a careful sequence: begin with terrain-appropriate tires, secure a practical level of ground clearance, and then build outward with protection and suspension as needed. This strategy preserves reliability and safety while still offering meaningful performance gains. It also keeps you connected to the terrain rather than letting the terrain dictate every decision. When you align the core elements of tires and clearance, every trail becomes more navigable, every obstacle a learning opportunity, and every return to the road a conscious choice grounded in confidence.
External resource for deeper tire considerations and terrain handling: https://www.off-road.com/building-your-first-off-road-truck
Securing the Trail: Installing Essential Recovery Gear for Self-Reliant Off-Roading
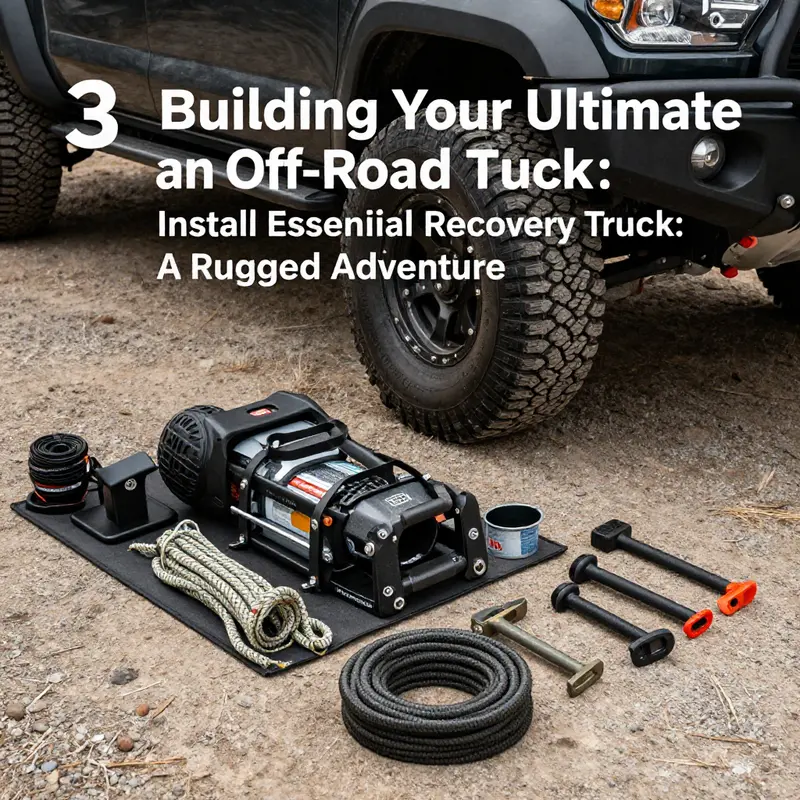
Choosing to build an off-road truck means embracing a mindset of self-reliance, especially when the trail disappears behind you. Recovery gear is not a luxury; it is the practical backbone that turns a potentially stranded day into a solvable challenge. The emphasis here is on making the kit robust, accessible, and easy to use, so you can focus on the terrain rather than the gear. When you start with solid foundations—a capable base, reliable tires, and a well-tuned suspension—recovery gear becomes a force multiplier rather than a last-resort panic button. The core idea is simple: you want to be able to extract yourself or a buddy quickly, safely, and without causing further damage to the vehicle or the environment. To achieve that, you’ll assemble a focused set of components and mount them with care, test them under controlled conditions, and keep them ready for the next expedition without clumsy improvisation.
At the center of the recovery system is the winch. The choice between an electric or hydraulic winch depends on where you wheel and how hard you push your truck. Electric winches cover most backcountry trips well, offering straightforward installation and reliable performance for typical rock crawling, sand, or mud. Hydraulic winches shine in extreme or prolonged recovery scenarios where the power draw from a battery would be prohibitive. Regardless of type, the winch must be mounted to a solid, reinforced structure—ideally on a front bumper frame mount or a dedicated winch plate that spreads the load across the vehicle’s chassis. It is not wise to rely on a light-duty mounting point or a flimsy bumper when a heavy pull could impose thousands of pounds of force. The installation should include anti-vibration pads to dampen the forces transmitted to the chassis, a small but crucial detail that reduces wear and helps the system last through many seasons of hard use.
Routing and wiring are the quiet performers of the setup. Power cables need to leave the battery with a clean, protected path, away from hot exhaust, steering components, and moving parts. Protective conduit or loom keeps cables intact and shields them from abrasion. A dedicated circuit with a correctly sized fuse and a relay keeps the winch from dragging down other essentials in the electrical system. Inside the cab, a reliable control switch or remote enables operation without exposing you to the line or the hooking points. The goal is a clean, safe workflow: deploy the winch, attach the line to a solid anchor, and recover with predictable, controllable power.
Anchor points are the invisible heart of winching safety. The most dependable options are frame-mounted recovery points or heavy-duty hitch receivers that are rated for well above your truck’s own weight. Factory hooks and bumper mounts are not suitable for serious recoveries, so replace them or reinforce them with purpose-built points. A frame-mounted D-ring is a simple, proven solution, and a dedicated hitch-mounted point can be handy for quick recoveries when you know you won’t push the limits. For safety and versatility, you’ll want a couple of different options for anchoring from front and rear, so you’re not tempted to improvise on the trail. A tree saver strap remains essential when trees are the only anchor in reach, but use it with caution and respect for the surrounding vegetation. If you must contact living trees, ensure you use a wide strap and a fair lead to minimize bark damage, and never rely on a strap to bear the full load of a recovery without a compatible anchor.
Alongside the winch, recovery boards form a practical bridge to traction in soft ground, sand, and mud. Traction boards provide a stable interface between tire and terrain, letting you crawl out slowly instead of spinning dangerously. They should be stored in a labeled, easily accessible location and sized to fit the widest tire you intend to run. Boards are not a substitute for proper tire pressure management or a solid anchor; rather, they augment your ability to regain traction when your wheels are truly stuck. A sturdy, low-stretch tow strap rounds out this trio of essentials. A strap designed for heavy-duty, low stretch takes the shock out of the recovery line and reduces the chance of whipping or snapping under load. Always inspect the strap for frays, knots, or cuts before each trip, and never rely on a damaged strand to bear the load.
A well-conceived spare tire strategy also plays into recovery planning. A spare is only as useful as its accessibility and its mounting system. A reliable spare carrier keeps the tire secure yet easy to reach on demand. The carrier should be robust enough to resist fatigue from vibration, and its release mechanism must be straightforward in muddy or cold conditions. If you’re running a larger tire size that changes the vehicle’s geometry, verify that the carrier does not intrude into the working space of the suspension components or rub against bodywork during articulation. The goal is clear access and secure retention, with a lock that prevents incidental removal on rough trails but remains operable with gloves on in poor weather.
Once you have your winch, recovery points, boards, tow strap, and spare carrier in place, the flow of a recovery itself becomes a matter of discipline and practice. On the trail, you’ll often be faced with uncertainty and variable terrain, so a methodical approach matters more than brute force. Before engaging any winch operation, assess the situation from a safe distance. Check the ground under the anchor point for stability and the line for signs of wear or kinks. Throw a quick glance at the outriggers or mounting brackets to confirm everything is solid. If a winch line has any damage, stop and retire the line rather than risk a catastrophic failure. When you finally engage the system, communicate clearly with anyone involved in the operation. A single, calm voice helps prevent surprises that could lead to injuries.
The practical side of this chapter, then, is not just the gear but the workflow that surrounds it. Labeling and organizing the recovery kit materials enhances safety and speed. Keep gloves, shackles, and the winch remote in a labeled toolbox so you don’t rummage blindly in the cold or rain. The line spool should be arranged to unwind smoothly, with the exposed portion clean and free of dirt. A plan for post-recovery inspection is essential: check the winch drum, the line or rope for fraying, the fairlead for wear, and the mounting hardware for any loosening. Even minor looseness after a heavy pull can propagate into failure if left unchecked. In the field, you’ll appreciate a small set of tools and spare parts—conduits, fuses, and connectors—that let you perform a quick tune-up or address a fault without returning to civilization.
In addition to the physical gear, invest time in knowledge. Understanding the basics of how load paths work, how to protect the battery and electronics from feedback, and how to calculate recovery loads can reduce the risk of harm or damage. A responsible approach to safety includes practicing with a controlled demo on level ground before attempting a difficult pull in mud or rock. Practicing with a partner who can keep eyes on the line and a radio backup helps you maintain situational awareness when the terrain becomes unpredictable. As your skills grow, you’ll find that preparation, not horsepower, determines how far you can push your truck on tough trails.
To connect this practical chapter back to broader maintenance and operation, consider a broader reference on durable vehicle systems and the mechanics that underlie them. A deeper discussion on diesel maintenance and step-by-step reliability can complement your recovery gear knowledge, offering insight into how to keep the drivetrain and electrical systems from becoming the weak link when you push into remote terrain. For an extended look, see mastering-diesel-mechanics-your-step-by-step-path-to-success. This internal link anchors the recovery-focused chapter to the larger skillset needed for a capable, resilient off-road build.
Finally, remember that recovery gear is part of a larger ecosystem of safety and preparedness on the trail. The goal is not to show off a big toolbox but to ensure that when you are the one stuck, you have the tools, the plan, and the know-how to regain momentum quickly and safely. The simple, practical steps—selecting the right winch, securing dependable anchor points, equipping with traction boards and a solid tow strap, and maintaining an organized, redundant system—translate into real-world confidence. You’ll sleep better at night knowing that, if the trail throws a curveball, your truck is equipped to meet it with patience, control, and a calm methodical approach.
External resources for further safety and technique are available from manufacturers and safety organizations. A highly regarded installation guide provides technical notes on securing winch systems and optimizing electrical integration. Access to these guides can help you verify torque specs, cable routing, and mounting integrity, ensuring your setup remains safe under load. This kind of documentation, paired with practical field practice, makes the difference between a flashy but unreliable system and a trusted recovery toolkit you can rely on when the going gets rough.
Under the Armor: Building Robust Underbody Protection for Off-Road Trucks
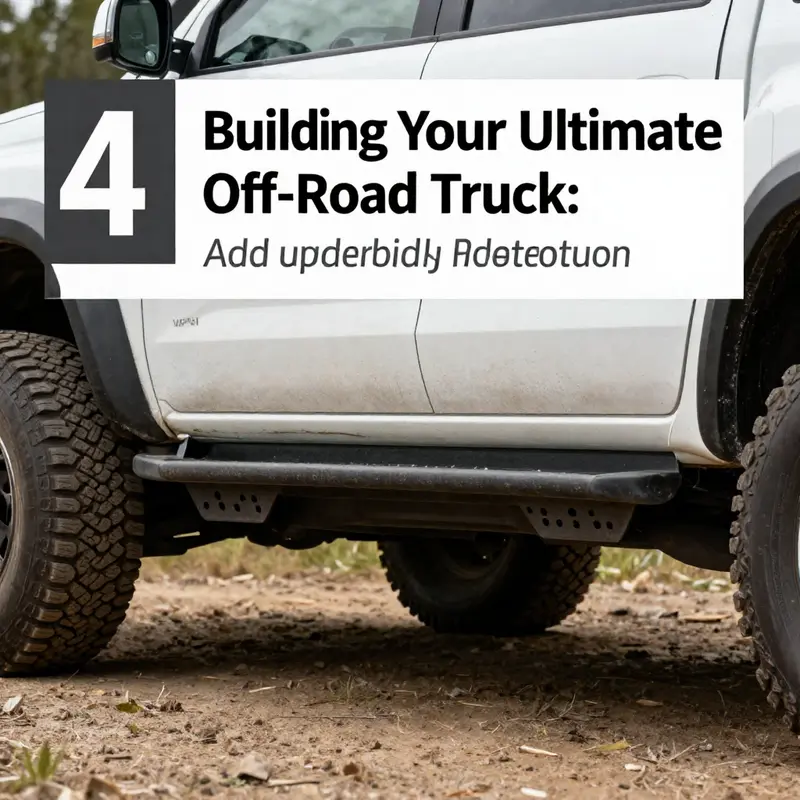
Protecting the heart of an off-road project begins under the chassis. The trail encounters rocks, stumps, and hidden dips that can bite hard. Underbody protection is the armor that keeps critical systems intact when the going gets brutal. The aim isn’t to make a tank, but to create a durable foundation that endures the unexpected without draining time, money, or momentum. In practice, that means a layered approach: sturdy armor plates where it counts, a coating system that resists the elements, and a maintenance mindset that keeps protection functioning through miles of rough terrain. When you think about underbody protection this way, you’re designing a shield that complements the rest of the truck’s upgrades rather than an afterthought bolted on at the end.
Starting with skid plates sets the tone. Plates should be thick enough to absorb a hit without bending under torque or high-speed brush, yet not so heavy they steal driveability. A practical baseline sits around 3 millimeters, though the final choice depends on how and where you plan to use the truck. The primary targets are the engine oil pan, the transmission housing, and the fuel tank. The engine oil pan plate guards a vulnerable sump that, if punctured, can lead to rapid oil loss and potentially catastrophic engine damage. The transmission plate protects the bell housing and gears that manage power transfer from the engine to the wheels. The fuel tank plate defends a mid-rear tank from impacts that could create fuel leaks or fuel line damage. Covering these three areas yields a robust shield against common off-road hazards while keeping the protection installable and maintainable over time.
Material choice matters, but it’s a balance. Steel plates deliver maximum strength for a given thickness and rough terrain, yet they add weight that can dull acceleration, impact braking, and fuel economy. Aluminum plates shave weight and resist corrosion, which matters in wet, muddy climates, but can wear more quickly under persistent abuse and may come at a higher price. For light use, aluminum offers attractive protection with less impact on handling. For serious overlanding or extended expeditions into remote zones, steel becomes appealing for its durability and resistance to deformation. In any case, mount plates as bolt-on units rather than weld them in. Bolted plates preserve serviceability—oil changes, plate replacement, and quick field fixes become feasible without specialty welding. The bolt pattern should distribute stress evenly across the mounting points, and you should regularly inspect fasteners after rough outings. Vibration, terrain hardness, and heat can loosen bolts; a quick post-trip check is worth doing before you head back into the wild.
Beyond the plates, an underbody coating strategy can dramatically extend life expectancy. A high-quality coating system goes beyond a simple paint job. Modern multi-layer approaches offer waterproofing, corrosion resistance against salt and chemicals, and resilience under constant vibration. A well-applied undercoating acts as a second skin, reducing direct metal exposure and dampening noise. It’s especially valuable where plates meet the chassis, where exposed gaps can trap moisture and mud. The coating’s elasticity matters as much as its adhesion—it should flex with the metal without cracking. A robust coating also simplifies maintenance because it makes washing and rust-prevention easier during and after harsh campaigns. When evaluating coating options, emphasize elasticity, long-term durability, and ease of touch-up. The cost delta is often justified by the significant reduction in rust and pitting that would otherwise sap performance and resale value over time. The goal is to slow corrosion, not to rely on the coating as the sole shield.
Protection is not limited to plates and coatings alone. Front and rear bumpers designed to tolerate impacts can improve approach and departure angles, enabling the truck to meet obstacles with less body damage. Side steps or rock sliders provide door-sill protection while preserving easy cab access and roof rack mounting—two practical benefits for trips that include loading and unloading gear. The overarching aim is to minimize body damage without inflating weight or impeding geometry. Every additional pound shifts weight distribution, potentially altering steering feel and tire wear, so new armor should be added with a clear sense of how it affects the whole vehicle. The most effective setups balance protection, weight, and the vehicle’s existing suspension and drivetrain architecture.
As with any modification, there are common misconceptions to sidestep. Protection is not a license to push into terrain unsafely. Skid plates are a last line of defense, not a universal shield against poor decisions. Plates can deform or detach if they’re hammered or mounted without regard to the drivetrain’s travel. After a challenging run, take time to inspect edges and fasteners—loose hardware invites failure. If a plate is bent or a bolt shows signs of stress, remove and repair or replace it before the next outing. The underside deserves the same respect given to the engine bay and cabin; neglect here compromises reliability just as surely as ignoring tire pressures.
Maintenance, however, is the practical dividend of thoughtful protection. A disciplined routine keeps the armor doing its job year after year. Start with a monthly underbody wash to clear mud, salt, and mud crusts that accelerate corrosion, especially after winter or long, muddy expeditions. After heavy use, inspect the plates for cracks or bends. Clean the hardware with a degreaser, then rinse and dry thoroughly. Use compressed air to clear joints and ensure nothing is rubbing or binding during suspension movement. Re-lubricate moving points such as bushings or U-joints where applicable, and replace worn dust boots promptly. Even though the plates may not move, their attachment points and spacers are subject to stress; keeping them tight and clean prevents surprises on remote trails. At times you’ll discover small misalignments where plates meet the chassis; address these promptly to avoid chafing on oil lines or wiring harnesses that pass near the undercarriage. The goal is to keep everything protected but accessible for service—a small, repeatable routine that pays off in reliability on longer journeys.
A practical build must also consider the ongoing trade-offs between added protection and vehicle dynamics. Extra armor adds weight, which can affect acceleration, braking, and handling, especially on high-traction surfaces where momentum matters. The balance point is protecting the most vulnerable components without creating new interference with steering, suspension travel, or ground clearance. Plan plate dimensions with the vehicle’s existing geometry in mind, and consider any potential drag or heat buildup in the engine bay as you cover the lower sections. If you’re preparing for a serious expedition, pre-fitments and a dry-run check with a buddy can reveal hidden clearance issues before you load up and head out into a remote zone. A careful approach to fitment reduces the risk of rattles, heat soak, and unexpected component failures during critical moments on the trail.
The broader knowledge you bring to the project matters as much as the hardware you install. A solid grounding in mechanical fundamentals makes it easier to decide where protection is most needed and how to service it when problems arise. For a deeper dive into essential mechanical fundamentals, see Mastering Diesel Mechanics: Your Step-by-Step Path to Success. This reference isn’t a sales pitch for gear; it’s a reminder that robust protection makes sense when you can service it confidently and safely. With that mindset, your underbody strategy becomes a natural extension of your care for the engine, transmission, and driveline—an integrated system that keeps you moving through miles of rough terrain, not a collection of disparate parts.
Finally, treat underbody protection as an evolving part of your build. Start with a solid, properly installed shield set tailored to your most common environments. Add a coating system that preserves metal, reduces sound, and resists the elements. Integrate bumpers and sliders as trips demand, always mindful of weight and geometry. With each trail, you gain practical insight that helps refine mounting points, plate sizing, and maintenance routines. The right sequence yields a durable, affordable setup that remains serviceable in remote places, while you progressively tackle more challenging environments and longer expeditions.
For a deeper understanding of underbody protection, see How to Protect Your Off-Road Truck’s Undercarriage – 2026 Guide.
Rising Over Rough Terrain: A Progressive Path to Upgrading Your Off-Road Truck’s Suspension
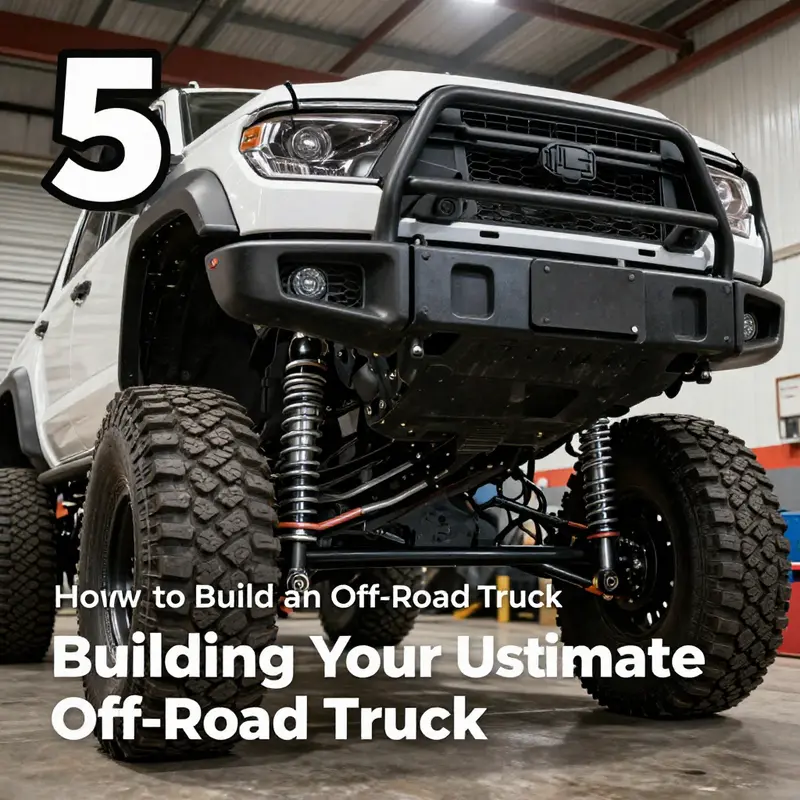
Upgrading suspension for an off-road truck isn’t about chasing a single dramatic upgrade. It’s about building a cohesive, reliable system that increases ground clearance, enhances wheel travel, and preserves or even improves control through a sequence of deliberate steps. The idea is to start with a solid, compatible platform and then layer in components that work together rather than against one another. In practice, this means treating the suspension as a living part of the vehicle that must be tuned to your typical terrain, load, and driving style. With that mindset, the path becomes a measured progression rather than a rushed overhaul, and the end result feels like a natural extension of the truck rather than a separate accessory line.
The journey begins with the foundation: the appropriate lift kit tailored to your make and model. A lift kit designed specifically for your truck preserves geometry and steering geometry, which are essential to predictable handling. It’s tempting to chase big numbers, but the goal is reliable clearance without introducing new driveline angles that can wear components prematurely. For most enthusiasts who want a practical balance between off-road capability and daily drivability, a modest lift—around two inches—offers enough room for larger tires while minimizing the need for heavy driveline modifications. More aggressive lifts, such as three to four inches, should be contemplated only after a comprehensive assessment of upgraded axles, driveshafts, steering components, and chassis geometry. The wisdom here is to avoid generic, low-cost kits that skim components and fail to address suspension geometry properly. A well-matched, purpose-built lift kit establishes correct bump-stop heights, preserves proper camber and caster ranges, and ensures that control arms and related hardware fit the truck’s existing suspension design. When you install this foundation, you’re not just increasing ride height; you’re setting the stage for consistent handling, better ground clearance, and safer travel over obstacles.
Once the lift is in place, the next essential upgrade focuses on the heart of control: the shocks. Stock hydraulic dampers often struggle under high heat and heavy loads, which leads to oil foaming, reduced damping, and a mushier feel on rough terrain. Upgrading to high-performance shocks—specifically units designed to withstand repeated compaction and heat—delivers more consistent damping across a wide range of conditions. The ideal setup uses nitrogen-charged dampers that resist foaming and a damping system with adjustable compression and rebound. The ability to fine-tune the shocks matters a lot when you stack on heavier tires, cargo, or a full payload. You gain not only improved ride quality but also steadier behavior when you encounter rock gardens, sand whoops, or washboard surfaces. The goal is smooth, controlled articulation rather than abrupt jarring or wallowy body motions. A well-tuned shock package helps the springs do their job more effectively by controlling how quickly the wheel moves relative to the chassis, which in turn improves traction and steering feel on unpredictable terrain.
But a suspension upgrade is not just about the springs and the shocks. The suspension’s durability must match the new range of motion. Lifting a truck shifts stress patterns across components, so reinforcing critical areas is a prudent move. This can include upgraded control arms, sway bar links, and axle components that resist bending under load. In addition, protecting the undercarriage becomes increasingly important, because the higher ride height exposes more delicate parts to ground impacts. Front and rear skid plates or rock sliders provide a protective shell that both reduces the risk of puncture and helps maintain alignment by resisting damage to vital mounting points. For trucks that still rely on leaf springs, consider helper springs or air assist kits to support heavy loads without sacrificing ride quality. The objective is not to chase a super-stiff, unyielding setup but to craft a robust system that remains predictable under a range of loads and on varying terrain.
With height and control addressed, attention naturally shifts to tires and wheels, the indirect yet powerful partners in suspension performance. Tire choice sets the ground rules for grip, ride, and how much the suspension must work to keep the tire in contact with the terrain. When you pair larger, more aggressive tires with a lift, the wheel and tire package must be tuned to minimize unwanted weight and protect against rubbing. A balanced approach involves selecting tires that deliver the right traction for your typical environment—sand, mud, or rocky trails—while staying within the vehicle’s fender clearance and maintaining acceptable speedometer accuracy. Equally important is the wheel choice. Lighter alloy wheels reduce rotational mass, improving steering response and the suspension’s ability to absorb jolts. The objective is to reduce unsprung weight where possible while maintaining strength and durability. In practice, you’ll find that proper tire and wheel sizing is a crucial, sometimes overlooked, element of suspension performance. It allows the suspension to move naturally, instead of fighting against heavy tires that demand more from springs, dampers, and links.
As this progression unfolds, the geometry of the suspension emerges as a focal point for refinement. For most builds, the initial emphasis is on achieving clean vertical travel and stable, predictable steering. However, advanced users may explore camber, caster, and even kingpin angles to optimize grip on uneven surfaces and improve straight-line stability during challenging climbs. These adjustments should be undertaken with the right tools and a careful eye on alignment. Improper changes can accelerate tire wear, degrade steering feel, and shorten component life. In practice, this means pursuing alignment checks after major changes and approaching geometric tweaks conservatively. If you’re not confident in performing these adjustments, enlist a qualified technician to verify that angles remain within the vehicle’s designed tolerances. The caution here is not to chase marginal gains at the expense of safety and long-term reliability.
An important theme threads through all of these steps: progress in small, measured increments. A step-by-step approach—lift kit first, then shocks, then reinforcement, then tires—reduces risk and provides clear feedback about how each decision affects handling, traction, and comfort. It also creates a logical testing pathway. After each major upgrade, you should take the truck on a mix of road and trail to evaluate how it behaves in real conditions. A controlled testing environment reveals whether the ride height affects overall balance, whether the dampers deliver consistent control during speed changes, and whether reinforcement components truly shield critical parts under load. This iterative testing helps you decide when to stop, refine, or move forward with additional enhancements.
Of course, a practical build must also keep maintenance and safety at the forefront. Suspension work is not merely a one-time installation; it requires ongoing attention. After performing major upgrades, schedule a thorough inspection of mounting points, bushings, and joints. Check for abnormal wear or looseness, especially at the control arms, steering links, and axle mounts. If you notice any change in steering feel or a dip in ride quality, address it promptly. In addition to mechanical checks, regular wheel alignment and tire maintenance become even more critical as components settle into the new geometry. A well-planned maintenance cadence helps preserve the benefits of your upgrade and protects against the unexpected downtime that can derail trips to remote trails.
What emerges from this patient, layered approach is not simply a higher truck or a stiffer ride. It is a more controlled, confident platform capable of handling a wider range of terrain without sacrificing daily usability. The suspension becomes a living part of the vehicle: it adapts to the load you carry, the terrain you encounter, and the speed at which you travel. It asks for thoughtful choices rather than a single blockbuster modification. By prioritizing a solid lift kit as a foundation, upgraded shocks for consistent control, reinforced components for durability, appropriately matched tires and wheels, and careful attention to suspension geometry, you create a chassis that can articulate over rocks, float over sand, and land softly on rough trails. The end result is a truck that feels dialed in, not dialed up, with suspension that supports your ambitions rather than complicating them.
The path is deliberate, and the payoff extends beyond the trail. With a suspension system upgraded in a measured fashion, you gain confidence—an asset that translates into safer driving and more enjoyable exploration. You learn to read terrain, anticipate how your truck will respond to changes in surface and weight, and trust the vehicle to carry you through intricate off-road sections without surprising you. This is the essence of building an off-road truck that remains a reliable companion on remote expeditions and a capable vehicle for weekend adventures. The suspension, properly upgraded and carefully tuned, becomes a bridge between you and the terrain, delivering traction when you need it most and comfort when the trail demands patience.
External reference: https://www.foxracing.com/off-road-truck-build-guide
Final thoughts
Building an off-road truck isn’t just about the equipment and enhancements; it’s truly about understanding your vehicle and how each modification contributes to overall performance and safety. By following this detailed guide, comprising foundational knowledge and essential upgrades—like tires, underbody protection, recovery gear, and a robust suspension system—you’ll empower yourself to create a vehicle tailored for your adventurous pursuits. Remember to celebrate each step of this journey, and use your evolving skills to push your limits in the great outdoors. Your off-road truck will not only be a means of transportation but a gateway to exhilarating experiences that await on rugged trails.