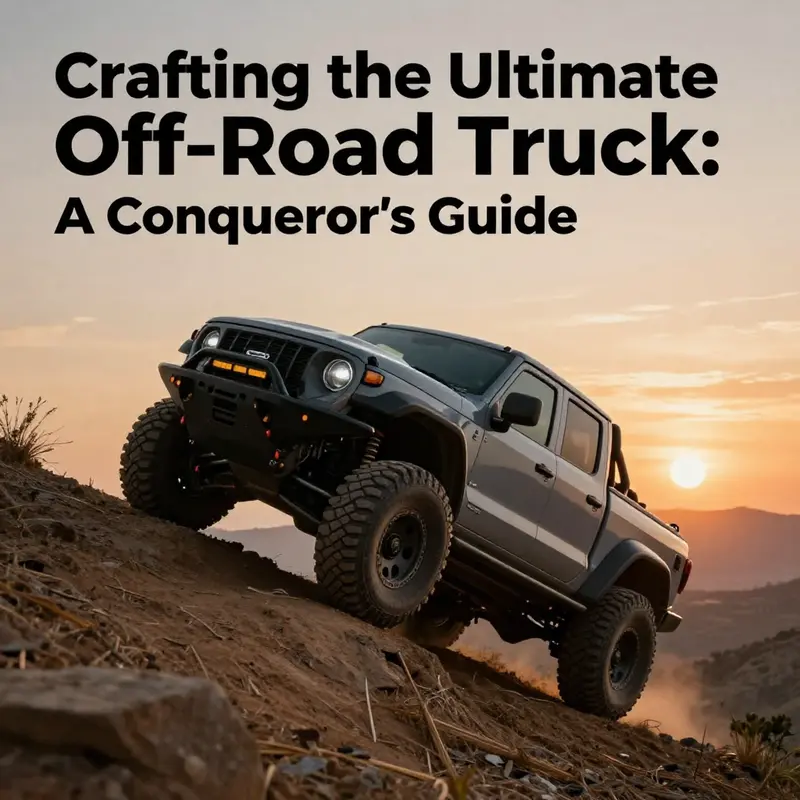
For those who crave the wild and untamed, building an off-road truck is more than just a project—it’s a passion. A vehicle that deftly navigates rugged terrains and tackles obstacles is essential for off-road enthusiasts, adventurers, and rural landowners alike. This guide will illuminate the foundational steps, crucial upgrades, and robust recovery gear essential for constructing a truck that embodies durability and performance. From selecting the right platform to enhancing its capabilities with tires and suspension upgrades, each chapter will gear you towards creating your bespoke off-road powerhouse. With every modification, you’ll pave the way for endless exploration and unforgettable adventures.
Laying the Groundwork: A Thorough Path to a Trail-Ready Off-Road Truck
Building an off-road truck begins long before bolting on fancy parts. It starts with a clear understanding of what a dependable base looks like, what upgrades truly matter for capability and safety, and how to pace those upgrades so you don’t outpace your budget or your skill. The most reliable path is a gradual, fundamentals-first approach that treats the vehicle as a system rather than a collection of flashy add-ons. When you begin with that mindset, every choice you make—every brake line you bleed, every tire you mount, every piece of protective plate you weld on—serves a purpose beyond appearance. It serves the kind of reliability that turns a weekend trail ride into a predictable adventure rather than a roadside puzzle. This chapter threads together the essential steps, presenting a cohesive narrative of what to do first, what to avoid, and why each choice matters, especially for a beginner building from the ground up.
The cornerstone of a capable off-road truck is the platform itself. The goal is a reliable, body-on-frame four-wheel-drive platform that uses a low-range transfer case. This configuration is not merely a nod to tradition; it is a practical design that tolerates abuse and simplifies aftermarket work. When you shop, prioritize a clean, well-maintained example with minimal rust—particularly along the frame rails and undercarriage. The frame is the skeleton you’ll rely on in rocks, mud, and stumps. A vehicle with a solid service history and complete maintenance records gives you confidence that the engine, transmission, and differentials have lived a careful life and aren’t masking hidden stress. Avoid vehicles with complex, uncertain histories or heavy modifications that obscure what you’re getting into. In short, you want something you can trust to perform when the going gets tough, not something that needs constant triage before a single trip.
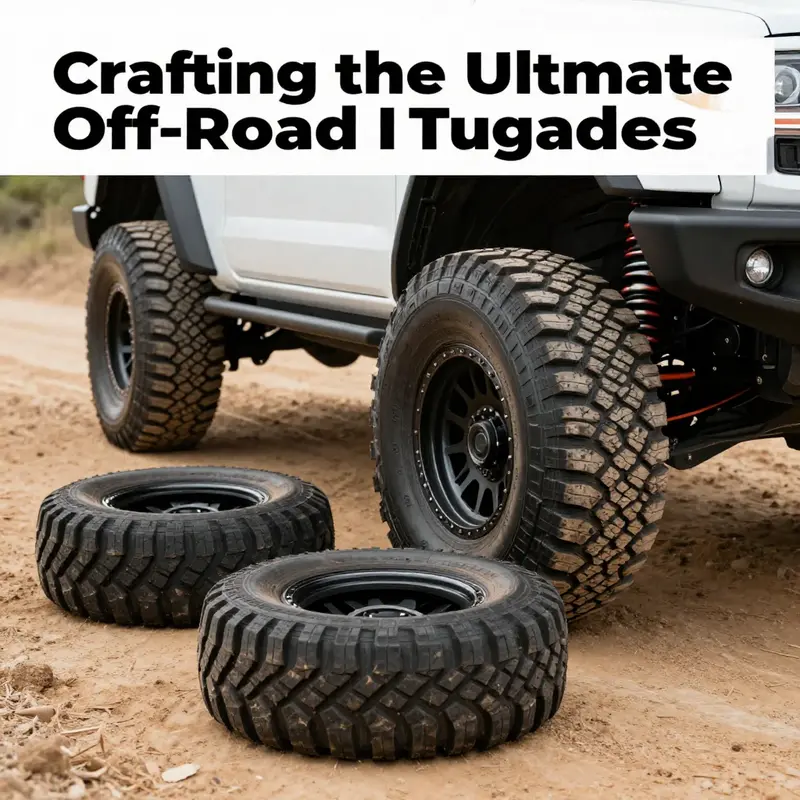
Once the platform is secured, the next decision that pays dividends early is tires. Tires are the single most impactful upgrade you can make for off-road capability, especially for beginners who need predictable grip and reliable handling. The target is quality all-terrain rubber that fits your wheel size without rubbing and without forcing you to change gear ratios. Size matters, but not at the expense of function. A common range that works well for many trucks is within 16 to 18 inches in diameter, with tire widths and tread patterns balanced for the terrain you expect to encounter most often. Cost is a practical consideration, but reliability is paramount. Typical outlay covers mounting, balancing, and the tire itself, with careful budgeting that keeps you within a reasonable range for a solid, durable tire rather than chasing a bargain that wears out in a season. As you upgrade, keep a portable air compressor, a tire pressure gauge, and valve tools in the toolkit. Lower pressures can improve traction on sand or mud, but you must re-inflate for road speeds. The spare should be sized similarly to the road tires so you can swap quickly without throwing the balance off. And remember, a large, heavy spare tire can affect fuel economy and speedometer accuracy; plan accordingly and recalibrate if needed.
With tires settled, you’ll want to establish a balanced suspension approach. It is tempting to chase big numbers on a lift, but early over-lifting can backfire. A modest approach—think a small, single-digit increase in ground clearance to improve approach and departure angles—usually delivers the most reliable gains without introducing drivetrain angles that complicate alignment or wear. A practical budget for shocks and associated components can be modest, especially if you can perform part of the work yourself. Start with new shocks, control arm bushings, and ball joints to restore ride quality and steering feel. If you need more height, opt for a measured lift that keeps suspension geometry in check and avoids throwing the drive shafts out of phase. The aim is not to tower over obstacles but to approach them with confidence and the ability to control weight transfer through careful throttle and braking. The balance is delicate; too much lift introduces driveline angles that amplify vibration and wear, so proceed gradually, re-check alignment, and test on a controlled course before hitting rougher terrain.
A dependable recovery kit sits at the heart of safer off-roading. A basic kit can turn a stuck moment into a solvable delay rather than a costly tow. The core items include certified recovery points at the front and rear, a heavy-duty recovery rope or strap rated for the vehicle’s weight, a pair of soft shackles, tree protection straps, sturdy work gloves, a compact shovel, and lightweight traction boards. Organization matters; keep everything in a labeled kit so you can locate items quickly in mud, sand, or snow. Safety rules the day here: do not improvise with random hardware or drag hooks on trailer balls, and always verify load ratings before applying any traction. Designing a simple, intuitive layout means you can access tools without risking injury or worsening a stuck situation.
Protection, when chosen wisely, protects your investment without becoming a needless weight penalty. The first line of defense should be bolt-on skid plates that shield the engine, transmission, transfer case, and fuel tank from rocks and debris. These plates are meant to take the impact, not be decorative. Side rock sliders guard the door sills and double as useful steps, shielding vital panels while offering practical foot placement. Early on, avoid heavy steel bumpers; they add significant weight and often offer limited return in off-road capability until you gain more experience and balance on the trail. The goal is a system that keeps critical components safe without blunting performance or stealing braking and handling feel.
Maintenance forms the quiet backbone of a reliable build. Before adding hardware, ensure the truck’s mechanical health is solid. This means fresh oil, coolant, brake fluid, and differential or transfer-case fluids, plus filters in good condition. High-quality brake pads, healthy batteries, and clean electrical connections are not optional ornamentation; they keep you safe and reduce the risk of roadside failures. A careful, measured maintenance baseline will save you money and headaches down the road and makes every upgrade you perform more effective because you’re starting from a solid platform. Some owners budget conservatively for DIY maintenance but expect higher costs if they rely on shops for everything; the important part is to have a plan that aligns with your time, skills, and long-term goals.
Electrical systems can become a maintenance headache or a straightforward partner, depending on how you approach them. For most beginners, a simple, well-organized electrical plan works best. Use a relay and inline fuse block to power accessories like lighting and a small air compressor. Run wire of an appropriate gauge, insulate where it passes through metal, and ground to a clean, short path. Label each circuit clearly so troubleshooting is easy in the field. The objective is reliability and simplicity, not a tangled web of circuits that makes diagnosis a scavenger hunt. At this stage, a single strong starting battery with clean wiring is often enough. Complex dual-battery setups can be alluring, but they are not necessary for a first build and can become a source of confusion when you are still learning tail-light etiquette on rough terrain.
A recurring theme in any foundational plan is smart purchasing. It pays to buy smart by prioritizing safety-critical and reliability-oriented components first. Some items lend themselves to being bought used, such as wheels, chassis, or skid plates, provided you inspect for cracks and corrosion. Other components—tow straps, soft shackles, and winch cables—should be bought new and certified with intact labels. This discipline helps you stretch the budget, ensuring you don’t end up with compromised safety gear or unreliable parts. In parallel, the most important upgrade is skill development. The best improvement you can make to a truck’s off-road performance is your own ability to drive smoothly, choose lines, and manage throttle and braking on variable terrain. Enroll in a beginner off-road driving course or join a local trail group where you can practice low-range gear use, throttle control, and terrain reading. The hands-on learning you gain here compounds the value of every dollar spent on hardware. The more you practice, the more intuitive the vehicle becomes and the more confident you will feel in challenging situations. It’s a simple truth: knowledge is the cheapest, most powerful upgrade.
Weight and payload are the quiet governors of capability. Extra gear adds weight, which in turn increases braking distance, reduces handling clarity, and wears tires more quickly. Respect your vehicle’s payload rating and, if possible, measure real-world weight with a portable scale. Roof racks, rooftop storage, and heavy bumpers can all tip the balance away from secure, predictable handling if used without testing. The aim is to travel lighter rather than heavier until you have proven, balanced handling on the kind of trails you intend to tackle. A disciplined approach to load planning—carried tools, recovery gear, water, and emergency supplies arranged with purpose—keeps the center of gravity predictable and the car’s response predictable as well.
To tie these threads together, the practical path is one of steady progression and careful testing. Start with a trustworthy platform, fit tires that deliver grip and efficiency, and fine-tune the suspension for predictable handling while maintaining a reasonable ride height. Add a practical recovery kit and protective plates, then establish a rigorous preventive-maintenance routine. Keep electrical simple, data-driven, and well labeled. Seek knowledge as your most important upgrade, whether that means a hands-on course, a trail group, or a reliable reference that distills mechanical fundamentals into actionable steps. The aim is not to chase the next shiny upgrade but to cultivate confidence, predictability, and safety on rough terrain. As you gain experience, you can expand into more advanced features—part by part, only after you have proven the base system and have established a steady capability on the trail. For a broader perspective on practical design and technique, this approach aligns with established, real-world guidance that emphasizes foundational strength over flashy additions.
A helpful way to anchor your learning process is to see how a seasoned, systematic learner approaches mechanical knowledge. A practical primer on core mechanical fundamentals can be found in Mastering Diesel Mechanics: A Step-by-Step Path to Success. This resource offers a structured path to understanding engine behavior, drivetrain interactions, and how each subsystem affects off-road performance. It’s not a replacement for seat time, but it complements practice with clarity and method, helping you interpret how a given modification influences throttle response, torque delivery, and reliability on rough surfaces. Remember that the goal of this chapter is not to produce a garage full of gadgets, but to create a reliable, predictable platform that makes your first trips enjoyable and safe. The trail rewards preparation and patience, and the build rewards you with confidence earned through deliberate, informed choices.
As the journey continues, you’ll begin to layer in more capable upgrades—like limited-slip or electronic lockers, more aggressive armor, or more advanced suspension options. Each addition should be weighed against your current skill level and the kind of terrain you expect to encounter. After you learn to balance grip, weight, and momentum on straightforward trails, the extra traction from a locker may be worthwhile. But until then, you’ll prefer a well-maintained, balanced system that behaves predictably under a wide range of conditions. The beauty of this approach lies in its scalability: a solid, well-considered foundation remains invaluable whether you stick to simple woodlands tracks or push into more technical off-road environments. It’s a framework that respects safety, budget, and the incremental nature of skill development, allowing you to grow along with your truck.
For readers who want a consolidated, broader practical perspective on building and upgrading off-road trucks, an external resource that compiles a comprehensive guide is available here: https://www.thecarconnection.com/road-trip-ideas/off-road-truck-build-guide. This resource presents a broader context and additional considerations for future stages of your build, complementing the steady, foundational approach outlined above. By keeping the early focus tight—platform, tires, suspension, recovery, protection, maintenance, electrical simplicity, and skill development—you position yourself to make meaningful progress without overspending or compromising safety. The end state isn’t a rushed flop of gadgets; it’s a trail-ready vehicle whose performance you understand and can rely on when the terrain gets tough.
External resource: Off-road truck build guide
https://www.thecarconnection.com/road-trip-ideas/off-road-truck-build-guide
Internal reference: Mastering Diesel Mechanics: A Step-by-Step Path to Success
https://dirtantrucks.com/mastering-diesel-mechanics-your-step-by-step-path-to-success/
null
null
The Quiet Backbone: Why Essential Recovery Gear Holds the Safety Line in an Off‑Road Truck Build
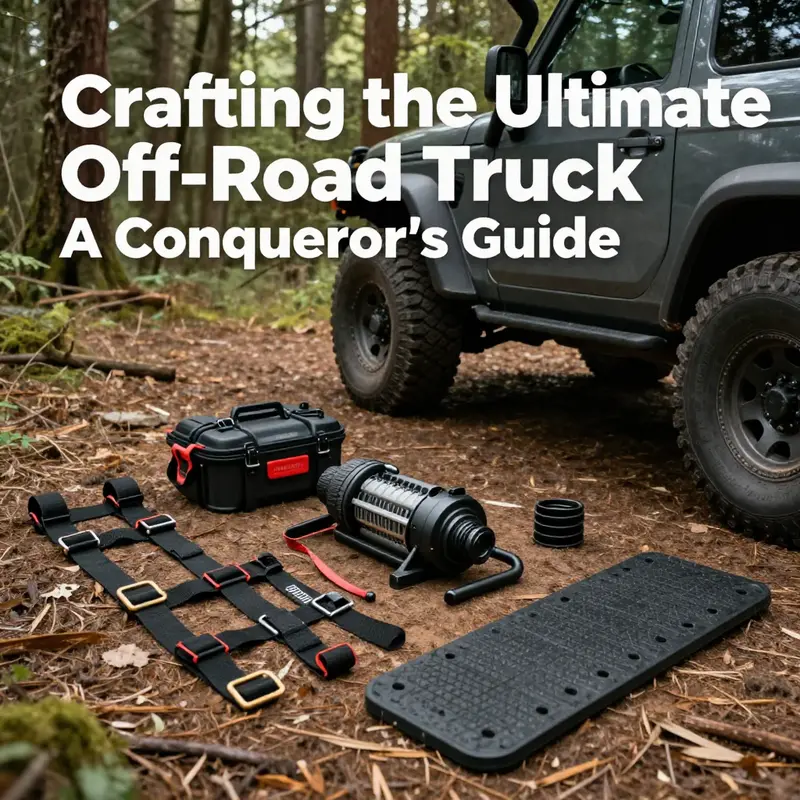
When you set out to build an off‑road truck, your mind often leaps to horsepower, tires, and springs. But the quiet backbone of every successful, safe expedition is recovery gear—the tools you hope you never have to use, yet rely on in the moment you most need to regain traction, escape a jam, or protect others from harm. In a practical sense, recovery gear is the bridge between your vehicle’s rugged potential and the actual terrain you will encounter. It represents both preparation and prudence, a reminder that every upgrade you choose—from the base platform to the tires you mount—threads back to resilience, self‑reliance, and the ability to keep moving when the trail tests you. The best builds treat recovery gear not as an add‑on but as a core element, integrated into the truck’s design, storage, and maintenance routine. A well‑chosen winch paired with the right line, a couple of solid recovery straps, a set of boards, and a handful of ancillary tools create a safety net that makes every ride less risky and more purposeful. This isn’t a parade of gadgets; it’s a narrative about balance—between capability and caution, between weight and reliability, between expense and long‑term value. You start with a reliable base, you choose tires wisely, you tune the suspension for predictable handling, and then you arm yourself with recoverability that respects both your limits and the terrain you’re chasing. If you keep that balance, your progression from beginner to capable enthusiast becomes a natural arc rather than a reckless sprint. The recovery gear discussion that follows is less about shopping lists and more about understanding how each piece works in harmony with the rest of the build, how to store it so it stays ready, and how to deploy it safely with the awareness that your own competence under load will ultimately decide the success of a recovery operation as much as the gear you carry. In the spirit of the broader guide, the aim is to emphasize cost‑effectiveness, practicality, and the kind of safety discipline that compounds value over time. A robust recovery setup doesn’t simply save you from getting stuck; it liberates you to push a little farther, know you can handle rough patches, and learn the terrain without inviting unnecessary risk. The heart of the approach is clear: invest in gear that is proportionate to your truck’s weight and intended use, master its operation through practice and study, and keep the system simple enough to troubleshoot on the trail. With that mindset, the recovery kit becomes a reliable partner rather than a vague safety protocol you hope never to rely on.
The first truth to embrace is the primacy of a capable winch in the recovery arsenal. The winch is not a luxury; it is a workhorse that translates terrain into controlled leverage. When selecting a winch, the rule of thumb is to target a pulling capacity at least 1.5 times the total weight of your vehicle in its typical ready‑to‑go configuration. This margin matters because field recoveries rarely unfold with the clean, textbook geometry you study in a shop manual. Real world pull angles, anchor position, and rope line dynamics can dramatically alter effective capacity. Electric winches deliver quick, controllable power off the battery, but hydraulic systems can be more robust under heavy, continuous use. The choice between electric and hydraulic should be guided by how you plan to use the truck and where you’ll operate; for many backyard builds or weekend adventurers, a well‑sized electric unit paired with a reliable battery setup will cover most situations. What follows is not a sales push but a reminder: capacity, reliability, and proper maintenance are the pillars of a safe winch deployment. The line or cable you run is the second critical component, and its character matters almost as much as the winch itself.
Synthetic rope has become the default for many builders due to its lighter weight and safer handling. It’s easier to coil, splices well, and minimizes risk of serious injury if it snaps—though it still carries the potential for injury under extreme load, so respect and training matter. Steel cable, while extremely tough and resistant to certain damage modes, can recoil with devastating force if it fails. For most beginners, synthetic rope offers a favorable balance of safety, weight, and manageability, assuming you practice rope handling and establish strict pull procedures. The winch line length should balance the pull you anticipate with the realities of anchor placement; a longer line increases the need for a snatch block or fairlead to avoid excessive angle loading. Speaking of which, the ability to re‑route and multiply force without sacrificing control is where recovery gear philosophy truly shines. A snatch block, for example, is not merely a clever accessory; it’s a tool that expands your recovery options by increasing mechanical advantage while keeping the winch within its safe operating window. In a well‑planned build, you don’t chase raw horsepower in every situation; you harmonize the gear you carry so you can adapt with precision, even when the soil underfoot shifts unexpectedly.
Beyond the winch and line, recovery straps are the simplest, most‑used items in the kit. They are designed to exert steady, controlled force on a vehicle that’s momentum‑bound by mud, sand, or snow. The key is to select straps with appropriate weight ratings that exceed your vehicle’s weight by a comfortable safety margin. A strap rated for a higher load helps prevent heat buildup in the material during a long recovery, reduces the risk of strap failure, and keeps the operation safer for all participants. Carrying at least two straps of suitable rating gives you options when a straight pull isn’t feasible and you need to create a lift or move the vehicle at an angle. The strategy you adopt on the trail—whether you’re pulling straight back to solid ground or needing to recover from a sidehill—will be heavily influenced by the rating and elasticity of your straps. Elastic recovery straps can be forgiving in variable terrain, but they demand careful attention to anchor points and line of pull to avoid snags or sudden jerks. The important principle is straightforward: never exceed the load rating, never attach straps to unsafe anchor points, and always use a dampened, controlled pull with clear communication among all participants.
Recovery boards offer a tactile, mechanical solution when tires spin in soft ground and you need traction to break free. These boards, usually made from high‑density polyethylene, slide under spinning tires and create a temporary, solid surface that the tire can bite into. The boards work best when you flatten the ground around the tire and place them at a shallow angle, guiding the tire onto a stable plane rather than attempting a brute pull. A set of boards is lightweight, compact, and surprisingly effective on mud, sand, or snow, and this is where planning pays off. They’re less dazzling than a winch, yet they’re often the tool that saves a recovery without exhausting the battery or stressing the drivetrain. The same careful approach applies to other devices: keep boards dry, clean, and free from cracks; inspect them for deformation after a heavy use; store them in a manner that’s quick to reach on the trail and protected from the elements when not in use.
A snatch block is a small piece of kit with outsized impact. When you need to reconfigure the line to gain leverage around obstacles or to recover from an awkward angle, the snatch block preserves the winch line without imposing excessive angle load on the winch drum. It also allows you to winch from a safer point when your anchor point isn’t aligned with the vehicle. As with every component, understanding your own environment matters; a snatch block has to be properly rated for the load and used according to safe practices to prevent line damage or misattachment that could endanger the crew.
No recovery kit is complete without consideration for personal safety and immediate medical readiness. A well‑stocked first‑aid kit is essential for any outdoor excursion, and a tire repair kit protects you from the most common slowdowns on rough terrain. A compact, portable air compressor helps you adapt tire pressures to suit different surfaces—an almost universal advantage on off‑road moves. A sturdy multi‑tool becomes your pocket technician, offering the ability to tighten, adjust, or improvise on‑the‑trail without scrambling for the right tool in a pinch. Together, these items extend your operational window and reduce the chances of a minor setback becoming a major delay. They also reinforce a recurring theme in this guide: functional simplicity. When you have the basics right—traction, leverage, safe line handling, and a few practical ancillary tools—you have a platform that can respond to the terrain without becoming unwieldy.
Organization and routine play as big a role as the gear itself. A labeled, organized kit ensures you can locate winch gloves, light shackles, or a spare fuse at the moment of need rather than scrambling through a jumble of equipment. The practical discipline of neat storage reduces the risk of rust, moisture damage, or missing components after a trip. A simple, rule‑driven approach works wonders: everything that leaves the vehicle returns in the same place, and every item receives periodic checks for wear, corrosion, or frayed webbing. Regular maintenance is not a burden; it is what preserves the gear’s reliability and your confidence in using it when the miles away from help. The goal is to prevent a recovery from becoming a failure due to preventable issues such as corroded connectors, worn straps, or tangled lines. In this sense, your approach to recovery gear mirrors the broader maintenance philosophy that anchors the entire build: anticipate problems, inspect routinely, and replace with high‑quality components at signs of wear.
A recurring point worth repeating is that the best recovery approach is the one that fits your skill level and your vehicle’s design. As you spend more time behind the wheel and on the rocks, you’ll learn where your real limits lie and where your gear’s limits must be enforced through careful technique rather than force. The most valuable upgrade in this chapter is not the largest or newest piece of gear but the growing confidence that comes from practice, training, and a measured approach to risk. Skill development is the quiet upgrade that compounds every time you approach a challenge with a plan, test your anchor points, and rehearse a safe, deliberate recovery sequence. For beginners especially, a short course or trail group session can demystify the process, help you understand the practical realities of winch line load, anchor point selection, and the dynamics of a controlled recovery. This is where the deeper message lands: you do not need the most expensive gear to succeed. You need gear that you understand, maintain, and can operate with calm competence under pressure.
To ground these concepts in a broader sense of ongoing learning, consider how your knowledge of mechanical systems underpins every recovery decision. A solid foundation in engine and drivetrain maintenance often translates into fewer roadside failures and greater confidence when you need to deploy recovery gear. For readers who want to bridge the gap between practical recovery and broader mechanical mastery, one helpful resource to explore is a comprehensive, field‑oriented guide to mechanics. Mastering Diesel Mechanics: Your Step‑By‑Step Path to Success offers a structured approach to understanding the engine and powertrain fundamentals that keep your recovery gear ready for action rather than becoming a liability. This is the kind of learning that pays off in reliability, longevity, and self‑reliance on the trail.
Finally, as you fix your eyes on the horizon of off‑road exploration, remember that every piece of recovery gear you carry should serve a clear purpose, be appropriate for your vehicle’s weight and configuration, and be maintained with the same care you give to your tires and brakes. Weight and space are finite resources, so avoid duplicating functions or overloading the payload with unnecessary items. The best setups are streamlined yet capable, flexible enough to accommodate a range of scenarios, and organized enough that you never waste time fumbling through gear when the wheel is stuck in a rut. Your truck’s recovery kit should feel like a natural extension of the vehicle—compact, reliable, and ready for action at a moment’s notice. With this mindset, you’ll not only survive tough terrain but also grow as a driver who respects the terrain, the equipment, and the people sharing the trail with you.
External resource: For a broader, technically detailed overview of recovery gear, see the Off‑Road Recovery Gear Guide: https://www.offroad.com/recovery-gear-guide
Final thoughts
Building an off-road truck is a journey that starts with a solid foundation and evolves through thoughtful upgrades and crucial gear. As you refine your truck, remember that each modification serves to enhance not only performance but also safety and reliability on challenging terrains. Equip yourself with the knowledge and skill you need to conquer the wild, allowing your truck to become a true extension of your adventurous spirit. With the right base, tires, suspension, and recovery gear, you’ll be ready for whatever the road—or lack thereof—throws your way.