
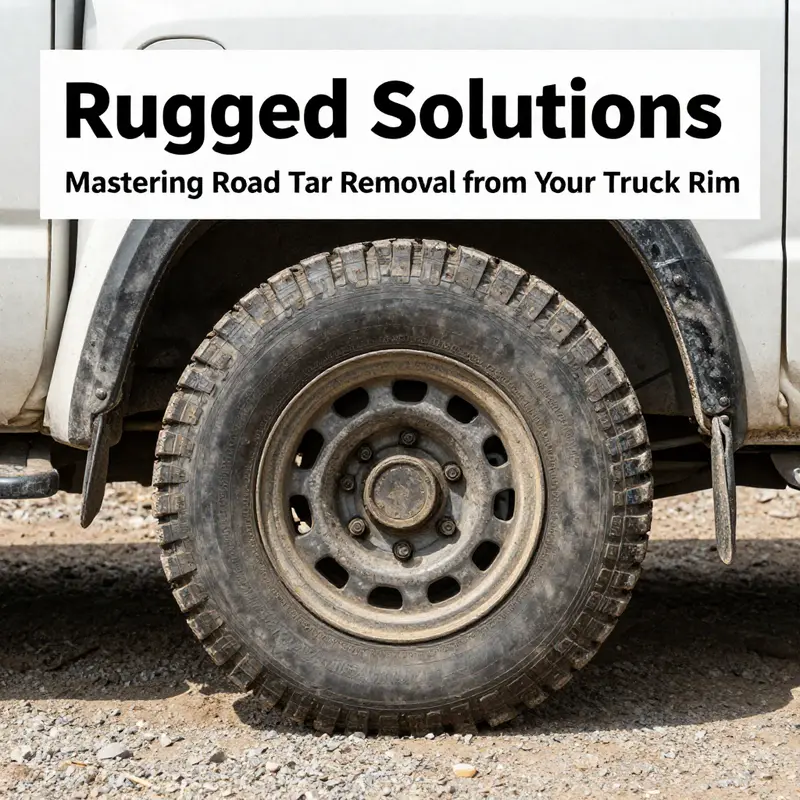
For off-road enthusiasts, there’s nothing like hitting the trail with your truck, pushing it to its limits. But with the thrill of rugged landscapes comes the inevitable battle with road tar—an unsightly nuisance that can mar your truck rim’s gleam and performance. This guide delves deep into effective methods to remove road tar, ensuring that your cherished vehicle remains a symbol of pride. Each chapter will navigate through practical techniques, essential safety precautions, and insights into top commercial products, arming you with the information needed for a successful cleanup. Prepare to dive into a journey of maintaining your truck’s brilliance against tar’s stubborn residue.
Tar Removal from a Truck Rim: A Safe, Thorough Path
Tar on a truck rim can be stubborn, but removing it safely is achievable with a calm plan and the right sequence. Start with warm, soapy water and a soft cloth to lift fresh tar without scratching finishes. For dried tar, use a dedicated asphalt or tar remover designed for automotive use. Always follow the product instructions, apply a light dwell time, and avoid letting the remover dry on the surface. Use a soft nylon brush to lift loosened tar; avoid steel wool or abrasive tools that can scratch coatings. Rinse thoroughly with clean water, then dry with a microfiber towel. After cleaning, apply a protective wax or sealant to help repel future buildup. Throughout the process protect nearby components such as brake rotors and seals, and contain runoff and solvents in accordance with local regulations. If needed, repeat the cycle with gentle pre-clean, targeted remover, and careful brushing. Safety notes: work in a well-ventilated area, wear gloves and eye protection, and keep solvents away from heat and open flames. This approach preserves the rim finish while restoring wheel cleanliness and longevity.
Safe Hands, Clean Wheels: Essential Precautions for Removing Road Tar From a Truck Rim
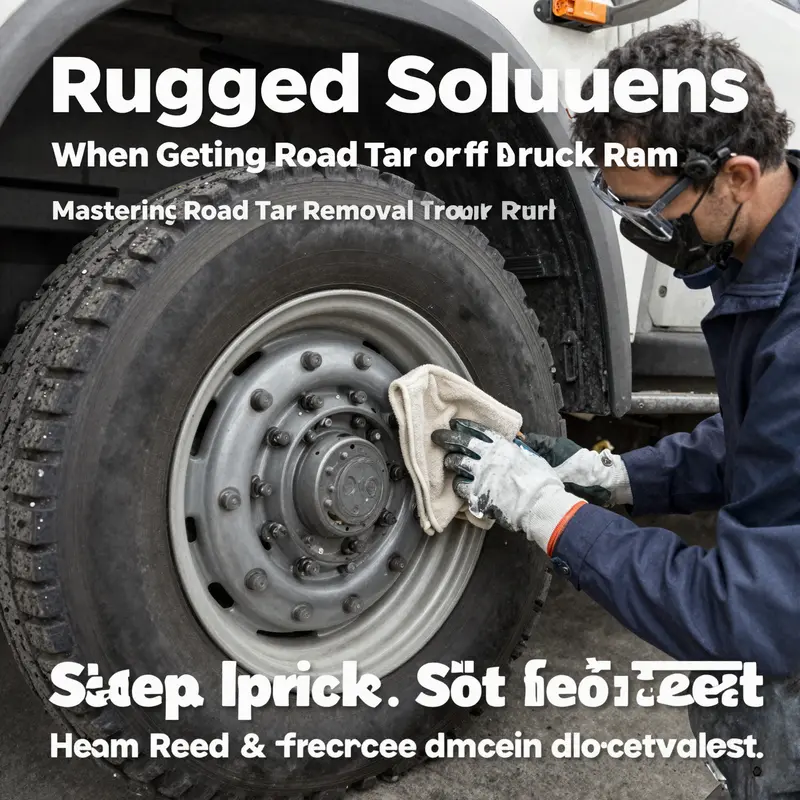
Road tar on a truck rim is stubborn, but the bigger challenge often lies in safety. The moment you slide under a vehicle or reach toward a freshly coated wheel, you enter a zone where chemicals, heat, and mechanical risk intersect. The goal is not merely to remove tar, but to do so without exposing yourself, the finish on the rim, or the surrounding environment to unnecessary harm. When you approach tar removal with a clear mindset about safety, you set the stage for an effective clean that preserves the wheel’s integrity and minimizes the chance of accidents. This chapter walks you through a steady, pragmatic way to handle tar on truck rims, weaving practical steps with the cautions that keep the process responsible and reliable.
First, equip yourself with the right personal protective equipment. Gloves should be chemical resistant, snug enough to prevent slippage but flexible enough to permit fine motor control. The skin on your hands is your first line of defense against solvents, adhesives, and the residues tar can leave behind. Safety goggles guard your eyes from splashes and aerosols that can arise as cleaners interact with tar and metal. Long sleeves and pants add a shield against splashes or accidental contact, particularly if you’re working in an environment where splatters can travel. The aim is simple: prevent any contact that could lead to irritation, burns, or longer-term dermatitis. In addition to gloves and goggles, a lightweight respirator or at least a face mask with organic vapor cartridges can be prudent when you are using solvent-based cleaners or heavy-duty tar removers, especially in windy outdoor settings where fumes disperse quickly. The moment you feel any irritation in your eyes or lungs, stop, step back, and reassess. Safety gear is not optional gear; it is the gateway to a controlled, successful cleaning.
Ventilation is not a mere afterthought. Many tar removers emit fumes that can irritate the nose, throat, and lungs, and some solvents can accumulate in enclosed spaces. If you are working in a garage or a shop, crack a window, set up a fan to move air to fresh air, and avoid lingering in a closed area long enough to feel the fumes accumulate. If weather permits, outdoors is best, with a gentle breeze that carries away fumes rather than trapping them around you. The environmental context matters as well. Tar residues and solvent vapors can travel with wind and settle on nearby soil or vegetation if you are not careful. Lay down a protective mat or a disposable sheet to catch drips and splashes, and ensure your work area can be easily cleaned so no tar-laden rags or solvents are left to degrade the environment or create a slipping hazard.
Another essential shield is awareness of ignition hazards. A large portion of tar remover formulations and associated solvents are flammable to some degree. Even heated rims or nearby exhaust heat can become ignition sources if a volatile solvent or tar-soaked rag comes into contact with a spark. The obvious rule is never to use these cleaners near open flames, hot surfaces, or smoking. Store all flammable products sealed and away from heat sources. When you finish a session, seal containers tightly, and keep rags in a metal container with a tight lid or in a non-combustible metal bucket until they are fully dry and ready for proper disposal. A small habit—checking that any cloths or towels are completely dry before stacking them with other materials—reduces the risk of spontaneous combustion from moisture interacting with solvents.
Before you apply any cleaner, test a tiny, inconspicuous patch of the rim. This is a safeguard against discoloration, etching, or other finish damage. The test can be performed on the backside of the wheel or another hidden area. If you notice any change in color, sheen, or surface feel, halt and reassess the product choice or method. Not all tar removers affect every finish equally. The same adhesive remover that works on a steel wheel might interact differently with chrome plating or aluminum alloys. Testing helps you avoid a scenario in which a successful tar removal becomes a costly cosmetic repair. Alongside the patch test, read the product label for any cautions about the specific wheel material you are treating. Some cleaners specify dwell times or dilution ratios that can influence both safety and effectiveness. Following those instructions is not merely bureaucratic; it is a path to predictability in the outcome.
When it comes to tools, softer is better. Use soft brushes, non-abrasive pads, or microfiber cloths for agitation. Steel wool or metal scrapers can gouge or scratch a wheel, especially if the rim surface is painted, clear coated, or chromed. Gentle scrubbing works in layers: you loosen tar with a mild cleaner, then reapply or rework with a fresh cloth to wipe away, and you repeat as needed. Applying protective pressure with a gentle brush helps prevent scratching while still dislodging stubborn tar. If the tar has formed a film that resists initial cleaning, allow the remover to dwell for the recommended period, never letting it dry completely on the surface. A dry film can be harder to remove and may require additional scrubbing, which raises the risk of wear and tear on the rim finish. The dwell time is a balancing act between letting the solvent soften the tar and avoiding overexposure that could affect the wheel’s finish or the underlying metal.
The sequence of steps matters, not as a rigid script but as a practical rhythm that respects the chemistry involved. Start with warm, soapy water and a soft cloth if tar is still fresh. This is the gentlest approach. Fresh tar is significantly easier to release than tar that has cured and baked onto the wheel by sun and road heat. If the tar has set, switch to a specialized tar remover designed for automotive surfaces. Apply the cleaner as directed, usually with a spray or a brush, then allow it to sit for several minutes. The goal of dwell time is to soften the tar so your subsequent scrub can lift it away without excessive force. During this phase, avoid letting the cleaner run onto the tire bead or into gaps that could trap residue or affect the wheel joint. Rinse gently to remove loosened tar and cleaner residues before moving to a second pass if necessary. If more tar remains, repeat the cycle—apply, dwell, scrub, rinse—until the wheel shows a clean surface. Finally, rinse thoroughly with clean water to remove all traces of the cleaner. A microfiber towel is ideal for drying; it wicks away moisture without scratching delicate coatings. Drying completely is essential because lingering moisture can promote corrosion on exposed metal or leave water spots on polished finishes. A thorough dry is more than cosmetic; it reduces the risk of salt and dirt re-adhering to a damp surface.
Once the tar is removed, the finishing touch matters. Some owners opt for a light protective coating or wax on the rim to reduce future buildup and ease future cleanings. The protective layer can help repel tar and road grime, making subsequent cleanings faster and less aggressive. If you choose to apply any protective product, make sure the surface is completely dry and free of dust. Work in a shaded area to avoid rapid evaporation or streaking caused by direct sunlight. A well-prepped and protected rim is better prepared to resist the next encounter with road debris. In the long run, a proactive approach to wheel care—regular inspections for tar, wax, and protective coatings—reduces the risk of corrosion and helps preserve the wheel’s finish.
Incorporating safety into routine maintenance does not require elaborate rituals. It requires a thoughtful approach that blends judgment, proper gear, and a respect for the wheel’s materials. The very act of planning ahead—to have the right gloves ready, to choose the appropriate cleaner, to test a small area, and to ventilate—transforms a potentially hazardous task into a predictable, repeatable process. You will likely face varying degrees of tar adhesiveness depending on traffic conditions, climate, and exposure time. The consistent thread through these variables is safety-first thinking. If you ever feel uncertain about the cleaner’s compatibility with your wheel material or about the fumes’ intensity, pause, reassess, and seek guidance. There is no harm in stepping back to confirm a safer path forward.
For readers seeking a broader perspective on maintenance practices that complements tar removal, consider exploring additional maintenance topics such as diesel mechanics and routine vehicle upkeep. A comprehensive resource on diesel mechanics can provide foundational insights into how engine and wheel components interact under road conditions and how to maintain them safely over time. This broader maintenance awareness helps you frame tar removal not as an isolated chore but as part of a disciplined care routine. Mastering diesel mechanics: A step-by-step path to success offers a perspective on how to approach vehicle care with methodical, safety-conscious thinking. You can explore this approach here: https://dirtantrucks.com/mastering-diesel-mechanics-your-step-by-step-path-to-success/.
In sum, removing road tar from a truck rim safely hinges on preparation, restraint, and respect for the wheel’s finish. Start with the right protection, maintain a well-ventilated and ignition-free environment, and approach each tar-removal phase with a measured hand. Test a small area first, choose the right tools, and use clean, mild agitation to lift tar without scratching. Rinse thoroughly, dry completely, and seal the surface with a light protective layer if desired. These practices uphold safety and preserve the wheel’s appearance, ensuring that today’s tar-removal session becomes a routine maintenance success rather than a risky, reactive moment.
External reference: https://www.mechanicsfiles.com/how-to-remove-road-tar-from-a-truck-rim/
Choosing the Right Tar Remover: Safe, Effective Commercial Solutions for Truck Rim Care
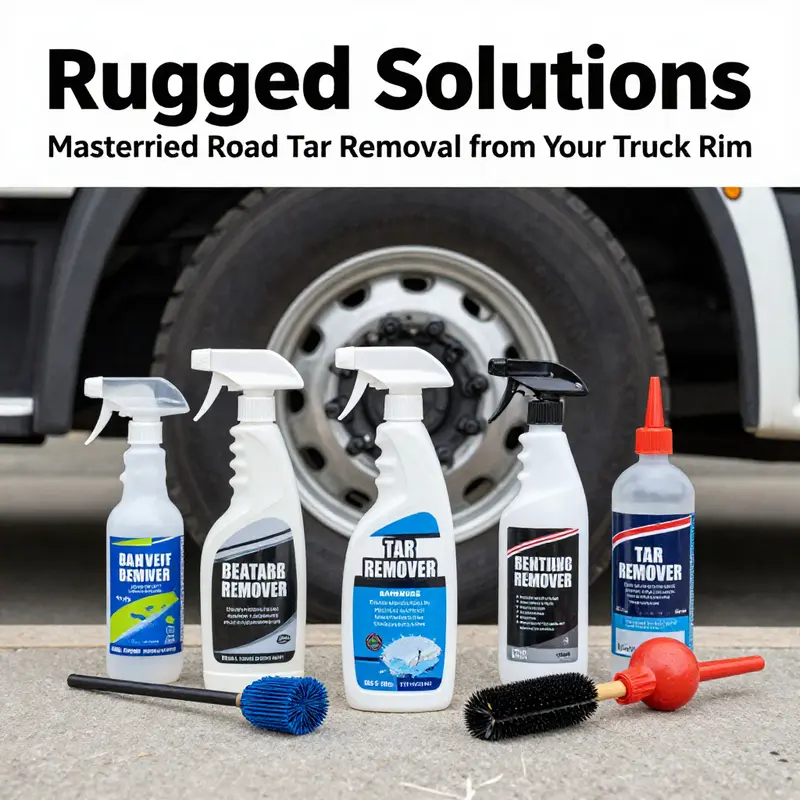
Road grime and tar have a stubborn relationship with truck rims. Tar sticks to finish, hardens in the wheel wells, and can creep into tiny nicks and crevices along the bead and spokes. The result is more than a cosmetic nuisance; tar can trap heat, create hotspots under heavy braking, and tempt aggressive scrubbing that risks scratching delicate finishes. The answer isn’t a single quick wipe; it’s a careful, informed approach that starts with knowing what you’re using and how to apply it. When you’re responsible for fleets or a solo operator who keeps a heavy vehicle roadworthy, choosing the right commercial tar-removal product is less about bravado and more about chemistry, surface compatibility, and process discipline. The goal is to dissolve or lift the tar without harming the rim’s finish, underlying metal, or any protective coatings that shield the wheel from corrosion and road salt. In this light, the decision to rely on a commercial tar remover—designed specifically for automotive surfaces—becomes a practical step that pays off in preserved aesthetics, longer wheel life, and a safer, more predictable maintenance routine.
The spectrum of commercial products designed for tar and adhesive residues on wheels is not a single line of equivalent tools. There are tar-remover formulations that target sticky residues with balanced solvents, degreasers that cut through grease and tar with fast evaporation, and wheel-specific cleaners that claim to safeguard finishes while lifting stubborn deposits. A well-chosen product speaks softly and works effectively; it penetrates tar without hurling harsh chemicals at the finish, it stays within the safe limits for painted, chrome, or aluminum rims, and it provides a predictable dwell time that yields a clean wipe. When you approach tar cleanup this way, you can balance speed with care and reduce the risk of dulling or etching the wheel’s surface.
A practical starting point is to frame the cleaning around the rim’s material and finish. Painted rims, chrome wheels, and aluminum alloys each respond differently to solvents and cleaners. A generic rule of thumb is to select a product labeled as safe for the specific finish you’re dealing with, then test in a small, inconspicuous area before applying broadly. This step is not merely cautious; it’s a guard against subtle changes in gloss, dull spots, or edge-surface damage that may not be immediately obvious until you’ve gone through a full cycle of cleaning and drying. The testing step is quick: apply a small amount of cleaner on a hidden edge or interior curve, wait the recommended dwell time, then wipe. If the finish remains unchanged and the tar loosens as expected, you’re in a reliable zone for broader application.
As you weigh options, consider the form of the product. Tar removers tend to come in spray or liquid forms, while degreasers and multi-surface cleaners may deliver broader cleaning power. The advantage of spray formats is targeted application; you can focus efforts on the tar-streaked segments without saturating the entire wheel. A liquid or gel that you apply with a brush can extend control, letting you map out the tar’s footprint. Whatever form you choose, the product should be designed to break down the tar’s adhesive grip without attacking clear coats, painted finishes, or bare metal. Labels often emphasize the chemistry behind the cleaner—solvent strength, the balance of penetrants, and the rate at which it evaporates. A solvent that evaporates too quickly may leave tar behind, while one that lingers too long can increase dwell time and risk surface damage if misused. The art is to match dwell time with the tar’s age and thickness, which brings us to a disciplined cleaning sequence.
Begin with a gentle wash to remove surface dust and loose grit. Warm, soapy water with a soft cloth or sponge helps reduce the amount of tar that binds to the wheel during the initial wipe. This step is not optional; it helps keep the product from working harder than necessary and reduces the risk that abrasive particles scratch the rim during later steps. When the tar is fresh, this approach can knock off a sizable portion of the adhesive without resorting to harsher solvents. If the tar has already dried, the cleaner’s role becomes more pronounced. The product is allowed to dwell, often for several minutes, as recommended by the manufacturer, so its molecules can soften the tar’s grip on the coated surface. The duration is not arbitrary; it’s calibrated to the tar’s thickness and the solvent strength. As a rule, you avoid letting the cleaner dry on the surface, which could create a film that requires more aggressive scrubbing or a second application.
The scrubbing phase demands discipline. A soft-bristled brush or a non-abrasive pad becomes the instrument through which solvent and tar meet mechanical action. Steel wool or rough scrapers are out of the question; they can mar chrome finishes, scuff painted rims, or push tar into tiny pores of the wheel surface. Light, even strokes are preferable, and you work in small sections so you don’t overlook edges, inner grooves, or valve stem areas that are prone to tar collection. The goal is to loosen tar so that it can be wiped away with a damp cloth. If a stubborn patch remains, you reapply the cleaner and extend the dwell time slightly, but you avoid a hard insistence that might over-wet the wheel or degrade any protective sealant.
Wiping away the softened tar should reveal a clean, residue-free surface. It’s common to repeat the application and scrubbing cycle once more for very heavy buildup. After the tar loosens, a thorough wipe with a clean, damp cloth is usually enough to remove both tar and cleaner residue. A final inspection helps ensure that no ghost patches remain—areas where tar might have smeared or where solvent film might have lingered. In this stage, you also take stock of any pretreatment needs for the rim’s finish. If you’ve used a solvent that could affect wax or clear coats, a rinse with clean water becomes essential to prevent surface corrosion or dulling. Following the rinse, dry the rim completely with a microfiber towel. Drying isn’t a cosmetic step alone; it prevents water spots, corrosion, and the occasional residual film that could attract more dust or road grime in short order.
With the tar removed, you can consider applying a protective layer to help minimize future buildup. A light wax or a dedicated wheel-protecting coating can create a hydrophobic barrier that makes tar and contaminants more manageable in subsequent cleanings. This protective step is a practical preventative measure: it doesn’t replace cleaning, but it reduces friction for tar and grime and often shortens dwell times for future cleanings. It also contributes to easier maintenance in environments with frequent exposure to road film and traffic residue, which are common in long-haul operations or urban driving where tar exposure is regular.
Choosing the right product also means weighing safety and usage practices. Proper ventilation is essential when working with solvents, and gloves protect the skin from potential irritation. It’s wise to test any product on a small area before applying it to the entire wheel, especially on non-standard finishes or newly coated rims. Following manufacturer instructions for application and dwell times reduces the risk of surface damage and maximizes the product’s efficacy. In addition, avoid using gasoline or alcohol-based solvents unless explicitly approved for automotive finishes, as these can attack paint, clear coats, or protective sealants. Keeping the work area organized, avoiding contact with the tire bead, and protecting surrounding components such as the brake rotor when possible will also reduce the chance of unintended damage.
The broader value of commercial tar removers lies not only in their ability to soften tar but also in their compatibility with different wheel surfaces. For fleet maintenance, a standard approach can be to stock a few versatile products designed to address tar, adhesives, and grease, then select the most appropriate option based on rim material and finish. The process described here emphasizes control and repeatability: wash, apply, dwell, scrub, wipe, rinse, and dry in a consistent sequence. That consistency makes it easier to train new technicians, reduces the risk of damaging rims during cleaning, and ensures that tar removal never becomes a guessing game. It’s a practical discipline that aligns with the broader maintenance philosophy of keeping wheels in top condition while preserving the investment that rims represent—especially on heavy trucks subjected to harsh road conditions and varying climates.
To connect practical cleaning with ongoing learning, consider a broader technical resource on maintenance fundamentals that emphasizes mechanical reliability and systematic care. Mastering Diesel Mechanics: Your Step-by-Step Path to Success offers conceptual grounding on how routine, methodical maintenance practices, including careful cleaning and material consideration, contribute to long-term wheel and vehicle performance. By linking tar-removal practices to a broader maintenance framework, technicians can approach cleaning as part of a holistic care routine rather than a one-off chore. This mindset helps ensure that every component—rims, tires, brakes, and the wheel housings—receives careful attention consistent with the vehicle’s duty cycle.
The technical takeaway is clear: choose a tar-remover product that is compatible with the rim’s finish, apply it with patience, and respect dwell times and surface-safety guidelines. The chemistry of these products is designed to target the adhesive bonds that tar forms with metal and coating layers, but the safety margins are defined by coatings, sealants, and protective layers on the rim. When used correctly, a commercial tar remover can simplify maintenance, reduce wear on wheel finishes, and accelerate turnaround times for fleets that must keep service on the road. The practice also reinforces safety and efficiency in the workshop or yard, where quick yet careful cleaning translates into less downtime and more predictable performance on the highway.
In the end, the chapter on commercial products for removing road tar from a truck rim is less about chasing a magic cure and more about applying a disciplined, surface-aware approach. You start with a plan: identify the rim type, select a compatible tar-removal product, perform a careful wash and test, apply with dwell time, scrub gently with appropriate tools, wipe clean, rinse, and dry. You finish with a protective measure that helps prevent immediate reaccumulation of tar and grime. And you keep a steady, safe practice that makes every subsequent cleaning easier. For the fleet, for the shop, for the driver who wants to keep wheels looking sharp and performing well, this is the practical path that aligns with both the science of cleaners and the craft of maintenance.
External resource for further reading: https://www.goofoff.com/products/tar-adhesive-remover
Final thoughts
In the rugged world of off-roading, your truck rim can withstand a lot, but road tar doesn’t have to be its forever mark. Armed with the right methods and understanding of safety practices, you can restore your vehicle’s luster and proudly showcase your adventure-filled journeys. Remember, successful maintenance doesn’t just preserve aesthetics; it ensures your truck’s performance remains top-notch. Keep these insights in mind, invest in quality products, and get ready to hit the trails again—with your truck looking as proud as you feel.