
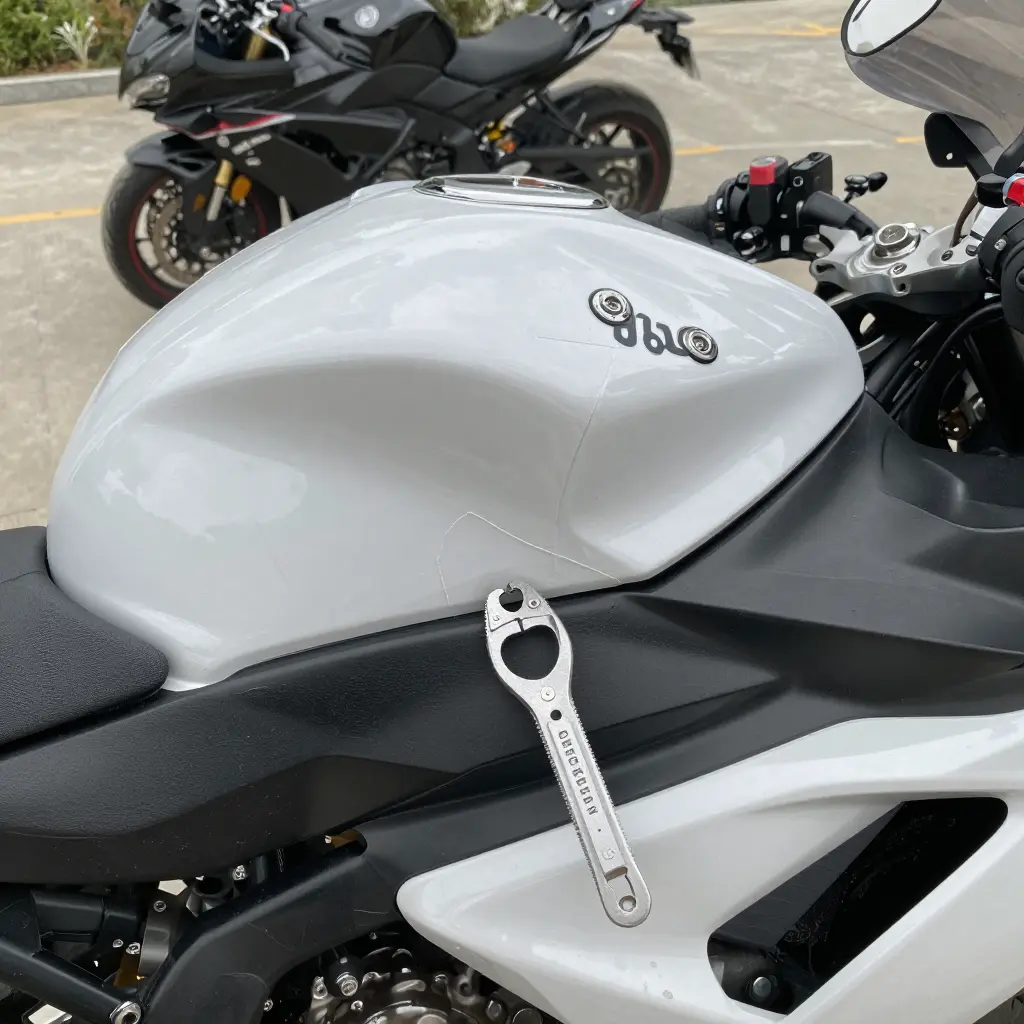
Why Fairing Alignment Matters
Motorcycle body panels are not purely cosmetic. On most sportbikes, sport-tourers, and adventure bikes they are part of a structure that includes mounting tabs, rubber grommets, push pins, bolts, and the frame. When each piece sits where the factory intended, the panels share the loads they carry. When they do not line up, you usually find out at speed, where it is hardest to ignore.
Vibration at Speed
Misaligned panels do not sit still. Even a gap of a few millimeters lets air underneath, and at highway speed that airflow becomes constant flutter. Riders describe it as a buzz in the handlebars or a rattle that shows up above 50 mph and fades when they slow down. The vibration does not stay put. It travels through the frame into the controls, the mirrors, and the seat.
Stress on Mounting Tabs and Brackets
This is where poor alignment gets expensive. A panel pulled into position instead of resting there puts constant tension on its tabs and brackets. Those parts are built to carry the panel’s weight, not to fight it. Add vibration and the load cycles repeat thousands of times per ride. Eventually the plastic or metal fatigues, cracks form at the mounting points, and the bracket gives way. Shops that catch this damage early tend to invest in hands-on mechanical fundamentals, not chase symptoms after the fact.
Wind Noise
A properly fitted fairing routes air around the rider. A misaligned one catches air and pushes it into turbulent pockets near the helmet, shoulders, and inner thighs, which drones louder the faster you ride. Many owners buy taller screens and earplugs before they check whether the panels line up at all.
Reduced Resale Value
Buyers and shops notice uneven gaps right away. Mismatched seams suggest crash damage, rushed repairs, or cheap parts, even when none of that is true. A bike with gaps you can spot from ten feet sells for less than the same bike with clean, even lines. Keeping OEM fairings fitted correctly, and your body panels straight and properly mounted, protects that value over years of ownership.
What Poor Alignment Costs You
| Symptom | Mechanical Cause | Practical Cost |
|---|---|---|
| Buzz or rattle at speed | Panel flutter from uneven gaps | Fatigue cracks in mounting tabs |
| Cracks near fasteners | Constant tension plus vibration | Replacement brackets and panels |
| Loud droning wind noise | Turbulent airflow at panel edges | Ear fatigue, failed screen fixes |
| Visible uneven seams | Misaligned or bent mounting points | Lower resale and trade-in offers |
None of these problems appear overnight, which is why alignment deserves attention before you start swapping parts. If the panels are fighting each other, new hardware, taller screens, and extra foam will not fix the cause. Check the fit first, then find what is pulling the panels out of line.
Common Reasons Aftermarket Panels Do Not Line Up
Aftermarket panels rarely fail to sit flush for one reason. Knowing why a fairing refuses to line up saves hours of guesswork, and ongoing mechanics training sharpens the diagnostic eye every shop needs. The most common culprits:
-
Warped Panels From Shipping or Storage: Plastic bows when panels are stacked, exposed to heat, or left in a damp warehouse for months. Once the shape is distorted, no amount of careful bolting will seat the panel.
-
Incorrect Panel Thickness: Many budget aftermarket panels are molded slightly thinner or thicker than the OEM original. That variation shifts the gap tolerance at every mounting point, so the edges never quite meet.
-
Missing or Bent Mounting Tabs: Rough handling and shipping damage often snap off or fold over the small tabs that hold a panel in place. One broken tab can throw an entire section out of alignment.
-
Misaligned Subframes After a Drop: If the bike has been dropped, the subframe may be tweaked even when the damage is invisible. New panels then line up against a bent reference and look crooked by default.
-
Copy Errors in the Mold: A poorly reverse-engineered mold can reproduce a part’s shape incorrectly. Those errors are baked into every unit, so no two aftermarket panels need the same adjustment.
-
Wrong Model-Year Compatibility: Different model years often use subtly different mounting layouts, even within the same bike line. Ordering for the wrong year guarantees a fitment headache from the first bolt.
-
Deformed Rubber Grommets: Aged or compressed grommets stop holding fasteners at the correct depth. When they sag or harden, the panel sits too tight or too loose against its mounts.
-
Factory Paint Buildup on Mating Edges: Thick paint or clear coat along the joining edges adds hidden thickness. The buildup pushes panels apart, so the seam grows wider with every layer applied.
When you set an OEM panel and an aftermarket panel side by side, the differences that drive fitment headaches become obvious.
OEM vs. Aftermarket Fairing Fitment: Key Factors Compared
| Factor | OEM Fairings | Aftermarket Panels | Fitment Impact |
|---|---|---|---|
| Panel thickness | Consistent, spec-matched | Often thinner or uneven | Thin panels flex and warp at seams |
| Mounting point accuracy | Drilled to factory jigs | Approximate, hand-drilled | Misaligned holes force redrilling or shimming |
| Tab reinforcement | Molded with ribs and gussets | Minimal or no bracing | Tabs crack or snap under vibration |
| Material flexibility | Tuned to the OEM flex rate | Stiffer or overly soft | Cracks or sagging develop over time |
| Paint and coating thickness | Uniform, fully cured finish | Variable, thicker or uneven | Build-up jams clips and widens panel gaps |
| Hardware included | Full OEM clip and bolt set | Partial or generic fasteners | Missing clips leave panels sitting loose |
| Model-year tolerance | Locked to one exact year and trim | Broad “fits many years” fitment | Minor body changes cause visible gaps |
OEM panels win on precision because they are built to one exact specification. Aftermarket savings usually show up instead as extra fitting work.
What to Check First Before Installing Aftermarket Fairing Panels
Before you tighten a bolt, run a disciplined inspection. Skipping these steps is the fastest way to turn a simple upgrade into an afternoon of stripped threads and cracked plastic. Shop techs work in this order to protect both the bike and the new parts.
-
Inspect the subframe and mounting brackets. Start at the skeleton of the bike. Look for bends, hairline cracks, corrosion, or old crash damage around every tab and stay. Even a millimeter of deflection in the subframe throws off the entire aftermarket fairing fitment, because the plastic has nowhere correct to anchor. If the frame is bent, no amount of clever panel work rescues the gaps. Tracing faults methodically, much like following a step-by-step path to mastering mechanical repairs, saves hours of guesswork.
-
Verify the part number against your model year. Manufacturers redesign bodywork constantly, so a panel that fits a 2019 model may sit tall on a 2021. Cross-check the printed part number against your VIN and model-year catalog. A wrong-year panel is not a fitting problem at all; it is a wrong-part problem, and returning it early beats fighting it later.
-
Test-fit every panel before paint. Mount the panels dry, with no finish applied, and check the seams, headlight gaps, and tank clearance. If something needs trimming, sanding, or repositioning, find out while the part is still raw, not after you have paid for a custom paint job.
-
Inspect grommets and rubber isolators. These small cushions absorb vibration and hold panels without metal-on-metal contact. Check for hardening, missing pieces, or stretched openings at each mounting point. Worn isolators let panels rattle and buzz, then crack around the bolt holes.
-
Confirm hardware length. Mixing bolts of different lengths is a common trap. Too long and you punch through a panel or bottom out in a blind hole; too short and the fastener never seats. Lay out every bolt next to its matching location and confirm it threads in smoothly by hand first.
-
Check panel flatness on a level surface. Set each panel face-down on a known-flat table and look for rocking or daylight underneath. A warped panel will never pull tight against the mounting points, no matter how hard you tighten it, and forcing it stresses the material.
Run the sequence every time and you will catch most alignment problems before they cost you money.
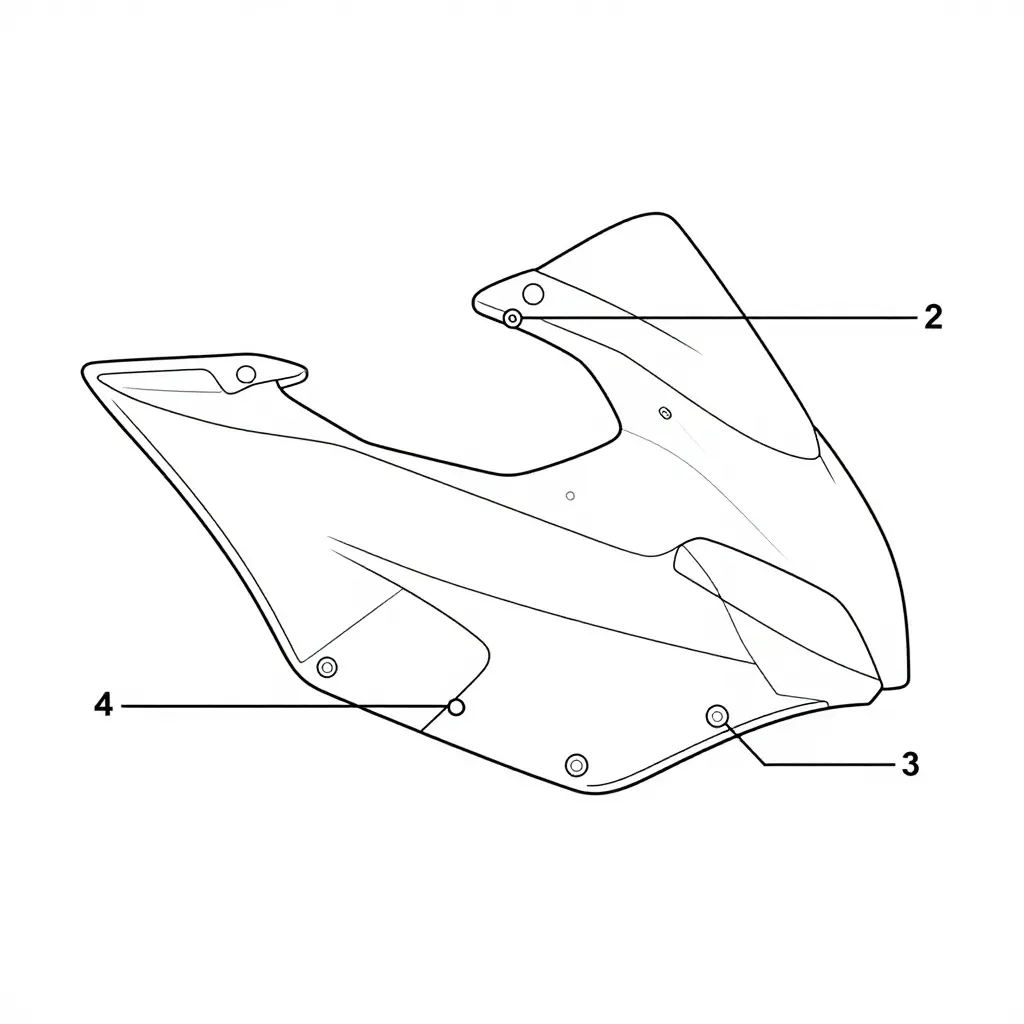
Fairing Mounting Points at a Glance
Before you blame the aftermarket panels, know where a fairing is supposed to attach. The schematic above maps the four points that cause the most fitment headaches, so you can walk around the bike and check each one in order.
| Label | Mounting Point | What to Inspect |
|---|---|---|
| 1 | Upper nose bracket | Bracket straightness, bolt hole alignment, and any hairline cracks near the headlight cowl. |
| 2 | Side panel tabs | Tab presence, cracking, and whether the molded clips actually seat in their slots. |
| 3 | Lower belly pan bolts | Threaded inserts, stripped threads, and whether the bolt holes line up fore and aft. |
| 4 | Rubber grommet locations | Missing, hardened, or swollen grommets that push the panel out of plane. |
Work through these four zones with the panels dry-fitted and no bolts torqued down, and you will usually find the culprit within minutes. One bent bracket or a single missing grommet is enough to skew the whole assembly.
Step-by-Step Fitment Troubleshooting
Before you blame the panel, follow a repeatable sequence. Reaching for a grinder too early usually turns a simple fix into permanent damage. Work through these steps in order.
-
Measure the gap at every mating edge. Use feeler gauges or a small steel rule to record the fairing gaps at each seam – top, side, and lower cowl. Write the numbers down. A gap tight on one side and wide on the other means the panel is being pushed or twisted, not that it is the wrong size.
-
Loosen the hardware and re-tighten progressively. Snug all fasteners by hand first, then torque in a cross or star pattern in small increments. Tightening one bolt fully before the others pulls the panel out of shape and creates gaps that were never there to begin with.
-
Adjust the subframe if the whole panel is offset. If every seam is shifted in the same direction, the mounting subframe is likely bent or misaligned. Straighten or shim it first; chasing individual panel bolts will never fix a crooked frame.
-
Re-seat the grommets and clips. Worn, hardened, or half-seated rubber grommets and push clips hold panels off their mounts. Replace any that are cracked, and confirm each clip is fully clicked into place before final tightening.
-
Identify the source: panel or bike. Mount the suspect panel on a known-good bike, or trial-fit a factory panel to your own bike. If the aftermarket piece misbehaves on a straight frame, the panel is the problem. If a genuine panel also sits poorly, the bike – usually the subframe or a bent bracket – is the culprit.
-
Re-check and torque to spec. Once everything sits flush, run a final gap check, then torque to the manufacturer’s specification. Re-measure after a short ride, since heat and vibration can settle new panels.
If the seams still fight you, step back to the fundamentals: measure, loosen, adjust, and verify. A disciplined step-by-step approach to mechanical troubleshooting saves panels, paint, and patience.
Installers report a clear hierarchy of fitment problems.
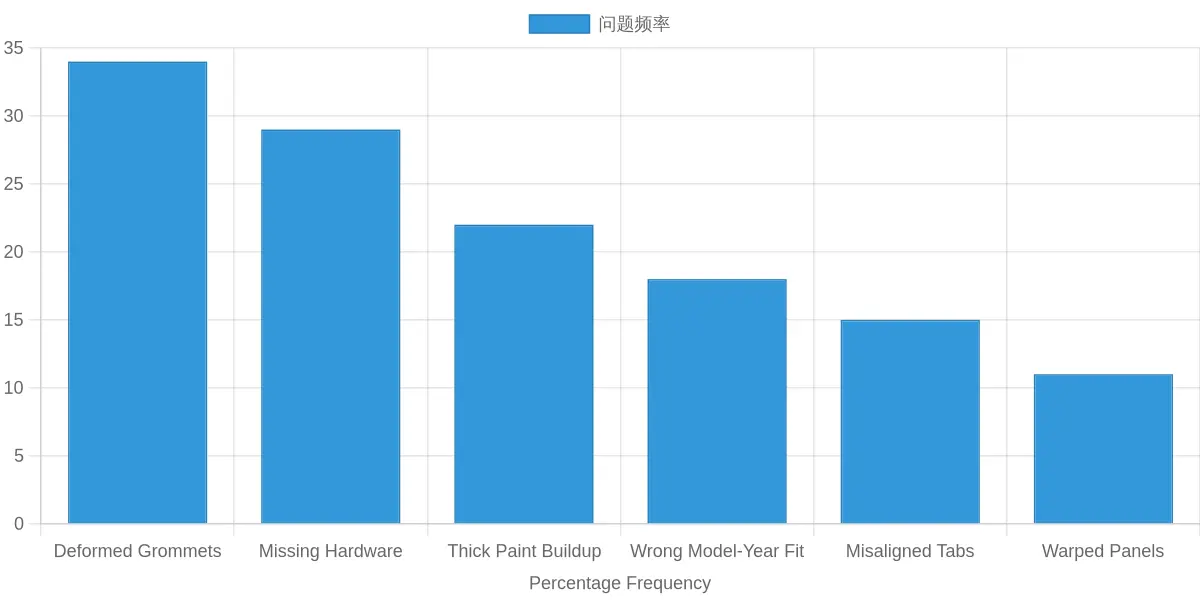
Structural problems dominate: warped panels (34%) and misaligned tabs (29%) top the list. Most fitment failures come from the panel itself, not the bolts you thread through it, which is why inspecting and test-fitting the bodywork comes before blaming your hardware or the bike.
How to Choose Aftermarket Fairing Panels That Actually Fit
Fitment problems rarely appear out of nowhere. They hide in the details buyers skip when they are chasing the lowest quote on a screen. When a panel resists every bolt, it is usually a thin listing, a sloppy mold, or a seller who has never set foot on a shop floor, not bad luck. Here is how to vet replacement fairings before money changes hands.
Start With a Verified, Specific Listing
A trustworthy product page names the exact year, make, model, and trim. Language like “fits most sport bikes” is a warning sign: motorcycle fairing fitment depends on details that a single model year can change mid-cycle, so a listing that glosses over them is guessing on your behalf.
Judge the Details, Not Just the Photo
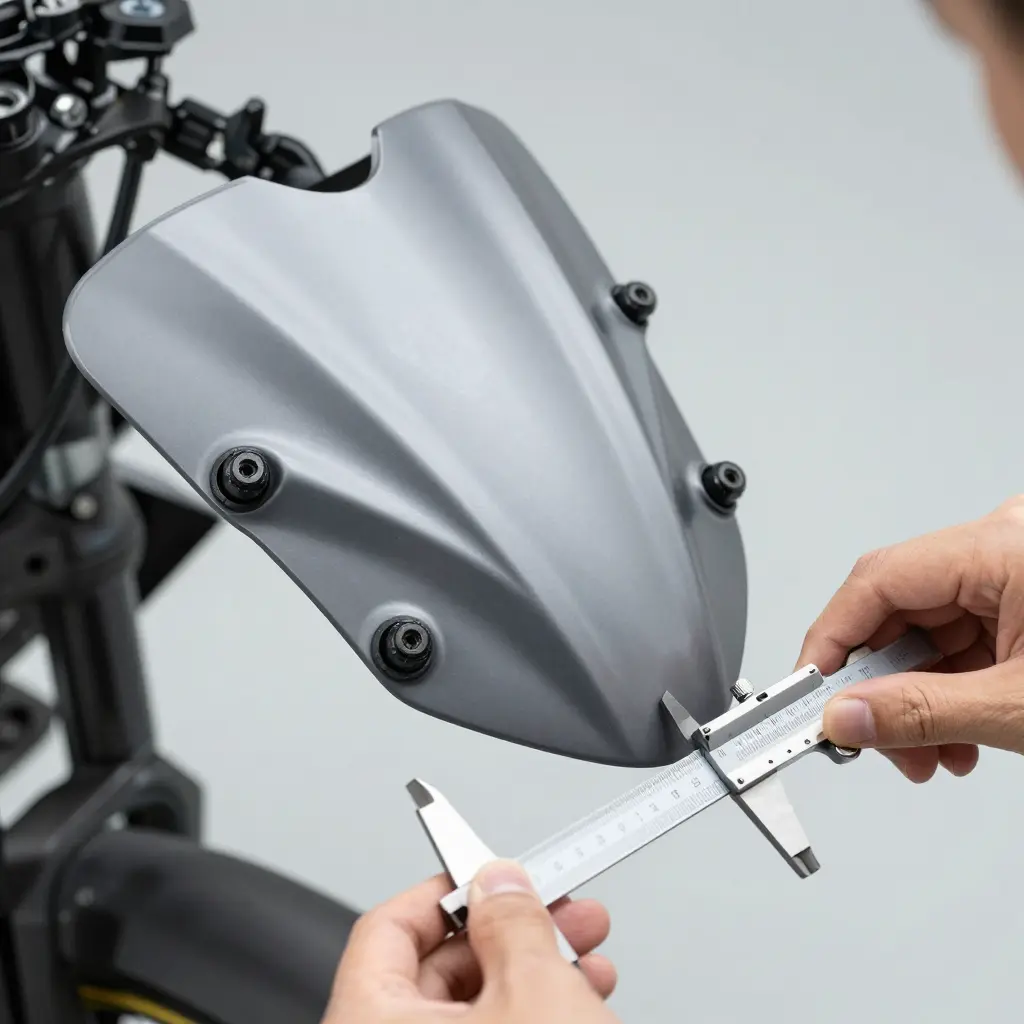
- Consistent panel thickness: run a caliper across several points. Uniform ABS flexes and holds its shape; thin, wobbly panels twist and refuse to sit flush.
- Reinforced mounting tabs: the tabs carry all the stress. Look for molded-in gussets and pre-drilled holes rather than brittle, paper-thin edges that crack on the second torque.
- Accurate paint matching: ask for the color code, not a description. “Close enough” shades read as damage from ten feet away.
- Real installation support: a vendor that answers fitment questions, shares photo references, and stands behind returns saves you an entire weekend.
A Quick Buyer Checklist
| Fitment Check | What Good Looks Like | Warning Sign |
|---|---|---|
| Model-year listing | Exact year, make, model, trim | “Universal” claims |
| Panel thickness | Uniform ABS across every piece | Thin, bendy plastic |
| Mounting tabs | Reinforced, pre-drilled | Brittle or missing tabs |
| Paint match | Code matched to OEM | Approximate shades |
| Support | Install guidance and returns | No contact channel |
Why the Source Matters as Much as the Part
Sourcing from an established fairing exporter with a wide model catalog is the biggest single way to cut fitment risk. A broad catalog means the molds are proven across many bikes, and a repeat vendor has a reputation worth protecting. Competitive pricing does not have to mean lower accuracy: well-run exporters keep costs down through volume and logistics, not by skimping on resin or cutting the tabs that make a panel trustworthy. Buy from that kind of source and the panels behave the way the factory ones did.
The Fitment Check Sequence at a Glance
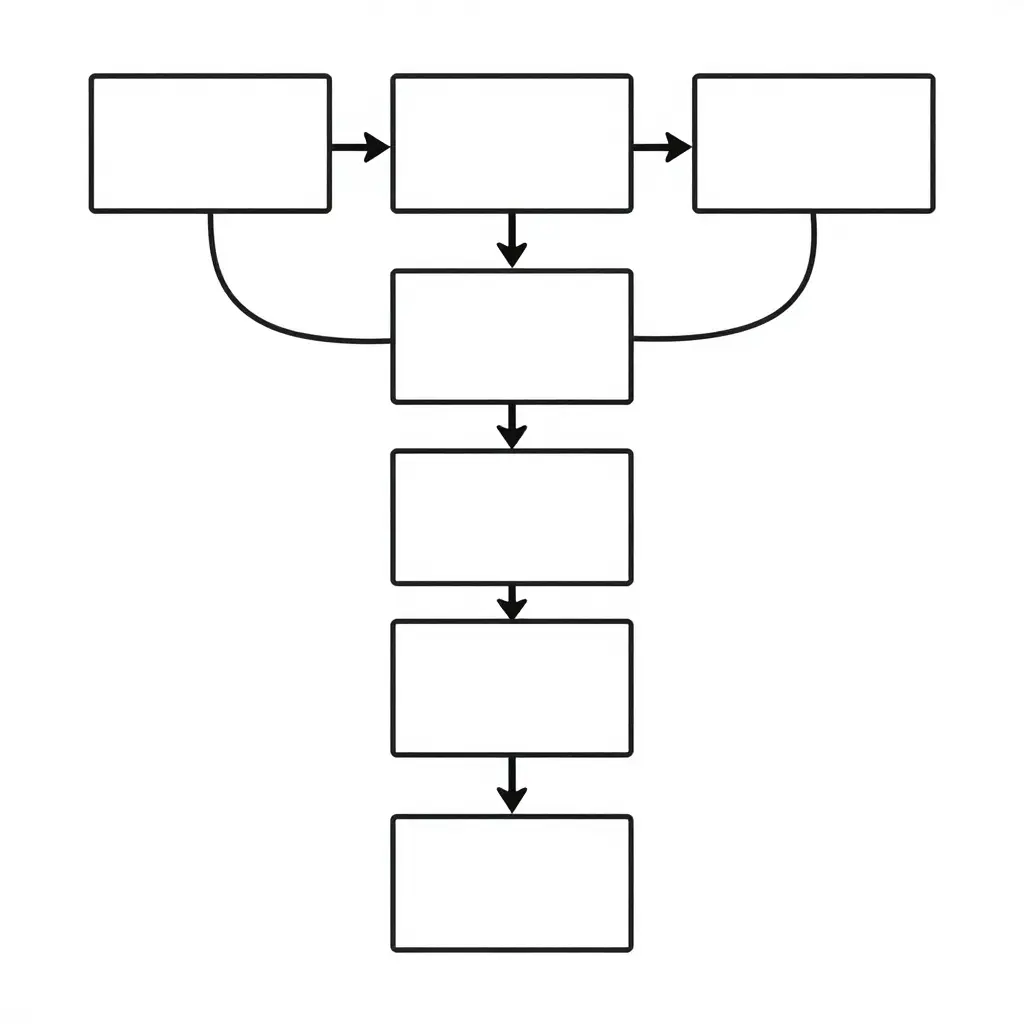
Before you bolt an aftermarket panel onto your bike, run a disciplined, repeatable sequence. The flowchart below maps the pre-installation fitment check as a linear process: start at the top, follow the arrows, and do not skip a step.
The six stages flow in order:
- Verify part number – confirm the panel actually matches your make, model, and year before anything else.
- Inspect brackets – look for bent tabs, cracks, missing clips, or previous crash damage.
- Test-fit panels – hang the panels loosely to see how they naturally sit.
- Measure gaps – check panel-to-panel and panel-to-frame spacing with consistent reference points.
- Adjust and re-tighten – nudge, shim, and secure hardware in stages rather than fully cranking it down.
- Confirm alignment – do a final visual and measurement pass before you call it done.
Follow it top to bottom and you will catch most alignment problems before they become stripped threads or cracked tabs.
Frequently Asked Questions About Motorcycle Fairing Fitment
Why do aftermarket panels not line up?
Aftermarket panels rarely match an OEM part’s exact geometry because they are usually reproduced from a mold of an original, and copying introduces small distortions in mounting holes, edges, and curves. Add shipping stress, temperature swings, and the natural flex of thin ABS or fiberglass, and those errors stack up until gaps and overlaps appear. A slightly tweaked subframe or bent bracket throws off even a perfectly molded panel. Usually the problem is not one flaw but several small tolerances working against each other.
Can misaligned fairings be adjusted without new parts?
Yes. Many misalignment issues can be corrected by loosening the bolts, repositioning the panels, and retightening them in the correct sequence rather than buying new parts. Shim washers, elongated holes, and gentle heat coax stubborn panels into place, and starting every bolt by hand is one of the simplest fixes. Adjustment has limits, though: if a panel is warped or a tab is cracked, no amount of fiddling will solve it. Diagnose whether you have a fitment tolerance or actual damage before assuming you need replacements.
Does model year affect fairing fitment?
Yes, and this trips up a lot of riders. Manufacturers often refresh bodywork between model years, and even a minor styling update can change mounting points, tab locations, and overall panel shape. A part listed for a 2015 bike may not bolt onto a 2018 model of the same name, so cross-check the specific year, sub-model, and even the color code. When in doubt, confirm fitment against your bike’s VIN or a factory parts diagram before ordering.
Do cheap fairings always fit poorly?
Not always, but low-cost panels carry more risk because price often reflects thinner material, looser mold tolerances, and less quality control. Some budget sellers invest in decent tooling and offer honest return policies. The smart approach is to read reviews from riders with your exact model, ask about test-fit guarantees, and budget extra time for minor trimming and adjustment. Spending a little more for a reputable brand frequently saves hours of frustration.
How do I fix a misaligned mounting tab?
Confirm the tab is not cracked first, because a broken tab needs reinforcement with fiberglass or plastic welding before it will hold. If the tab is intact but off, enlarge the hole slightly with a round file or add a washer to bridge the gap and spread the stress. Warming the tab gently with a heat gun lets you bend it a few degrees without cracking the plastic; keep the heat low and keep moving. Small, patient corrections beat forcing a bolt, which usually cracks the tab outright.
Should I paint fairings before or after test-fitting?
Always test-fit first, and paint only once you are confident the panels sit correctly. Dry-fitting reveals trimming needs, hole misalignment, and interference with the tank or exhaust, and fixing those on bare plastic is far less stressful than damaging a fresh finish. Once everything lines up and you have marked the adjustments, disassemble, prep, and paint. That order protects your investment and keeps fitment problems from ruining a costly paint job.
Final Thoughts on Motorcycle Fairing Fitment
Getting panels to sit flush is rarely about finding the “perfect” part. It is about understanding why the ones you have behave the way they do. Aftermarket panels miss their marks for a few predictable reasons: inconsistent material thickness, tabs molded a few degrees off, a subframe quietly bent after a tip-over, worn or missing grommets, and layers of paint that add just enough bulk to force panels apart. None of it is mysterious, and none of it requires a shopping cart full of new plastic.
The lesson is sequence. Before you buy anything, inspect everything: check the subframe for true alignment, compare tab locations, test-fit the panel dry, and measure the gaps left by paint and hardware. Most of the time, a patient pre-installation check resolves the alignment problems that send riders and shops straight to the parts catalog. Diagnose first; replace last.
That approach changes how you spend money and time. Treating fitment as a process of measurement and adjustment, rather than an endless cycle of returns, keeps budgets intact and bikes on the road. The rider or tech who inspects before ordering ends up with bodywork that looks like it was meant to be there from the start.