
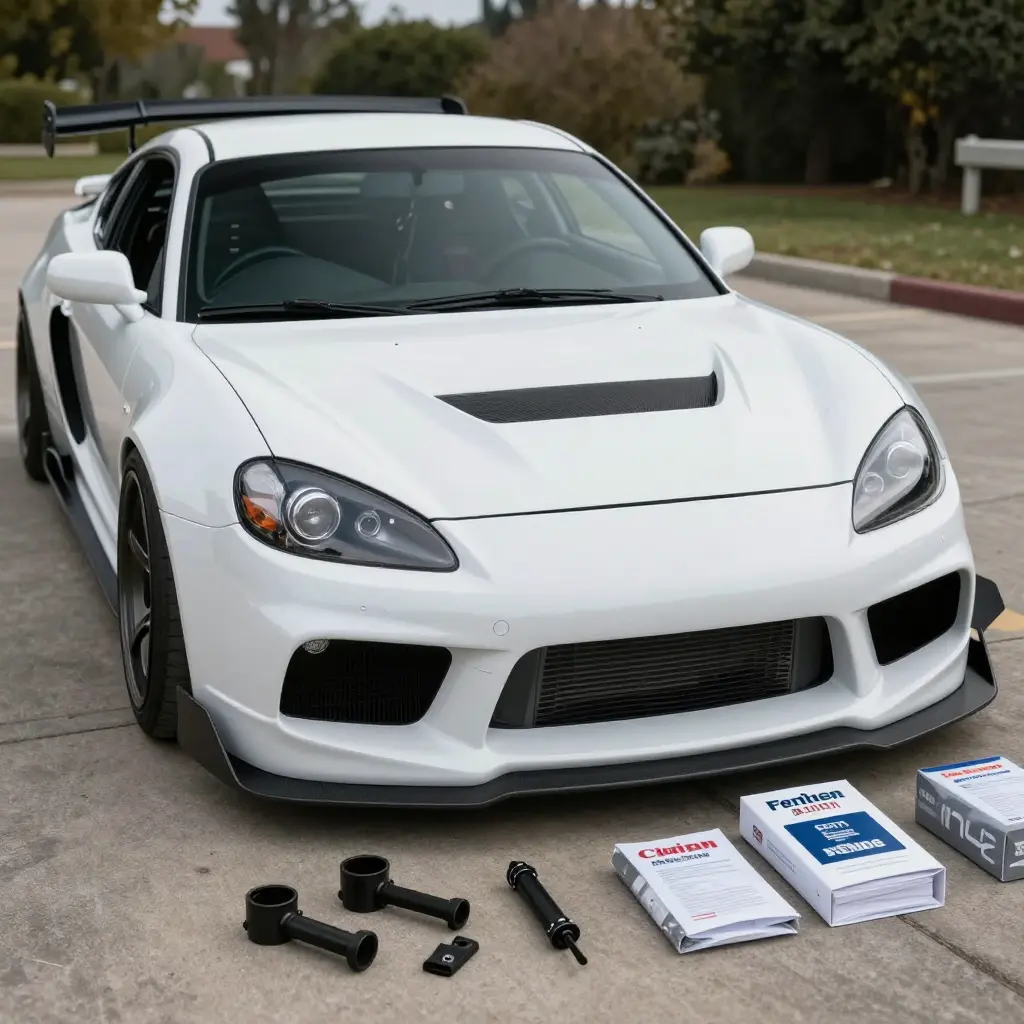
The number on an aftermarket fairing kit’s product page rarely matches what you end up paying. Paint, hardware, freight, and import fees each settle onto the bill at a different point, and a kit that looked affordable at checkout can clear its sticker price well before the box reaches your garage. Below is where the money goes, so you can budget before you order instead of after the invoice lands.
Three costs sit on top of the advertised price: paint, hardware, and freight. Each one is easy to underestimate, and each one shows up in a different place.
The Three Cost Pillars
- Paint: Color matching, primer, and clear coat are usually quoted as separate line items, not folded into the base shell price.
- Hardware: Clips, bolts, grommets, and mounting brackets are frequently sold apart from the fairing itself.
- Freight: Oversized, fragile panels ship in bulky crates, and that shipping bill is a genuine part of your total.
Sales tax, packaging, and handling fees stack on top as well, so the sticker price is a baseline rather than a final figure. If you plan to install the kit yourself, the same mechanical confidence that fairing work demands is what a step-by-step diesel mechanics course is built to develop.
The Three Cost Pillars of an Aftermarket Fairing Kit
At checkout, the number that jumps out is almost never the whole cost. A realistic aftermarket fairing kit cost rests on three components, and each one behaves differently. Paint is the cosmetic and protective layer: base coat, color matching, clear coat, and the labor hours behind the finish. Hardware covers the small parts that hold panels together and keep them seated at speed — bolts, clips, brackets, gaskets, and fasteners. Freight is shipping, driven by box size, dimensional weight, packaging, and distance to your door.
Paint is mostly labor and materials, and you can influence it through color choice and finish level. Hardware tends to be a modest, predictable line item, unless a cheap kit cuts corners and forces upgrades later. Freight swings hardest, spiking with oversized panels, remote delivery zones, or rushed timelines. Merge all three into one vague total and you lose track of where the money went.
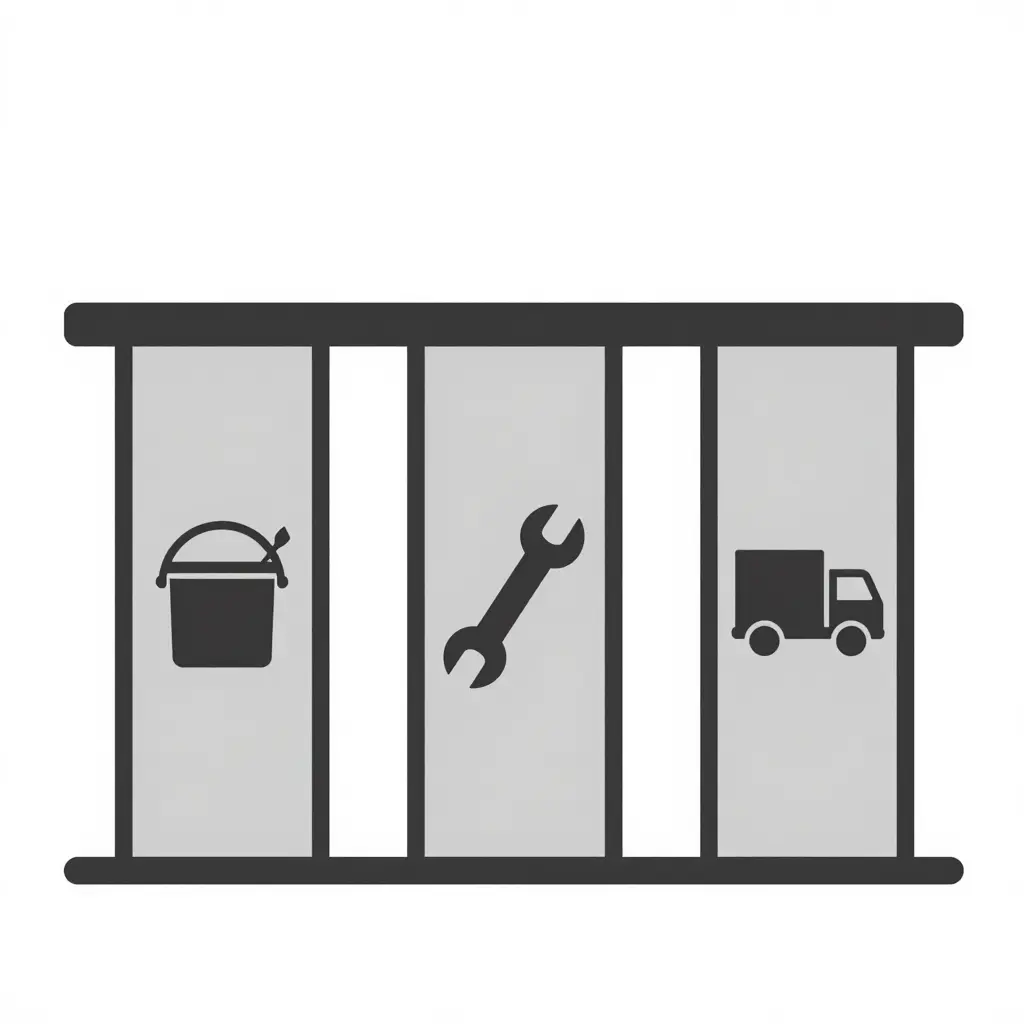
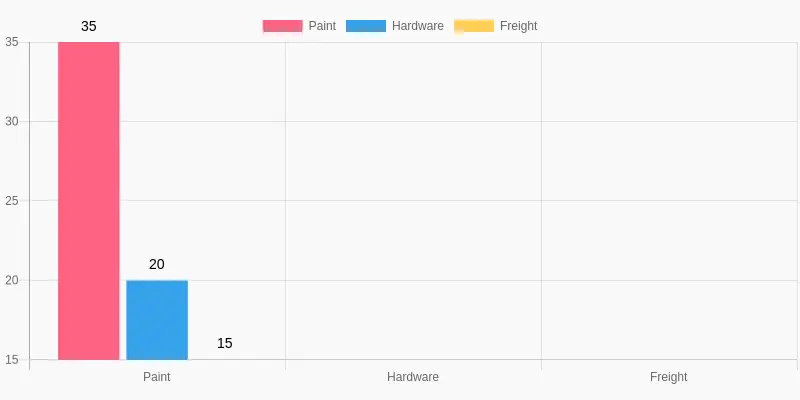
Price the paint, tally the hardware, and get the freight quote before you order. Each line looks affordable on its own; stacked together they add up to the number you actually pay. Skip one when you estimate and the budget will not hold. Use the diagram above as a checklist: paint, hardware, freight, then total.
Paint: The Largest Variable in a Fairing Kit Cost
The plastic panels are usually the easy part to price. Paint is where quotes spread apart: two kits built from identical plastic can land far apart in total cost based on what happens in the spray booth. Give paint its own line in any budget you build.
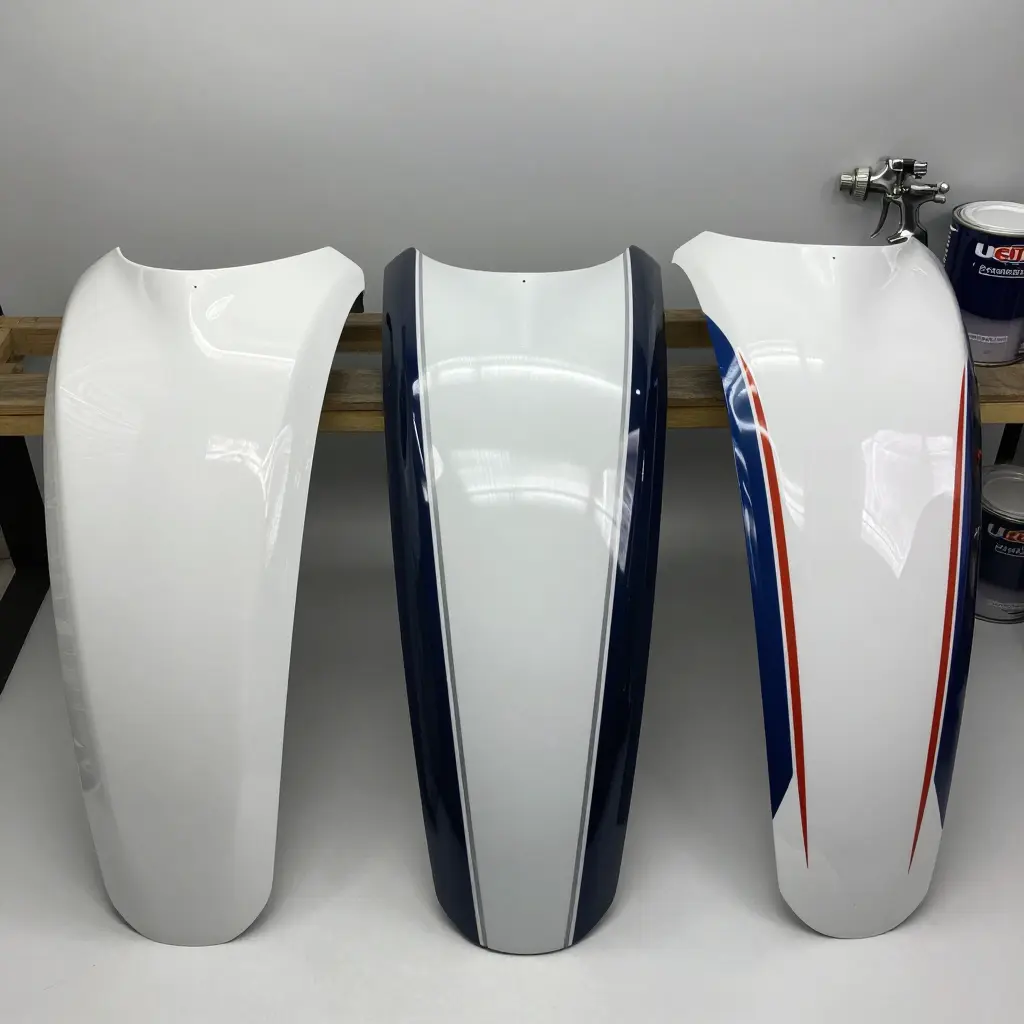
The Paint Options You Will Encounter
Most buyers pick from three categories:
- Factory-matched solid colors. A single color mixed to match your bike’s original shade. This is the most straightforward option and the easiest to price predictably.
- Custom multi-tone schemes. Two or more colors combined into a design, often with a race-inspired or two-tone layout. Each additional color adds material, masking, and labor.
- Clear-coat finishes. A protective top layer applied over the base coat. Available in gloss, matte, or satin, and it strongly affects both appearance and durability.
Why Paint Drives a Big Share of the Cost
Paint is labor-intensive. Every panel has to be prepped, sanded, primed, and masked before a single drop of color goes on. Materials add up too: quality base coats, reducers, and clear coats are not cheap, and a mistake means stripping the panel and starting over. Between the materials and the trained handwork, paint often costs more than the raw fairing panels it covers.
Variables That Move the Price
- Number of colors. Every additional color means more mixing, more masking, and more drying time between coats. A three-tone scheme will always cost more than a single shade.
- Graphics. Decals, stripes, and airbrushed designs add design work and demand real precision. Complex graphics can add hours of labor compared with a plain scheme.
- Finish type. Gloss, matte, and satin behave differently. Matte and satin cannot be polished or spot-repaired as easily as gloss, so they call for cleaner prep and more careful technique.
- Panel count. A full kit covers more surface area than a partial set, and each piece is sprayed, cured, and finished individually.
Knowing which lever moves the price helps you compare quotes on the same terms and decide where to spend and where to save.
Hardware: Fasteners, Brackets, and Mounting Kits
The painted shells get all the attention, but the hardware bundled with them — or missing from the box — decides how installation day goes. Most complete aftermarket kits ship with bolts, screws, grommets, retaining clips, brackets, windscreen mounts, and heat shielding.
What Usually Ships in the Box
- Bolts and screws sized to factory threads
- Rubber grommets and well nuts that prevent vibration cracks
- Retaining clips for trim panels
- Steel or aluminum mounting brackets
- Windscreen mounting tabs and spacers
- Heat-shielding foil for exhaust-adjacent panels
Not every seller includes all of it. Premium kits tend to treat hardware as standard, while budget kits strip it out to hit a lower headline price. That gap alone can put two quotes for the same fairing a hundred dollars apart.
Why Some Kits Include Hardware and Others Don’t
Hardware raises a manufacturer’s material and packaging costs, and most brands pass that along. Others sell a “shells only” kit and expect you to reuse the factory fasteners. Leave hardware out of your fairing kit cost and you may be hunting for a missing bolt halfway through the install, then paying retail for a replacement.
Read the listing line by line before you buy and confirm what is bundled. A few minutes of checking saves a second shipment and a lost weekend in the garage. If you want to sharpen your wrenching skills first, this step-by-step guide to diesel mechanics is a reasonable place to start.
Typical Cost Ranges by Fairing Kit Component
Before you hit “add to cart,” put the paint and hardware numbers next to the freight bill. The table below summarizes the main cost categories that shape your out-the-door price, along with what each one covers and how it hits your wallet. (If you plan to handle more of the work yourself, brushing up on your own mechanical skills can pay off before you order.)
| Component | What It Covers | Cost Range | Buyer Impact |
|---|---|---|---|
| Paint | Base coat, clear coat, color match, labor hours | $150 – $800 | Custom colors and show-quality finishes climb fast; factory-style colors cost far less |
| Hardware | Bolts, clips, grommets, brackets, fasteners | $30 – $150 | Budget kits skimp here, so set aside cash for replacement bits |
| Freight | Shipping, crating, oversize handling, liftgate fees | $50 – $300 | Bulky fairings ship as freight, and rural or residential delivery adds surcharges |
| Total Landed Cost | Everything above plus tax and any duties | $250 – $1,300+ | The true number you pay before the box reaches your door |
Freight: Why Shipping Can Surprise You
After you have compared prices, chosen a color, and sorted out hardware, the freight quote can still catch you off guard. A fairing kit is a set of large, awkwardly shaped panels that has to arrive uncracked, so it ships nothing like the padded-envelope parcels you are used to. Here is what actually drives the number, and how an aftermarket fairing kit can turn a bargain into a budget buster.
Package Size and Dimensional Weight
Carriers do not bill by scale weight alone. They use dimensional (DIM) weight, which is the box’s length × width × height divided by the carrier’s factor. Side fairings, a nose cowl, and a tail section all demand oversized cartons and thick foam padding, so the billable “weight” often dwarfs the actual pounds. A set that weighs 12 lbs on the bench can be billed like a 40 lb parcel.
Shipment Distance
Every mile adds cost. A kit crossing three states lands far cheaper than one shipped coast to coast, and remote or residential addresses frequently trigger surcharges. Pricing is zone-based, so the same box can cost twice as much depending on where you live — which is exactly why professional carriers obsess over zone pricing and routing.
Domestic Versus International Shipping
An overseas supplier can unlock a lower sticker price, but international shipping adds air or ocean freight charges, longer transit times, and extra handling at every handoff. Domestic sellers usually win on speed and predictability, even when the part price is a little higher.
Customs and Duties
Cross-border orders may also face import duties, taxes, and brokerage fees, billed separately from the shipping label. The amount varies by country and declared value, and it is easy to overlook when you are only comparing part prices. Check the landed cost, not the list price.
Optional Insurance
Fairing kits crack and split easily, and a damaged panel is expensive to replace. Carrier insurance is usually optional, and usually worth adding on a high-value order. Keep in mind that claim windows are short and that clear photos of the original packaging decide most claims.
Size, distance, borders, and protection all stack up, and the freight quote rarely matches what you first expect. Budget for shipping and insurance before you click buy.
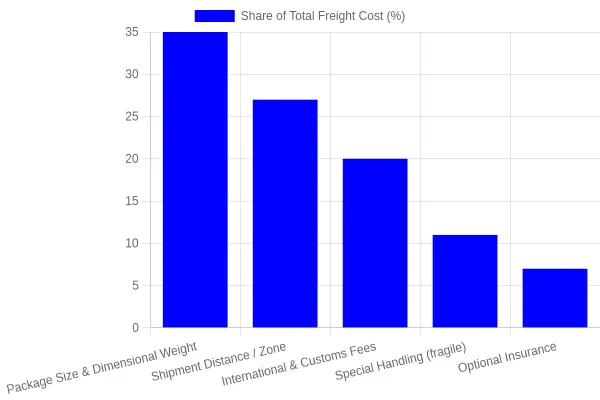
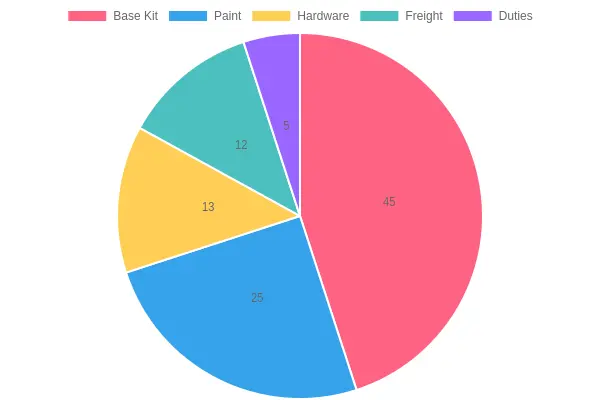
The bars show how paint, hardware, and freight each contribute to the total delivered cost of an aftermarket fairing kit. In a typical breakdown the base kit takes the largest share — about 45% of the total — with paint around 25%, hardware 13%, freight 12%, and duties 5%.
Fairing Kit Pre-Order Cost Checklist
- Verify the exact paint scheme and color code — custom or two-tone finishes often add a premium.
- Confirm whether mounting hardware and brackets are included — missing bolts can trigger a separate parts order.
- Request a written freight quote before checkout — oversized bodywork ships as dimensional freight, not cheap parcel.
- Check customs duties and import taxes — cross-border orders can add a surprising percentage to your total.
- Review the warranty terms and return window — restocking fees on painted fairings are notoriously steep.
- Ask about prep and primer requirements — unfinished panels may need sanding and priming at extra cost.
- Factor in shipping insurance — fairings crack easily in transit and claims need coverage set up upfront.
- Confirm the fairing material and thickness — ABS versus fiberglass affects both fitment and long-term durability.
- Inquire about installation labor if you are not DIY — a shop can bill several hours for a full kit swap.
Run through this list before you click buy and the estimate becomes a real, all-in number you can budget against. Once paint upgrades, hardware, freight, duties, and warranty terms are confirmed in advance, the hidden “aftermarket fairing kit cost” surprises that show up after the invoice clears simply go away. A few extra emails or phone calls now can save hundreds of dollars and a weekend of frustration, especially if you plan to handle the install yourself and want to keep labor costs down with a guide to mastering diesel mechanics.
Budgeting for the Total Landed Cost
A listing price tells you almost nothing about what you will actually pay. Paint, hardware, freight, and import charges arrive separately, and by the time the last box reaches your workbench the real number can climb 60 to 100 percent above the sticker. Before you order, build a single landed cost figure that captures every expense between the vendor’s warehouse and your garage floor.
The Five-Line Landed Cost Method
- Base kit. Write down the raw, unpainted aftermarket fairing kit cost exactly as advertised.
- Paint and finishing. Add OEM color match, clear coat, decals, and labor if a shop is spraying it.
- Hardware. Add bolts, clips, grommets, heat shields, and any mounting kit not bundled with the panels.
- Freight. Bodywork ships in oversized boxes, so dimensional weight — not actual weight — drives the shipping quote.
- Duties and taxes. Cross-border orders tack on customs clearance and import fees on top.
Total those five lines and you have your true cost. For riders who handle their own prep and spraying, following a methodical step-by-step path for DIY mechanics keeps labor and costly rework off the bill.
Why Comparing “Fairing Kit Prices” Alone Misleads
Most fairing kit prices exclude paint and freight, so two vendors can look far apart on the page and still land within a few dollars of each other. One seller may advertise a cheap bare kit and charge premium rates for paint and dimensional-weight shipping, while another bundles hardware and ships at a flat rate. Judge on the headline figure alone and you reward the wrong supplier.
Comparing Vendors on Equal Footing
Run every quote through the same five lines before you decide. The table below shows why the cheaper-looking kit is not always the cheaper purchase:
| Cost Component | Vendor A | Vendor B |
|---|---|---|
| Base kit | $389 | $449 |
| Paint and finishing | $220 | $150 |
| Hardware | $65 | $60 |
| Freight | $140 | $85 |
| Duties and taxes | $45 | $30 |
| Total landed cost | $859 | $774 |
Vendor A’s cheaper-looking kit actually costs $85 more by the time it reaches your garage. Budget the landed total rather than the headline number, and checkout will never blindside you.
Where to Source an Aftermarket Fairing Kit
Three things separate a good supplier from a frustrating one: selection, pricing, and how quickly they answer questions. A supplier who stocks a wide range of fairings across many motorcycle models is far more likely to hold an exact match for your bike, which spares you weeks of back-and-forth. Narrow catalogs tend to force compromises on fit, color, or mounting points.
Pricing deserves a closer look than the quote alone. Ask whether paint, hardware, and freight are included, since vendors bundle these differently. Treat parts buying like any other planned maintenance job — much as you would when following a step-by-step path to diesel mechanics mastery — and you will naturally weigh total landed cost instead of a single line item. Buyers who run tight purchasing tend to apply that same rigor to every supplier relationship, a habit that shows up in smart fleet management practices.
Response speed matters too. A vendor who answers questions about fitment, batch consistency, and shipping timelines within a day is easier to work with than one who goes quiet once the invoice clears.
Before you commit, keep one thing in mind: the headline price is a single number, and verifying the full total cost, freight and duties included, matters far more than the sticker figure.
Frequently Asked Questions About Aftermarket Fairing Kit Costs
Does the kit price include paint?
Rarely. Most aftermarket fairing kit listings quote an unpainted shell, with paint billed as a separate line item. Premium vendors do sell pre-painted sets, but those typically run 30 to 60 percent higher than bare panels. If a price looks suspiciously low, check whether paint is actually in the deal.
Is hardware always supplied with the fairing kit?
No. Many budget sets ship panels only, leaving you to reuse the factory bolts, clips, and grommets. If mounting hardware is not mentioned in the listing, assume you will need to source it yourself, which adds both cost and waiting time. Ask the seller for a full component list before ordering.
How is freight calculated for an aftermarket fairing kit?
Freight is usually based on dimensional weight rather than the actual weight of the box, because fairings are bulky but light. Oversized shipments often trigger extra handling fees on top of the base rate. Always request a delivered-to-door quote instead of a vague shipping estimate.
Are customs duties extra?
Often, yes. When a kit crosses a national border, import duties, taxes, and brokerage fees are typically the buyer’s responsibility and are not included in the vendor’s quote. Confirm in writing whether duties are prepaid before you commit.
How do I compare quotes across different vendors?
Compare the delivered total, not the sticker price. Add up panels, paint, hardware, and freight, then weigh fitment warranties and return policies on equal footing. A vendor with a higher headline price can end up cheaper once the extras are included. DIY mechanics who fit parts themselves also trim labor costs, so it pays to sharpen hands-on skills with a step-by-step path to mastering mechanics.
Does a cheaper kit save money overall?
Not necessarily. A low-cost aftermarket fairing kit may skip paint, omit hardware, or use brittle ABS that cracks during installation. Once you factor in repainting, replacement panels, and refitting labor, the bargain can cost more than a mid-tier set.
What can raise the final price unexpectedly?
Custom color matching, rush handling, and residential delivery surcharges often appear only after checkout. Confirm every line item in writing so the number you budgeted matches the number you pay.
The Bottom Line: Total Landed Cost, Not Sticker Price
The true aftermarket fairing kit cost is never just the number on the product page. It is the sum of three pillars: paint, hardware, and freight.
Paint decides the finish you actually receive, and its price moves with color, coverage, and prep. Hardware covers the bolts, clips, and brackets that hold every panel in place, and the wrong fasteners cost more later. Freight is the price of moving bulky, fragile plastic across long distances.
Budget the total landed cost up front and the surprises go away. A low advertised number can hide expensive custom paint and heavy shipping.
Before you order, confirm every cost component and compare full fairing kit prices, not just the headline figure. That is how you avoid a bargain kit that ends up the most expensive one.