
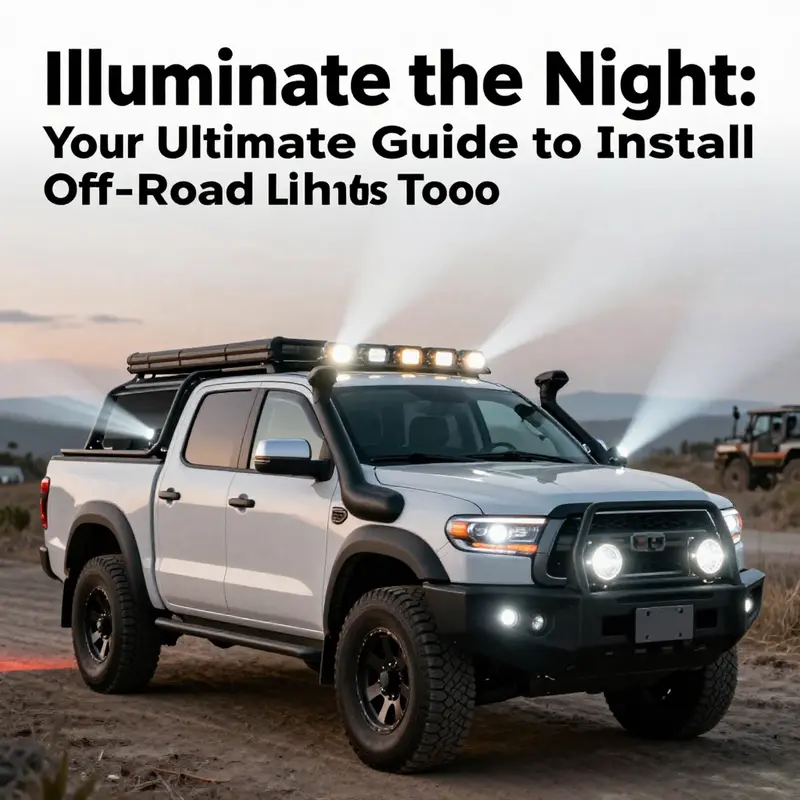
Embrace the adventure that awaits you on off-road terrains! Installing off-road lights on your truck is not just a modification; it’s a commitment to explore the uncharted and conquer the darkness. Proper lighting enhances visibility and safety when navigating rugged trails or cruising across rural landscapes under the stars. This guide breaks down the essential steps to successfully install off-road lights, detailing how to choose the right type, select optimal installation locations, gather necessary tools, and properly wire the lights to ensure reliable performance. Each section is crafted to equip off-road enthusiasts, racing fans, and landowners with practical insights that meld rugged adventure with state-of-the-art technology.
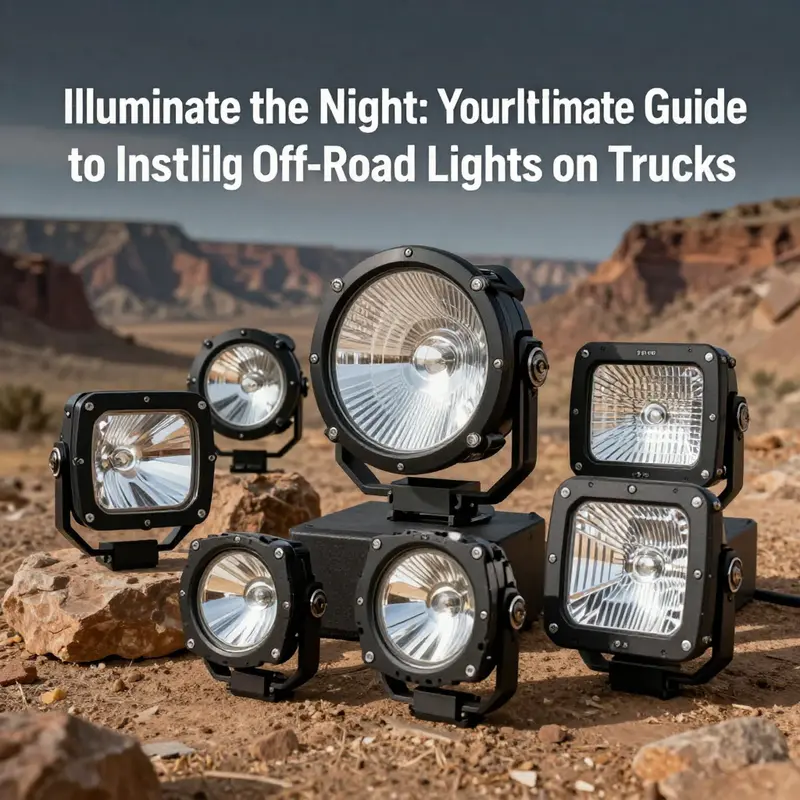
Lighting the Trail Ahead: A Practical Guide to Choosing the Right Off-Road Light Type for Your Truck
When the sun sinks behind the skyline and the trail ahead turns to shadow, the right off-road lighting becomes more than a convenience—it becomes a safety margin, a tool for decision making, and a way to extend your truck’s utility far beyond daylight hours. Choosing the right type of off-road light isn’t about chasing the brightest beam or buying the most rugged-looking housing. It’s about aligning the beam pattern, power needs, mounting practicality, and real-world terrain with how you drive and where you drive. The landscape of options can feel endless: LEDs that drink power sparingly, auxiliary forward-facing headlights that extend your daytime reach into the night, narrow-spot lights that cut through the dark like a laser, and hybrids that promise a blend of reach and broad coverage. Each category offers distinct advantages and deliberate trade-offs, and the best choice often comes down to a careful assessment of use cases, environmental conditions, and how a lighting system integrates with the truck’s existing electrical and mounting architecture. The goal is not just more light, but the right kind of light that helps you read the road, spot hazards early, and maintain an efficient, resilient electrical setup for the long haul through rugged conditions.
LED lighting has become the default baseline for modern off-road setups, and for good reasons. LEDs deliver high brightness with relatively low power draw, a long lifespan, and the ability to produce a daylight-like color temperature that reduces eye fatigue during long night runs. Their compact form factors let designers pack more capability into smaller housings or mount them in places that previously wouldn’t accommodate traditional bulbs. When choosing LEDs for off-road use, the focus should be on beam color consistency, lumen output relative to power draw, and the reliability of the driver circuitry in harsh environments. A robust LED kit will manage heat effectively, preventing dimming as temperatures rise or as the system runs for extended periods. Practical shoppers look for units that maintain output under vibration and moisture, with sealed housings and gasketed mounts that resist water ingress and dust.
Auxiliary headlights, sometimes referred to as main front lights, play a different role in the lighting ecosystem of the truck. They’re designed to complement the standard headlamps, widening the field of view and providing a broad, evenly illuminated corridor ahead. This broadness is useful for navigating the immediate surroundings—the rocky shoulder, loose gravel, or a gully on a trail—as you approach obstacles you expect to see more clearly with a wider beam. The moral here is balance: you don’t want a wall of light that blinds you to the subtle, far-off details, nor do you want a narrow beam that leaves the sides of the trail in deep shadow. When evaluating auxiliary headlights, the key considerations are the color rendering of the beam, the depth of field, and how well the lights pair with the factory lighting without causing glare or interference with sensors, if your truck includes any. The right auxiliary headlights extend your daytime visibility without demanding new driving habits or increasing fatigue from eye strain.
Off-road spotlights occupy a different part of the spectrum—laser-like, narrow beams designed to cut through distance rather than blanket the area. The payoff is clear: you can spot obstacles, wildlife, or the profile of a ridgeline far ahead on a dark highway or remote trail. The flip side is real and practical. Narrow beams command precise aiming, and misalignment can create glare for oncoming drivers or fail to illuminate the near-ground hazards that can derail a night ride. For many drivers, spotlights serve as long-range eyes that illuminate trails far in front of the vehicle, making it possible to react to changes in the terrain well before you reach them. This capability becomes especially valuable on long, open stretches where you’re traveling at modest speeds but need reliable long-range cues for type of surface, ruts, or unexpected steps in the trail.
Hybrid lights attempt to bridge the gap between reach and coverage, delivering both a long-range beam and a broad, near-field wash in a single package. The promise is appealing: fewer separate fixtures to manage, less wiring complexity, and a more unified aesthetic that seems to fit modern trucks’ design language. In practice, hybrids require careful selection to ensure the two modes don’t cancel each other out thermally or optically. The switching mechanism, the consistency of the color temperature across modes, and the reliability of the switching electronics in vibration-heavy environments matter as much as the raw lumen output. If you’re balancing long-range sightlines with campground illumination or need to light both the trail ahead and your immediate campsite, a well-chosen hybrid can provide a practical compromise. Yet it’s important to test how the beam transitions from spot to flood under real-world conditions to ensure you aren’t trading one deficiency for another in the name of convenience.
With the categories laid out, the next step is to evaluate how your driving environment and typical use cases influence the choice. Terrain and climate matter just as much as desired brightness. In deserts or open plains where flat surfaces reflect heat and glare, a broad, color-accurate flood can reduce eye fatigue and reveal evolving surface textures that matter for traction and obstacle avoidance. In dense forestry, steep ravines, or narrow trails, long-range visibility is often more critical, making spotlights or hybrid configurations appealing to ensure you can read the trail ahead while still catching the edges of the path where rocks or roots might lurk. Beam quality becomes a practical concern here, not a marketing buzzword. A beam with uniform spread, minimal hot spots, and a color temperature near natural daylight helps you discern texture, depth, and the small variations in terrain that spell the difference between a controlled turn and an off-road slip. Of course, the environment is only part of the picture; the system must also play well with your truck’s electrical architecture and mounted hardware. A robust selection process will consider not just brightness, but reliability, waterproofing, mounting compatibility, and long-term maintenance.
From the mounting standpoint, the vehicle is a dynamic platform with weight, wind, and vibration to contend with. Roof mounts maximize elevation, which translates into longer reach and broader coverage on the upper half of the scene in front of the truck, while bumper mounts place the light closer to the eye level of the obstacle line, a difference that can influence how shadows are cast on the ground. Hood mounts, though less common for serious off-road use, can supplement forward illumination if routing is done carefully to avoid heat buildup on the glass and to keep wiring tucked away from the engine bay. Side mounts, meanwhile, are excellent for revealing the blind spots on either flank, especially on trails that weave along the edge of drop-offs or through thick vegetation where a vertical clearance issue could suddenly appear. The expert recommendation to place spotlights on the driver’s side and floodlights on the passenger side is rooted in practical visibility—one side tends to pick up the obstacles and texture in the near field around the driver, while the opposite side covers the broader approach path and reduces the chance of creating an unbalanced glare pattern that could dazzle an approaching vehicle or a cyclist. In other words, placement is not just about aesthetics; it’s about creating a predictable, symmetrical lighting environment that helps you gauge depth, distance, and the shape of the ground under pressure.
Another layer of practicality concerns power and wiring. A robust lighting system demands a clean power source, careful routing, and protection against interference with the truck’s existing electrical system. The recommended approach is to tap into a fused power line from the battery rather than drawing directly from the ignition circuit. A relay becomes essential when you’re driving high-power LEDs, as it prevents the load from cycling through sensitive vehicle electronics and reduces the risk of voltage drop that can cause flickering or dimming. Grounding should be to a clean metal surface on the chassis or frame, free of paint or rust, so the return path remains solid under motion and vibration. Wiring should be tucked along existing looms or routed through grommets, door sills, or under carpets where feasible to minimize exposure to moisture, debris, or abrasion. A careful routing plan also anticipates future maintenance: secure, neatly labeled wires that won’t shift during off-road travel and connectors that seal against water intrusion. In practice, a well-planned harness will survive the trial of dusty trails and winter weather just as reliably as the lights themselves. It’s not just about getting power to the lights; it’s about ensuring the entire circuit remains stable and safe, especially when many trucks operate in environments where the electrical system is already pushed to its limits by accessories, winches, or auxiliary equipment.
Before you pull the trigger on a particular type of off-road light, you should also consider the legal and safety landscape. Regulations governing auxiliary lighting vary by jurisdiction, with restrictions sometimes applying to brightness, positioning, and operation when other traffic is present. The prudent path is to understand local rules before you install, aim, or use a set of high-intensity lamps in public spaces. Even when local laws permit certain configurations, responsible use is essential. That responsibility includes aiming lights downward and away from the sky to prevent glare that blinds other drivers, as well as avoiding upward angles that could reflect off atmospheric particulates or create a dangerous halo. In practice, you should plan to align the light pattern with your primary field of view and ensure that any additional lighting does not interfere with sensors, cameras, or safety equipment on the vehicle. Beyond legalities, there’s a moral and practical duty to maintain good exposure without contributing to glare that worsens night-driving conditions for others. You want lighting that improves visibility for you and your passengers while respecting the road users around you.
In terms of decision making, the practical process begins with a clear set of use-cases. Are you primarily navigating long, featureless stretches at speed, or are you crawling through brush and rocks where maneuverability and near-field visibility matter more? Do you operate in areas with frequent wildlife activity or in weather that muddies the air and coats everything in a fine layer of dust? Your answers guide whether you lean toward long-range spotlights, wide-area floodlights, or a balanced hybrid. It’s also worth thinking about the rest of the vehicle’s lighting ecosystem. You don’t want to duplicate function or create a disorganized light palette that makes it harder to interpret what you’re seeing. A thoughtful approach acknowledges that the truck’s headlights remain the anchor for everyday use, while auxiliary lighting augments capability for specific tasks or trails. Calibration matters: you’ll need to set beam angles carefully, test in off-road conditions if possible, and adjust the aim in small increments to achieve a comfortable, usable pattern that protects others and serves your needs. The goal is to achieve a coherent system where each light has a defined purpose, and their combined output translates into confident, controlled driving through the night. The choice, then, becomes a balance between beam quality, mounting practicality, electrical reliability, and lawful operation, rather than a single metric like total lumens.
As you prepare to translate this understanding into a purchase decision, imagine stepping back to evaluate the full picture of your truck’s lighting system. Begin by listing the terrains, speeds, and typical night scenarios you encounter. Then map those scenarios to beam patterns and coverage needs. Decide whether you want to maximize distance, maximize field of view, or achieve an adaptable mix. Consider how you’ll integrate mounting points with the vehicle’s structure and how you’ll route wires in a way that keeps water, mud, and debris at bay. Finally, assess your budget against the value of reliability in extreme conditions. It’s not merely about buying the most capable kit; it’s about ensuring the setup you choose can withstand the ride, protect the electrical system, and keep you visible, oriented, and safe through miles of darkness. The right choice helps you read the trail, respond quickly to obstacles, and do so with a calm confidence that comes from knowing you’ve chosen light that fits the truck, the terrain, and the mission.
For readers seeking a broader map of options and practical, side-by-side comparisons, a comprehensive external resource offers a deeper dive into off-road lighting options and installation considerations: https://www.autogear.com/off-road-lights
Where to Mount Off‑Road Lights: Balancing Visibility, Safety, and Durability on Your Truck
Choosing where to mount off‑road lights on a truck is a decision that shapes performance, safety, and long‑term reliability. The placement you pick determines beam coverage, heat management, exposure to debris, and the ease of wiring and service. Thoughtful placement keeps lights useful and legal, prevents damage to electrical and structural systems, and reduces the chance of failures when you need the lights most.
The front bumper or grille area is the most common starting point for installations. These locations sit low enough to provide precise forward illumination. A bumper mount focuses light on the trail directly ahead. It also avoids the dramatic shadows that can appear when lights sit too high. When mounted here, lights can highlight ruts, rocks, and roots without reflecting off low clouds or wet foliage. Bumper mounts are usually easy to access for aiming and maintenance. They also keep the center of gravity lower than roof mounts, which is beneficial for stability on technical terrain. When choosing a bumper or grille position, watch for sensors, airbags, and crash structures. Modern trucks often have delicate components behind the grille. Avoid drilling into load paths or near fuel and brake lines. If a location is near a factory sensor, consider a spacing adapter or relocate slightly to prevent interference.
Roof or roof rack installations give the widest coverage and the longest reach. Elevation reduces shadowing from hoods and tall obstacles. A roof bar is ideal when you want to see over crests and across wide valleys. The tradeoff is increased exposure. Roof mounts face more wind, rain, UV, and vibration. They also add height, affecting clearance under low obstacles. For trucks that carry tall loads under garages or in wooded camping spots, extra height can be a drawback. Roof mounting demands heavy‑duty brackets and vibration‑resistant hardware. Use lock washers, thread locker, and robust mounting plates. Reinforce the rack where possible and inspect fasteners regularly. Waterproofing becomes a priority. Roof holes must be sealed with grommets and a flexible sealant to prevent leaks and corrosion. On roof installs, confirm the roof structure will dissipate heat. High‑output LEDs generate heat, and poor heat dissipation shortens the light’s life. Choose locations with airflow and avoid bolting a light to a thin panel with no heat path.
Side‑mounted and fender positions add useful lateral coverage. Lights placed on the fenders, A‑pillars, or just behind the front bumper help when negotiating tight trails. These lights illuminate side drop‑offs and approach angles. They are also helpful for campsite setup and close‑range rock crawling. Side mounts are less likely to blind oncoming traffic when angled correctly. However, these positions can be vulnerable to brush, rocks, and accidental impacts. Consider skid plates or guards if you regularly drive among thick vegetation or tight rock gardens. For side lights, check for clearance when turning and when the suspension articulates. Fender wells and movable components can interfere with wiring if the routing is not planned.
Hood or cowl mounts provide a compromise between low bumper mounts and high roof bars. They lift lights slightly above the hood, giving a cleaner forward arc and reducing immediate hood reflection. Hood mounts often require custom brackets and careful wire routing through grommets into the engine bay. This route exposes wires to heat from the engine. Use heat‑resistant conduit and place routing away from exhaust and hot intake components. Hood mounts are easier to access than roof bars, making adjustments and repairs simpler.
When planning any mount, heat management and weatherproofing should guide your decisions. High‑intensity LEDs produce significant heat at the housing or heatsink. Mount locations must allow airflow and a path for heat to dissipate. Avoid tight cavities where heat can build up. If you must place a light in a restricted area, add a small aluminum spacer or plate that conducts heat to a larger surface. Seal all drilled holes with a flexible, UV‑resistant sealant. Use IP67‑rated housings and UV‑stable mounts to resist ultraviolet breakdown and water intrusion. Corrosion can compromise the mount and create electrical hazards. Apply corrosion‑inhibiting lubricant to exposed threads and use stainless hardware where possible.
Protecting wiring is as important as choosing the mount itself. Route cables along existing factory wiring looms or structural channels. Keep wires clear of moving parts like steering shafts, suspension linkages, and fan blades. Use split‑loom conduit, conduit clamps, and heat‑shrink tubing at connections. When wires pass through metal panels, fit grommets to prevent chafing. Avoid running high‑current power lines directly alongside sensitive signal wires. Electromagnetic interference can confuse sensors or radios. Ground points must be clean and solid. Find bare chassis metal and remove paint or rust with a file before establishing the ground. A poor ground causes flicker and can damage the light driver.
Avoid placing lights near fuel lines, brake lines, and structural supports. Fuel and brake lines are critical and sometimes hidden behind panels. A misdrilled hole can create a catastrophic failure. Structural supports distribute crash energy. Drilling through or weakening these supports compromises safety. If you are unsure, consult a vehicle manual or a professional before drilling. For trucks with airbags and crumple zones, follow manufacturer guidelines to avoid interfering with safety systems. When in doubt, choose non‑penetrating clamps, or use light mounting slots built into aftermarket bumpers.
Beam pattern and aiming are inseparable from location. The same light aimed from different heights produces different coverage. A spot beam on a bumper might throw far down a trail. From the roof, that same spot beam might overshoot and blind distant traffic. Careful aiming is essential to both usefulness and compliance. Aim spotlights to clear the immediate travel path and highlight obstacles. Aim floodlights lower to light close ground and peripheral areas. Many experienced drivers install a combination: spot on the driver side and flood on the passenger side for balanced forward coverage. After mounting, test aim on level ground. Drive to a safe, dark area and confirm that beams illuminate without creating glare for oncoming vehicles. Recheck aim after the first few days of off‑road use as fasteners can settle.
Durability details matter where the trail is rough. Use vibration‑resistant mounts and reinforced brackets. Consider rubber or polyurethane isolators between the light and bracket. They absorb shock and reduce stress on the housing. For bumper mounts, a captive nut or weld‑in plate gives a stronger anchor than thread into thin sheet metal. For roof mounts, add backing plates to distribute loads into the rack or roof structure. If you expect a lot of stone strikes, install protective guards in front of lights. Replaceable polycarbonate lenses or guards can save the light housing from catastrophic impact.
Legal and practical constraints also shape placement. Local laws can restrict when and how auxiliary lights are used. In many areas, high‑mounted lights or overly bright forward beams must be covered when driving on public roads. Choose mounts that make it easy to add covers and to route power to a switch that meets legal standards. Even when local laws allow off‑road lights, aim them low for road use to reduce glare. Some jurisdictions require supplementary switches or separate relays for auxiliary lighting. Planning mount location with wiring accessibility in mind makes it straightforward to install compliant controls.
Finally, plan for service and upgrades when you pick a location. You will need to adjust aim, replace bulbs, or swap wiring at some point. Choose mounts that allow access without disassembling large body panels. Good mounts reduce maintenance time and cost. Document the route of wires with photos and notes. Label wires at both ends so future troubleshooting is quick. Keep spare fuses, connectors, and a basic tool kit in the truck. Regular inspection after heavy use prevents small problems from becoming failures on the trail.
For sourcing heavy‑duty mounting solutions, consider suppliers that list detailed specs and IP ratings. High‑quality housings and UV‑resistant brackets improve lifespan and performance. A directory of suppliers can help you compare mounting options and protective accessories.
Practical examples often clarify choices. For a truck driven mostly on wide, open trails, a roof bar with a medium‑to‑long throw light gives the best view. For technical rock crawling, bumper and side mounts keep the lights protected and useful for close work. For mixed use, a combination of bumper spotlights and a low flood bar behind the grille offers versatility. Tailor the approach to your terrain, cargo, and typical driving conditions.
Where to mount off‑road lights comes down to a balance. Visibility, safety, durability, and legality must all be weighed. Choose locations that allow secure anchoring, adequate cooling, and protected wiring. Avoid critical vehicle systems and follow the vehicle manufacturer’s guidelines. Aim lights thoughtfully and protect them against impact and moisture. With careful placement, your off‑road lights become reliable tools for safe, confident night driving.
For additional guidance on sourcing durable lights and mounting hardware, see this supplier directory: https://www.alibaba.com/showroom/offroad-spot-light-suppliers.html. For practical vehicle wiring techniques and mechanical fundamentals, a useful internal reference is the guide on Mastering Diesel Mechanics: https://dirtantrucks.com/mastering-diesel-mechanics-your-step-by-step-path-to-success/.
Arsenal for Illumination: Gathering Tools and Materials to Arm Your Truck for Off-Road Lighting
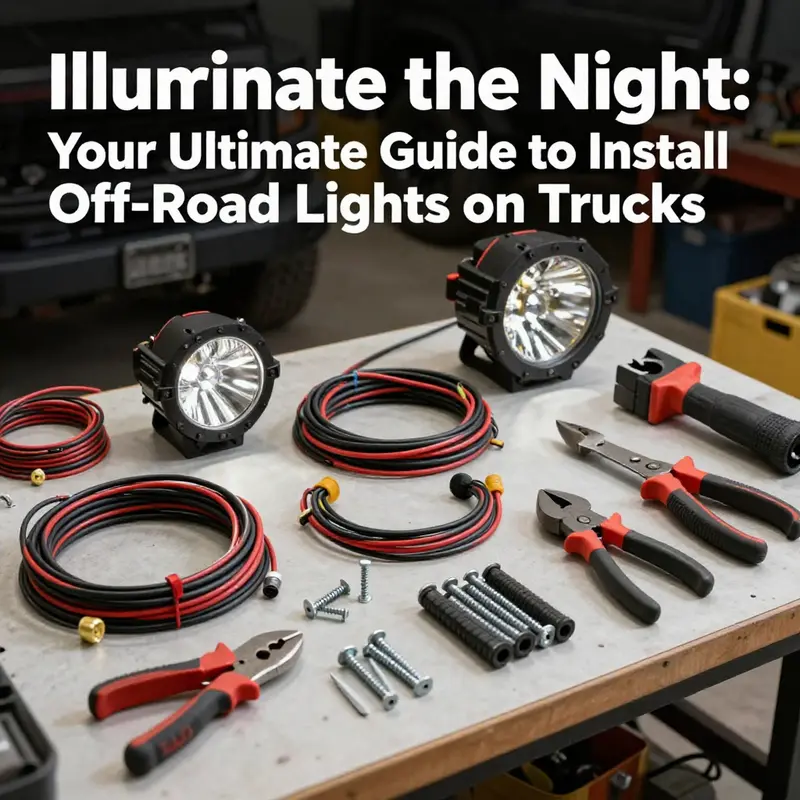
Every successful off-road lighting project begins long before the first hole is drilled or the first beam is fired. It starts with gathering the right tools and materials, selecting sturdy components, and planning a clean, logical path for power and data. When you take the time to assemble a thoughtful toolkit, you set the tone for a safe, durable installation that remains reliable through mud, rain, and long night runs. The tool kit isn’t just about having the right wrenches; it’s about building confidence in your own hands and building a framework that protects your truck’s electrical system as you upgrade its illumination for the trail ahead.
First, the essential tools form a small, well-chosen set that keeps the install moving smoothly. A good pair of screwdrivers—both flathead and Phillips—lets you secure mounting hardware and trim panels without marring surfaces. A wrench or socket set is indispensable for tightening brackets and for any ground or power connections that require bolts rather than screws. Wire cutters and strippers are not optional; they’re the bridge between the light kit and the truck’s wiring harness, letting you trim insulation and expose copper cleanly for solid connections. Electrical tape and heat shrink tubing are your insulation guards against shorts and corrosion, while zip ties become the quiet custodians of order, corralling wires along their journey from battery to lamp. A drill with the appropriate bits is the one tool that unlocks serious mounting options when you need to pass wires or create clean, weatherproof penetrations. A multimeter stands out as a safety-centric ally, letting you verify continuity, voltage, and resistance before you power a high-current circuit for the first time. Finally, don’t overlook safety gear. Safety glasses and sturdy gloves protect you as you work with metal, glass, and sharp edges that come with rugged installations. These tools aren’t flashy, but they are the groundwork that ensures you’ll avoid mistakes that could compromise performance or safety.
Beyond tools, the materials you select matter just as much as the tools themselves. Start with the off-road light kit, which is the heart of the project. The lights you choose should match your planned use: long-range spotlights for visibility far down trails, floodlights for broad area illumination around camps or rock gardens, or a hybrid that blends both capabilities for versatile performance. Remember, the goal is reliable nighttime visibility that reduces fatigue and preserves your reaction time. The wiring that ties the kit to the battery is the next crucial piece. High-quality wiring, typically 12-gauge or thicker for heavy-duty applications, ensures that voltage drop remains minimal and that the system can handle the surge when lights come on. A proper wiring harness with a dedicated fuse and relay setup is essential; it protects your truck’s electrical system from overload and keeps high-current loads from burrowing into ignition circuits or accessory circuits that aren’t built for that kind of draw.
Relays deserve emphasis. A relay module acts as a gatekeeper, allowing a low-current switch inside the cab to control a high-current lighting circuit without risking damage to switch contacts or wiring that travels through dash harnesses. Inline fuses and fuse holders provide a critical line of defense against short circuits and accidental overloads. Weatherproof connectors and seals keep the system robust in rain, dust, and mud, preventing corrosion and intermittent connections that are the bane of nighttime reliability. Depending on your setup, a switch panel inside the cab helps you control the lights without fishing for a toggle under the dash. A small enclosure or sealant can protect exposed connections if your lights live in areas prone to moisture, sharp spray, or immersion during rail or river crossings. These materials together form a resilient, tidy system that looks as good as it works when you’re back on the trail.
As you plan the wiring, the route matters almost as much as the component quality. Run wires along factory looms where possible to shield them from heat and abrasion, and pass through door sills or grommets to keep moisture out. If you drill into the bumper, frame rail, or roof mount, seal every drilled hole to prevent water intrusion. A clean routing plan minimizes rubbing against sharp edges and reduces the odds of a stray wire shorting out on a rough road. The power source is another critical decision point. Tap into the battery with a fused power line rather than drawing directly from the ignition, especially when high-power lights are involved. The fused, direct-path approach reduces the risk of battery drain or ignition-related flicker and ensures the lights have a stable supply even when the vehicle’s other systems surge. Grounding is non-negotiable: attach the ground to a clean, bare metal surface such as a frame bolt rather than spray-painted surfaces that can impair contact. A poor ground is a frequent culprit behind flicker and dimming, which defeats the purpose of adding more light at night. The grounding path should be as short and direct as possible, with multiple ground points avoided to prevent creating loops that can carry stray currents and hum.
With the toolkit assembled and the plan in place, you can transition from shopping list to hands-on work with a sense of purpose. The wiring harness, relay, and fuse apparatus become a modular system that can be customized for the truck and for the user. This is where practical knowledge from broader mechanical and electrical work pays off. To deepen your understanding of how electrical systems behave under load and how to translate that into safe, reliable upgrades, you can consult a broader mechanical learning resource such as mastering-diesel-mechanics-your-step-by-step-path-to-success. This reference provides a grounded perspective on electrical fundamentals that complements the install work without stepping you into uncharted territory. See mastering-diesel-mechanics-your-step-by-step-path-to-success for a complementary overview that reinforces best practices as you select materials and plan routes.
The assembly phase also invites you to consider long-term maintenance and future upgrades. Quality connections and secure routing aren’t only about the current job; they’re about the next time you need to swap in brighter or more efficient lamps, or when you want to add daytime running lights or auxiliary power for other devices. A methodical approach—one that prioritizes clean splices, correct gauge, robust fusing, and weatherproofing—pays dividends down the road by reducing the time you spend diagnosing intermittent faults or rerouting loose wires. It also helps when you’re selling the vehicle or handing it to a new owner who expects a neat, professionally executed upgrade rather than a jury-rigged harness. When you complete the project with a tidy, well-documented layout, you’ll gain not just better night vision but also confidence in your own mechanical craft. The tool set, the material choices, and the care you expend on routing all shape the end result: a lighting system that doesn’t just illuminate the path ahead but also reflects a disciplined, thoughtful approach to outfitting a truck for off-road adventure.
Finally, the broader ecosystem of guidance for this kind of project emphasizes planning, safety, and testing as a sequence rather than an afterthought. As you finish gathering parts and begin the actual install, you’ll routinely check alignments, verify beam patterns, and ensure the ground and power are rock solid before powering up for the first test. The step-by-step testing mindset is essential; even the best mounts and wires won’t deliver the desired performance if a single connection flickers or a ground point isn’t solid. The practical takeaway is simple: invest in a sturdy toolset, select materials with an eye toward durability and water resistance, and plan the run with routes that avoid heat sources, pinch points, and potential abrasion routes. The investment in time and care at this stage yields a better night’s drive and a safer, more controllable lighting system when you’re miles from help.
External resource: For a detailed, visual guide that complements this chapter, see How to Install Off-Road Lights on a Truck (Car and Driver): https://www.caranddriver.com/features/a46593780/how-to-install-off-road-lights-on-a-truck/
Powering Up the Night: Wiring, Power Sources, and Reliability for Off-Road Light Installations on Your Truck
Wiring up off-road lights on a truck is more than a quick bolt-and-connect exercise. It is a careful balance of power management, signal integrity, and protection against the harsh realities of outdoor travel. A well-planned wiring and power strategy keeps lights bright when you need them, prevents electrical drama in the cab, and reduces the risk of blown fuses or a battery that won’t start after a long night of exploration. The core idea is simple: feed your lights from a stable, high-capacity power source, route and protect the wiring so it survives mud, water, and road debris, and control the high-current circuit with components that tolerate vibration and heat. When you start from this foundation, the rest of the installation becomes a matter of precise execution rather than improvisation.
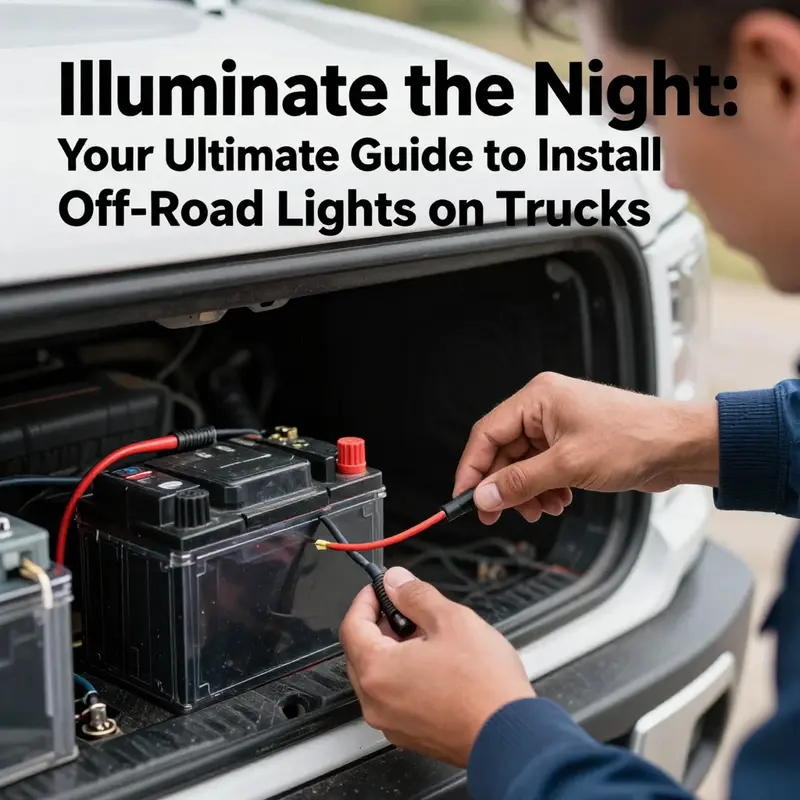
The truck battery is the heart of the system. It provides the stable current your high-output LED pods require, and it does so regardless of whether the engine is running. That stability matters because LEDs, while efficient, still draw a fair amount of current as you ramp up the beam. To maintain that stability and protect the vehicle’s electrical system, you cannot simply splice into a random circuit or rely on the ignition switch to power the whole setup. The safest and most reliable approach is to route a fused power line directly from the battery to a relay located close to the lights. The relay does the heavy lifting, converting a small, low-current signal from a cab switch into the high-current circuit that powers the lights. This separation matters: it keeps the cab switch from carrying the full load, extends the life of the switch, and minimizes voltage drop along long routes to the front of the vehicle.
Choosing the correct gauge for your wiring is not optional, it is essential. For most off-road light installs, a heavy-gauge run in the range of 10 to 12 AWG is appropriate. The exact choice depends on the total current draw of the lights and the length of the run from the battery to the last light. If you’re running multiple light pods or a continuous light bar across the roof, the current can add up quickly. Overly thin wire heats up, which not only wastes power but also raises the risk of insulation damage and short circuits in rough terrain. The rule of thumb is simple: the longer the run and the higher the current, the thicker the wire you should use. When in doubt, err on the side of a thicker gauge and straighten out any voltage drop issues with a properly sized relay and fuse setup.
Fuse protection is the corridor through which every practical installation must pass. A fuse is not a mere accessory; it is a critical safety device that saves your wiring harness and, by extension, your truck’s electrical system. Place the fuse holder as close to the battery as possible, ideally within a few inches of the positive terminal. This placement ensures that the entire length of the wiring from the battery to the lights is protected in case of a short or a snag in the loom. The fuse rating should align with the total current your lights will draw. For typical LED off-road lights, something in the 15 to 30 amp range is common, but you must calculate based on your specific load. If you have two light pods each pulling around 8 amps, a 20 or 25 amp fuse often works well, but double-check the manufacturer’s current draw. The fuse is not a flexible limit; it is a hard boundary that prevents overheating and potential fires in the event of a fault.
Relays are the silent workhorses of the installation. A standard 4-pin automotive relay accepts a low-current signal from your cab switch and, in response, completes a high-current circuit from the battery to the lights. Wire the relay so that the battery positive feeds power to the relay’s input pin, the relay’s output pin runs to the lights, and the coil is controlled by the cab switch through a small, protected control circuit. The switch itself should be placed where you can reach it easily while driving, and it should be designed to handle the vehicle’s vibration without turning on or off unintentionally. A relay not only protects the switch but also minimizes the voltage drop that can occur along longer wiring runs, maintaining brightness and preventing flicker that can mar night visibility.
Grounding is the often overlooked detail that can make or break a lighting installation. A solid ground establishes a complete circuit path back to the battery. Locate a clean, bare metal surface—ideally a frame rail or a major chassis bolt—and attach the ground wire securely with a ring terminal and a properly sized fastener. Avoid painted surfaces or corrosion-prone spots, and be mindful of other under-hood heat sources that can degrade connections over time. If you’re running multiple light pods, you can share a common ground, but each light cluster should have a sturdy return path to the chassis. A poor ground is the quickest route to dimming, flickering, and intermittent operation, especially when the vehicle is idling or when the engine is under heavy load.
Routing the wires through the vehicle is not just a matter of hiding them; it’s about resilience. Run power wires through protective channels, under trims, and, where possible, inside factory looms to shield them from abrasion, heat, and moisture. Use grommets wherever you pass through metal panels to prevent chafing and water intrusion. Where a channel isn’t available, consider conduit or corrugated tubing designed for automotive use. Weatherproof connectors at every junction are worth the extra effort, as they keep moisture out and maintain a solid connection after a day in rain, mud, or snow. Even the route itself matters: avoid sharp bends, kinks, and near-motor-mount hot spots where insulation can degrade. A clean, well-secured harness reduces noise, eliminates rattles, and makes service easier should you need to add or reposition lights later.
The practical realities of specific vehicle models sometimes influence routing choices. In some popular trucks, enthusiasts have favored routes that minimize cabin intrusion and maintain accessibility to auxiliary switches. A few guides advocate routing through the passenger-seat area to reach a dedicated auxiliary switch, sidestepping more invasive modifications. While this approach can simplify operation and keep the switch area tidy, it also introduces considerations about cab access, seat wiring, and the potential exposure of wiring to shifting seats. If you choose this path, treat it as a deliberate design decision rather than a shortcut. Always verify that any hidden path does not interfere with seat rails, airbags, or side-curtain wiring, and maintain a clear separation between high-current power and low-current signal wires to avoid interference.
Once all components are in place and the wiring harness is tucked neatly under carpets or inside door sills, testing becomes the final and perhaps the most anxiety-free part of the process. Start with a multimeter to confirm continuity and proper ground. Then momentarily power the system, watching for an immediate click from the relay and a solid, steady glow from the lights. If there is flicker, recheck connections at the battery, the grounds, and the relay coil. If brightness seems uneven, inspect the wire runs for any hidden pinch points or loose crimps that might be causing resistance. A calm, methodical test routine saves hours of troubleshooting later and preserves battery life and light efficiency during actual off-road use.
For the installer, the goal is reliability in demanding environments. A properly sized power circuit that uses a direct battery feed, an appropriate fuse, a robust relay, and a grounded return path creates a system that can endure engine heat, bouncing over rough terrain, and variable lighting demands as you switch from highway to washboard to shadowed trail. The control strategy—light switch in the cab controlling a relay that powers the lights from the battery—keeps the burden off the operator’s dash switches and avoids pulling ignition-sourced power for a high-current load. This separation is not just a technical preference; it is a fundamental practice for maintaining the vehicle’s electrical health and ensuring consistent performance when you most need it.
When planning the install, it’s also important to think ahead about maintenance and future expansion. If you anticipate adding more lights later, design the harness with extra capacity and a spare fuse position. Use connectors that remain serviceable after exposure to mud and water, and consider labeling the harness so you can quickly identify circuits if you need to diagnose issues on the trail. Documentation, even a simple diagram tucked under the hood, can pay dividends during a roadside repair or when you upgrade to a larger light setup. By treating the wiring like a critical system rather than a cosmetic upgrade, you increase both safety and reliability, which is what every night-driving or trail-exploring setup should promise.
In the end, the wiring and power source portion of an off-road light installation is about prudent, protective engineering. It is about acknowledging the realities of motion, vibration, and weather, and choosing components that perform under pressure. It is about creating a safe, predictable path for current that preserves the accessory’s brightness while protecting the vehicle’s broader electrical system. And it is about a methodical, patient approach to routing, grounding, and testing that yields a dependable lighting solution you can rely on for every adventure, day or night. For readers who want a practical, hands-on visual companion to this process, a detailed step-by-step video guide exists that walks through real-world wiring diagrams, grounding tips, and safe mounting practices for common truck models. The resource aligns with the principles outlined here and can offer valuable context as you move from theory to tangible installation.
External resource for visual guidance: https://www.instructables.com/Off-Road-Truck-LED-Cab-Roof-Light-Install/
Final thoughts
Installing off-road lights on your truck goes beyond mere aesthetics; it’s about ensuring visibility and enhancing safety during your rugged journeys. By thoughtfully choosing the right lights, finding the perfect installation locations, gathering the essential tools, and understanding wiring fundamentals, you’ll empower your off-road experience. Embrace the excitement of night adventures with confidence, knowing that you’re well-prepared for whatever the trail throws your way. Illuminate your path and continue to explore the endless possibilities that off-road driving offers!