
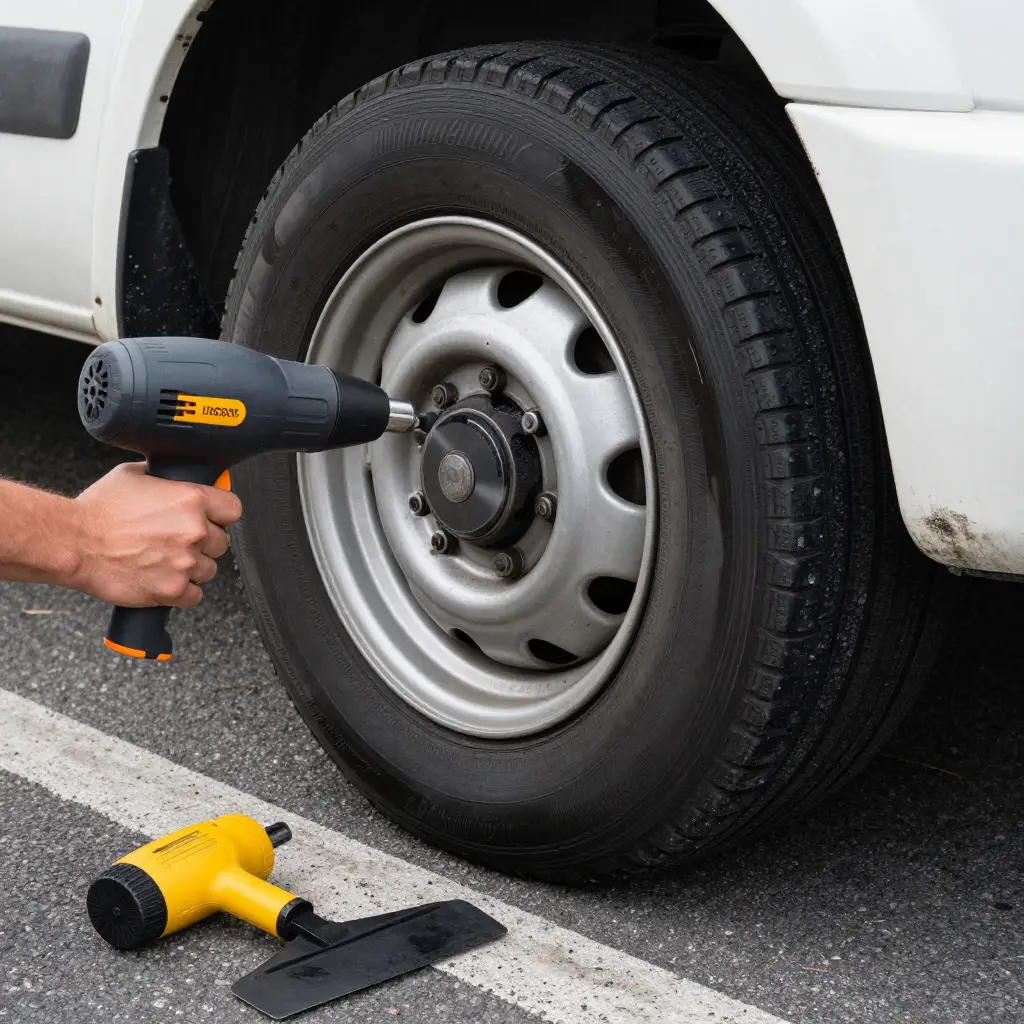
Road Tar on a Truck Rim: Heat It, Scrape It, Then Check the Clear Coat
Road tar on truck rims does not rinse off. It fuses to the metal and the clear coat like a hot glue stain, and a bucket of car soap with a rag will not move it. Keep scrubbing and the tar smears into a wider mess instead of coming loose.
The reason is simple: tar is petroleum-based and most car soap is water-based. Water and oil do not mix, so soap alone never gets a grip on road tar.
What works is three moves in order: heat the tar, scrape it off, then check the clear coat. Heat softens the tar until it lets go. A scraper lifts it without grinding it into the finish. The final check tells you whether your wheel finish survived the job.
Below are the tools you need, the technique that works on painted and polished rims, and the mistakes that wreck a wheel finish: how much heat is safe, which scrapers to reach for, and the solvents worth keeping in the garage.
Why Road Tar Bonds to Your Rims
Road tar is not dirt. It is a mix of asphalt binder and aggregate that crews lay down hot, or a spray-on asphalt emulsion used to patch cracks and seams. Roll a tire over a freshly paved lane or a repair spray and that sticky film flicks onto your rims and starts to cling.
Why does it grab so hard? Because it went on hot. Fresh tar is pliable, so it flows into every tiny groove and pore in the wheel finish. As it cools it stiffens and shrinks, and the tar locks itself into the surface. A rinse will not touch it after that.
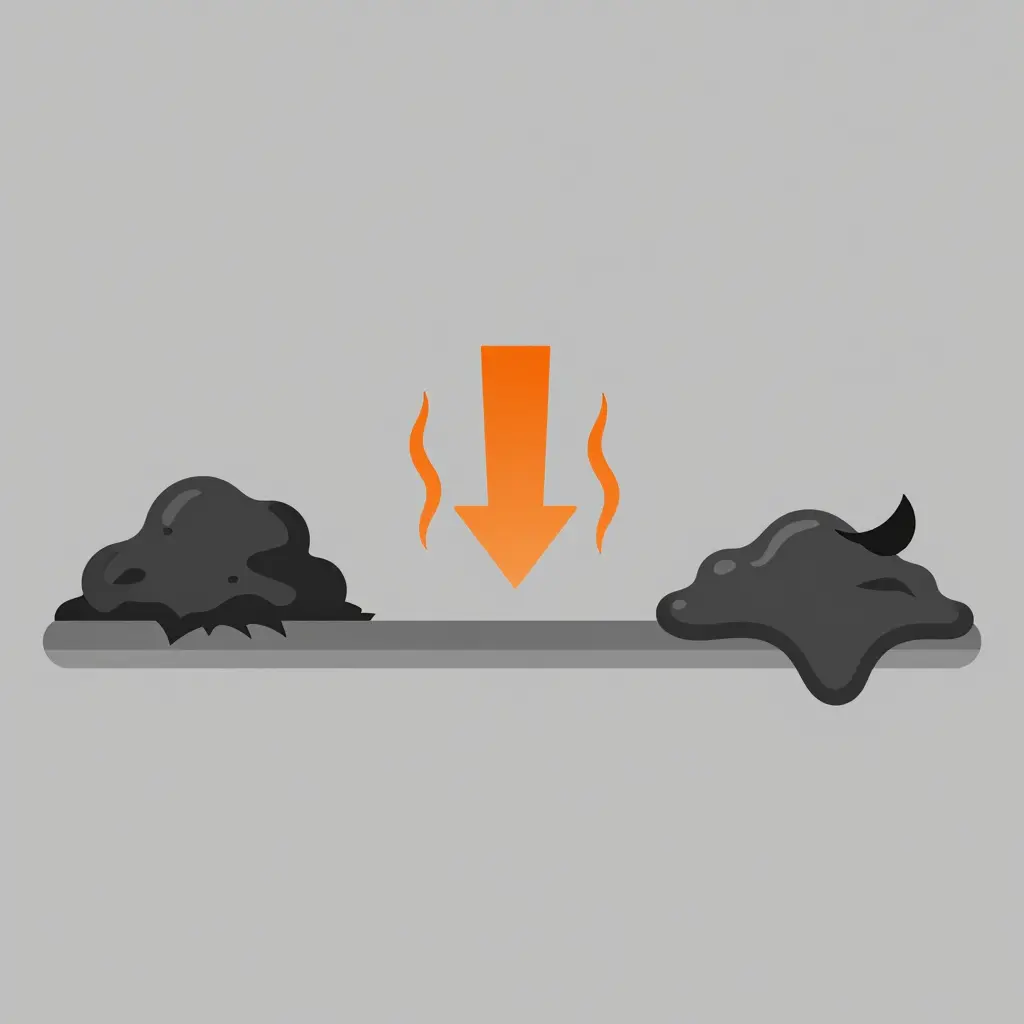
The same physics works in your favor. Warm it up and the tar turns soft and pliable again, which is why heating comes first.
- Heat It
- Scrape It
- Check the Clear Coat
Heat breaks the bond, scraping lifts the softened tar without scratching, and the final check catches damage you would otherwise miss.
Your clear coat is a thin protective layer, and hard scrubbing or harsh chemicals will dull or strip it. That is why an adhesive remover made for automotive finishes beats brake cleaner or gasoline every time.
Once the tar softens, it lets go quickly and cleanly. No drama, no scratched rims.
Why Heat Is the Highest-Leverage Step
Chisel a cold tar spot off a rim once and you will not do it twice. Road tar hardens as it cools, and at ambient temperature it bonds to the wheel like it is welded on. Go at it with a scraper too soon and you burn through strokes, fingernails, and patience for nothing. The variable that matters is temperature, not force.
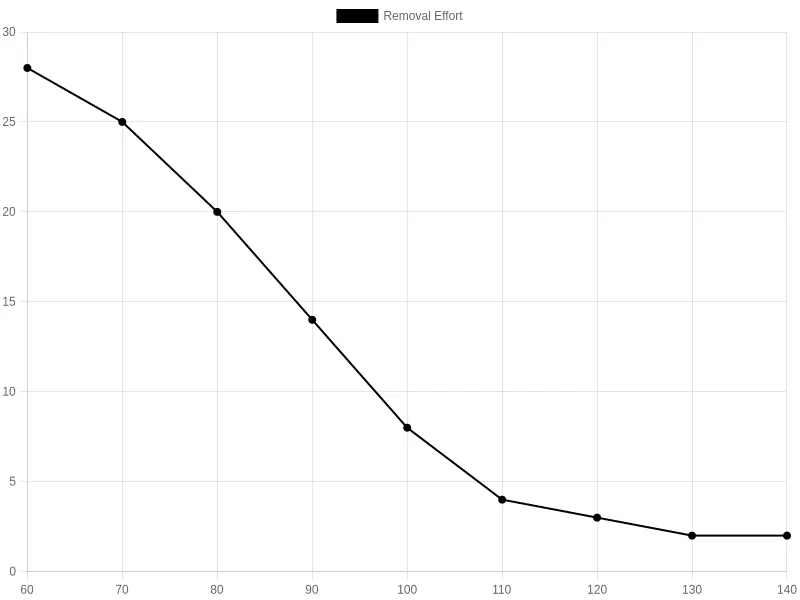
The chart below plots surface temperature in degrees Fahrenheit against removal effort, measured as the average number of scrub strokes per tar spot.
Reading the Curve
- Cold tar (60-80°F): This is the danger zone. At 60°F expect roughly 28 strokes per spot, and at a mild 80°F you are still grinding through about 20. Cold tar clings and smears the whole way.
- The sharp drop (90-110°F): This is where heat earns its keep. Effort falls from about 14 strokes at 90°F to 4 at 110°F, as the tar turns from a brittle solid into a soft, greasy film that wipes away under light pressure.
- The plateau (120-140°F): Once the tar is fully softened, more heat buys you almost nothing. Effort bottoms out near 2 strokes and flattens. Warmer is not meaningfully better, just hotter.
Spend your effort on heat, not elbow grease. 30 seconds with a heat gun, or even a hot sunny day, does more than five minutes of aggressive scrubbing, and it is easier on the clear coat because you are not scraping hard against the finish.
If you like working on your own truck, learning the practical side of diesel mechanics is a natural next step, and it pays off on every job in your driveway.
Step 1: Heat It
Dried road tar grips a rim like glue, and cold tar will not budge no matter how hard you scrape. Before you reach for anything sharp, heat it. Warming the tar breaks its grip on the metal and the rest of the job gets easier.
A few safe ways to do it, so pick whatever is already in your garage:
- A heat gun held about 6 to 8 inches back, kept moving and never parked in one spot.
- A hair dryer on high. Slower, but nearly impossible to overheat.
- A bucket of warm soapy water and a rag, working it in until the tar loosens.
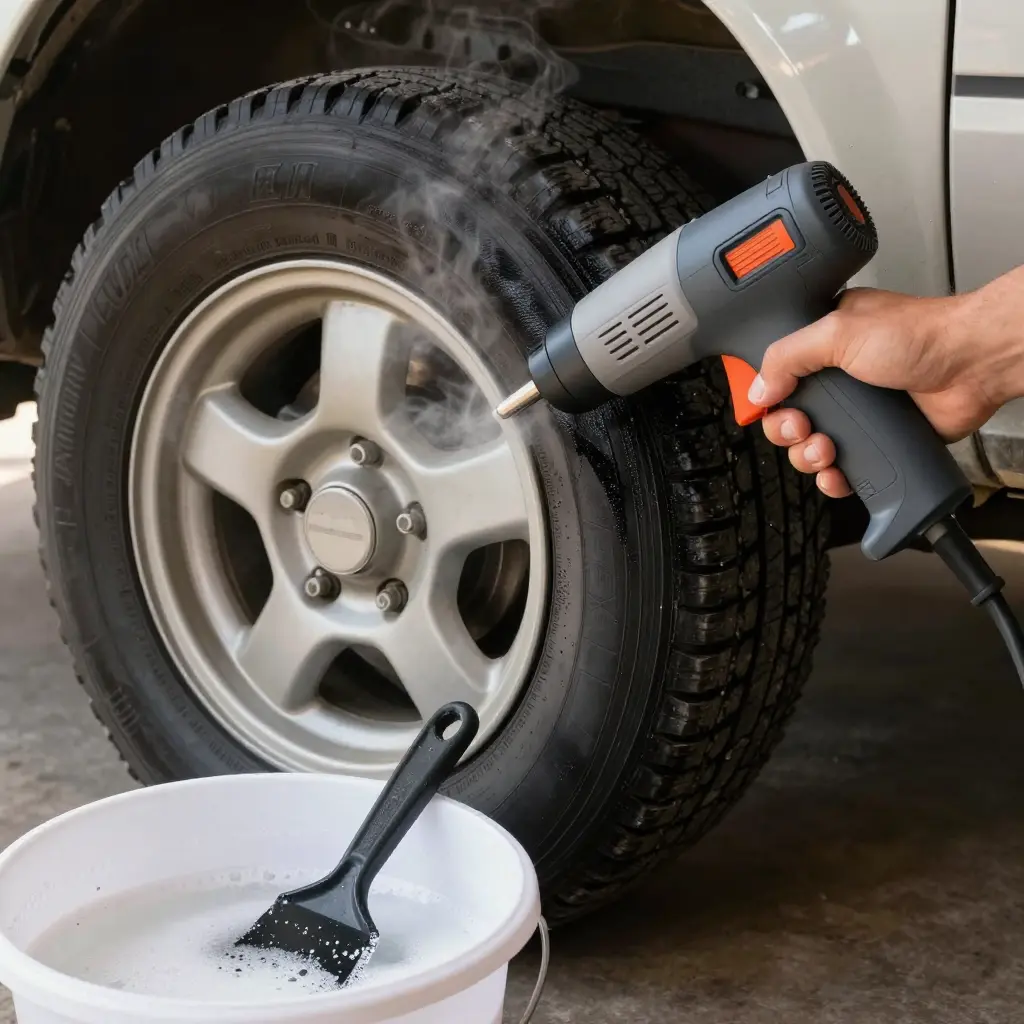
- A steamer, which softens road tar fast without scorching the surface.
Not sure when it is ready? Watch the tar. When it is warm enough it goes dull instead of glossy and starts to lift at the edge. That is the point to start scraping, and how you pull road tar off a rim without gouging the metal.
One warning: too much heat does damage. You can bubble or burn the clear coat, and plastic wheel covers will warp. If the rim is too hot to touch, you have gone too far.
Heating Do’s and Don’ts
- DO keep the heat source moving at all times.
- DO work in small sections instead of the whole rim.
- DO test the surface with your hand — warm, not scorching.
- DON’T hold heat in one spot for more than a few seconds.
- DON’T use open flames like a torch on your wheels.
- DON’T blast plastic covers with aggressive heat.
Keep the tool moving, keep your distance, and let the heat work.
Step 2: Scrape It
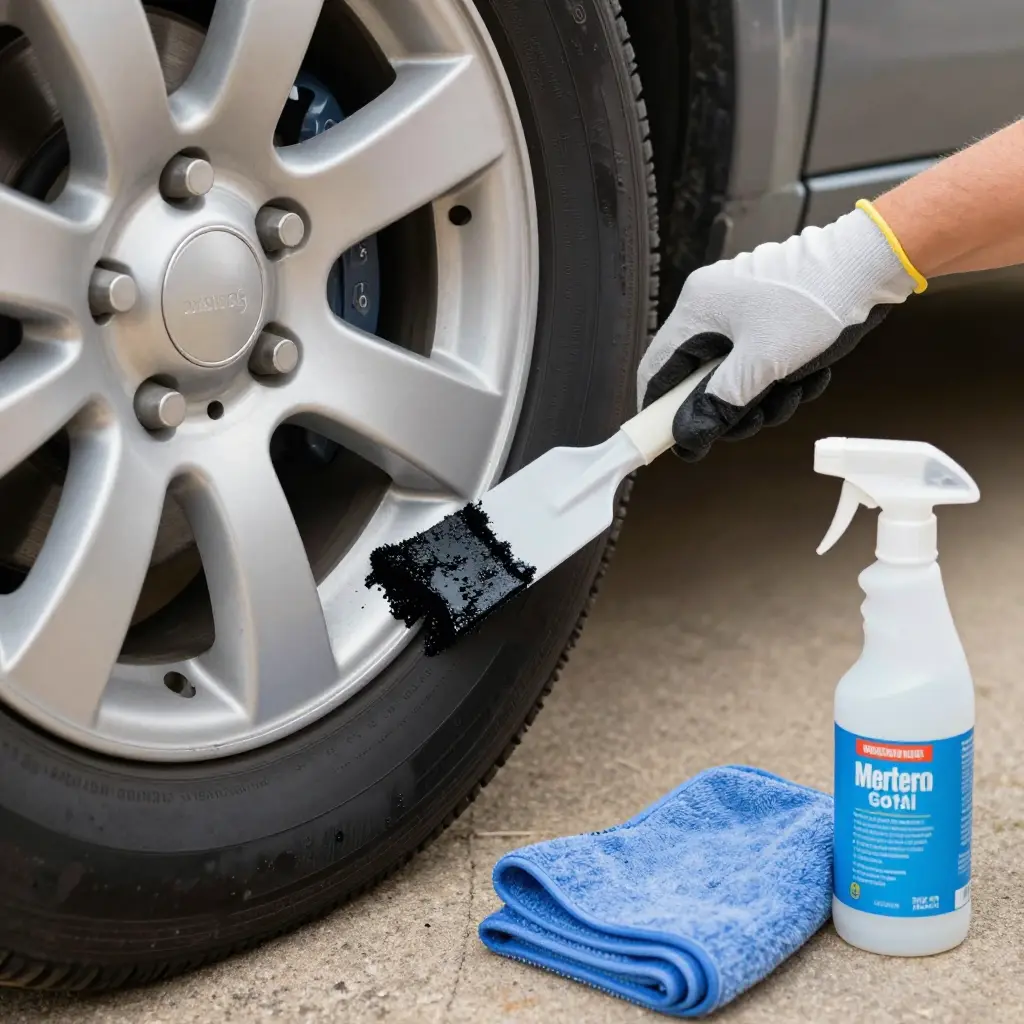
Once the tar is warm and soft, start scraping at its edge, not the center. Hold a plastic scraper at a shallow angle and let the blade lift the gunk off the surface. Let the tool glide along the wheel contour instead of digging in. You are peeling tar up, not grinding it into the wheel.
Keep Metal Off Finished Rims
On painted or clear-coated rims, leave metal blades in the toolbox. A narrow metal scraper feels precise, but it bites into clear coat and leaves permanent scratches. Use a plastic scraper or an old credit card. Both skate over the finish and still lift the tar. If a spot is stubborn, add heat rather than pressure. Basic hands-on maintenance like this pays off on every job you tackle.
Let the Chemicals Do the Rest
A thin film usually stays behind after the scraper. This is where a tar remover or adhesive remover earns its keep. Spray it on, give it a minute to dissolve the residue, then wipe with a microfiber towel. Do not grind at it; the solvent is already working. For heavy buildup, spray, wait, and repeat once before wiping. Re-warm the rim if the tar stiffens as you go.
Work Small, Stay Gentle
Work in small sections and go slow around the spokes and lug edges. Lifting beats grinding every time, and the finish survives. Removed this cleanly, rims keep looking sharp for years.
Tar Removal Methods and Tools Compared
Before you grab whatever is in the garage, match the method to the mess on the rim. The common tar-removal methods stack up like this, from gentle to aggressive. The goal is the same either way: strip the tar and leave the clear coat underneath intact.
| Method | Best For | Risk to Clear Coat (Low/Medium/High) | Speed | Cost |
|---|---|---|---|---|
| Heat gun / hair dryer | Softening thick, fresh tar blobs | Medium | Medium | Low-Medium |
| Warm soapy water and rag | Light films and final wipe-down | Low | Slow | Low |
| Dedicated tar and adhesive remover | Stubborn, dried-on tar | Low-Medium | Fast | Medium |
| Plastic scraper / credit card | Lifting softened tar safely | Low | Medium | Low |
| Metal scraper or razor blade | Extreme, hardened buildup | High | Fast | Low |
On clear-coated rims the safest combination is a heat gun or hair dryer to warm the tar, a dedicated tar remover to do the heavy lifting, and a plastic scraper or old credit card to lift it off. No metal touches the wheel. If you want to level up your general maintenance know-how, it is worth brushing up on hands-on truck maintenance skills.
Step 3: Check the Clear Coat
Once the tar is gone and the rim is dry, do not call it done. Check the clear coat now, before dust hides subtle damage.
Walk slowly around the wheel with a bright flashlight held at a low angle. Angled light reveals what flat overhead lighting hides.
Watch for three things:
- Hazy patches. Milky or cloudy areas usually mean the tar remover or heat softened the finish. If the haze fades as the surface cools and dries, it is temporary.
- Swirl marks. Fine circular scratches from scraping or wiping grit across the surface. Light swirls polish out; deep ones are clear coat damage you can feel with a fingernail.
- Dull spots. Flat, chalky patches where the clear coat is gone, with no gloss and no reflection. That is permanent.
Misting the area with water tells temporary from permanent. If the gloss returns while wet and vanishes as it dries, the clear coat is intact and needs polishing. If it stays flat, the coating is gone.
For light haze, hand-polish with a finishing compound. Put a dime-sized dot on a foam pad, work it in small circles for a minute, then buff it off with a clean microfiber. Do not bear down; let the polish work. Follow with a spot sealant or a thin re-coat on the exposed areas.
When to Leave It to a Pro
Stop if the dullness covers a whole face, the clear coat is peeling, or you find bare metal or corrosion. Respraying and proper rim polishing need equipment and a dust-controlled space most home garages lack. A wheel shop will get it right the first time.
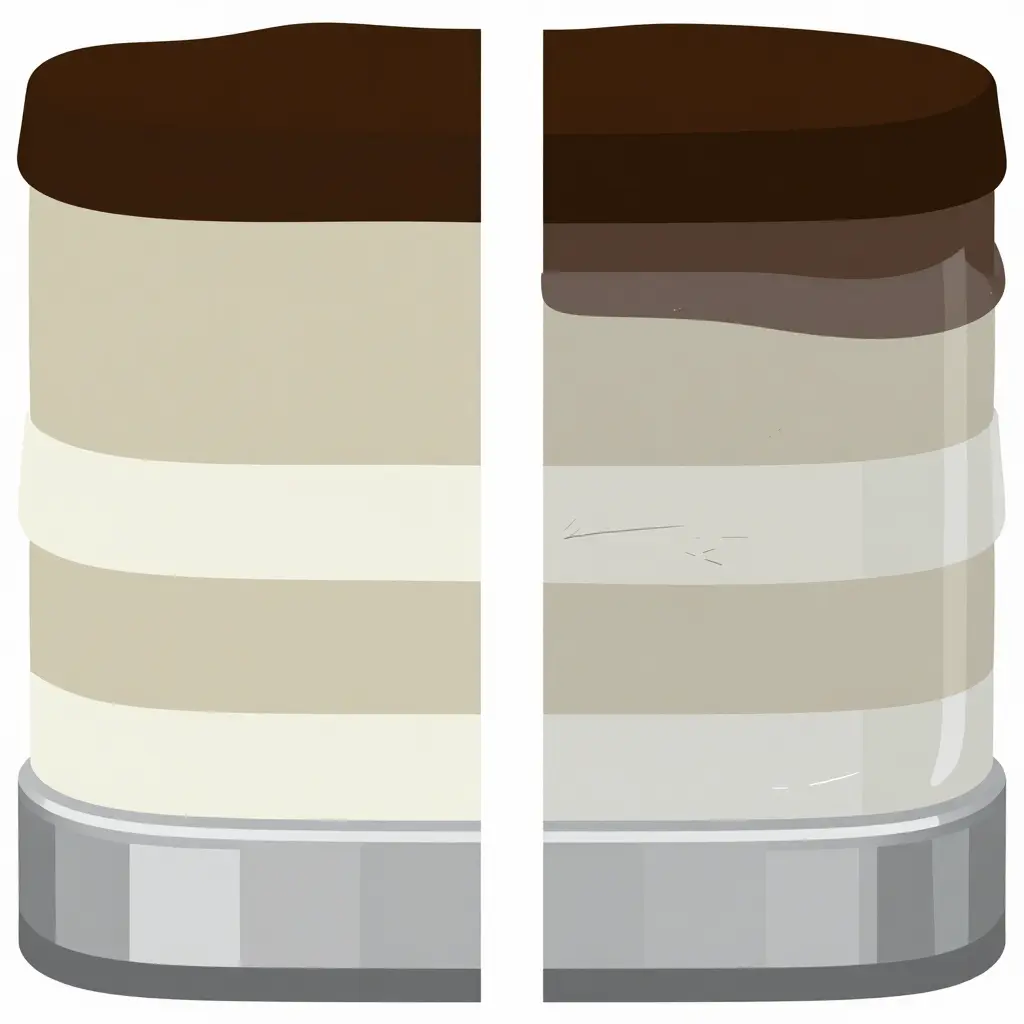
Think of the rim as a layered cake, which is the clearest picture of what “checking the clear coat” means: bare alloy at the bottom, then primer and base coat, then a thin, glossy clear coat, with road tar sitting on top after a long haul. On the left of the image every layer is intact. On the right the tar is gone, but the clear coat underneath is scratched from aggressive scraping. That is the point of this step. Removing tar is half the job; the real test is whether the clear coat survived, because that is the layer protecting the alloy from moisture, salt, and brake dust long after the tar is gone.
The Whole Job at a Glance
- Park in the shade and let the rim cool fully.
- Spread a tarp to shield the driveway from drips.
- Gear up with gloves, goggles, and a respirator.
- Pull the wheel for easier access, or work it in place.
- Brush away loose dirt, brake dust, and grit.
- Warm the tar with a heat gun to soften it.
- Scrape the softened tar and check the clear coat as you go.
- Lift stubborn clumps with a plastic scraper, never metal.
- Spray a citrus tar remover to dissolve what’s left.
- Let the solvent sit a minute or two to break the bond.
- Wipe the softened tar away with a microfiber cloth.
- Rinse and repeat on thick, caked-on patches.
- Wipe down the rim to remove solvent residue.
- Inspect the clear coat for scratches or dull spots.
- Polish out any haze with a fine finishing compound.
- Apply a coat of wax to seal and protect the finish.
- Reinstall the wheel and torque the lug nuts.
- Work one section at a time, following a proven step-by-step DIY path.
Where Your DIY Time Actually Goes
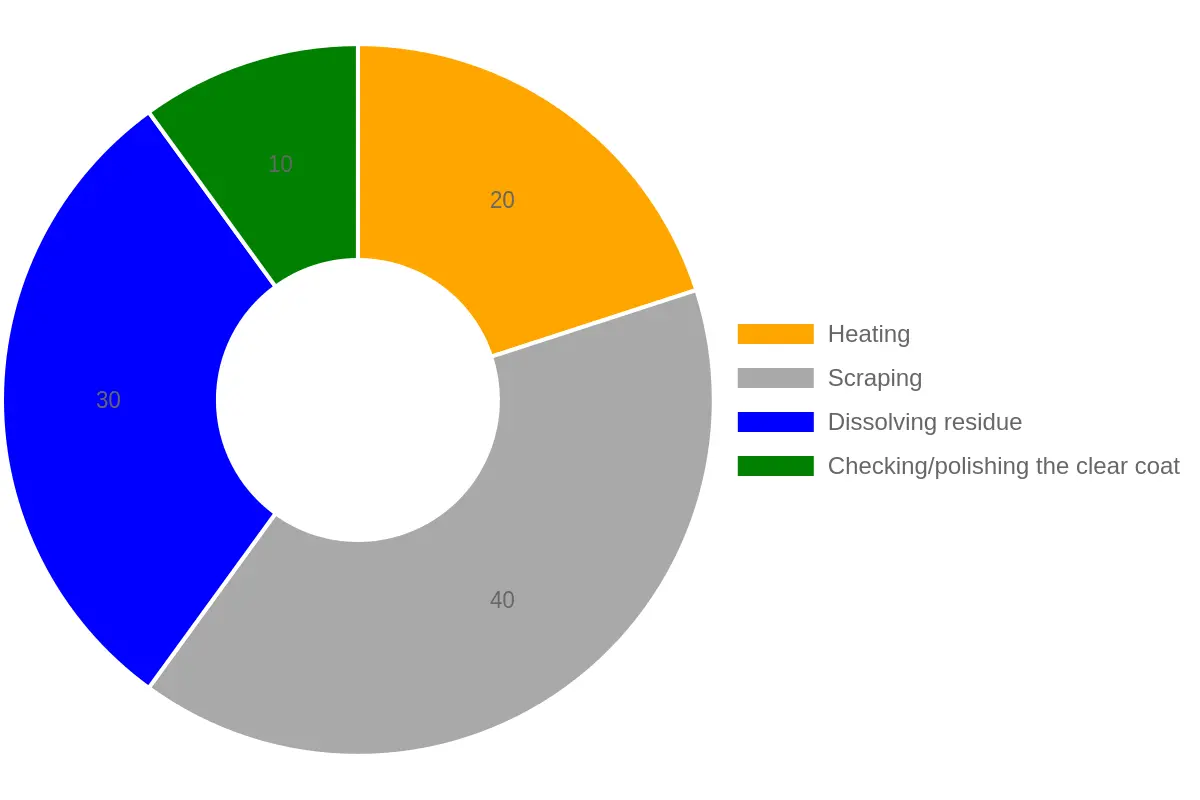
The job looks like one long scrub, but the time actually splits into three stages. The chart above breaks down the typical share of total job time for each.
- Heating (20%) — warming the tar so it softens and lets go instead of smearing.
- Scraping (40%) — the big one: lifting softened tar off the metal with a plastic scraper or rag. Most of your elbow grease disappears here.
- Dissolving residue (30%) — solvent and a microfiber cloth wipe away the stubborn film the scraper leaves behind.
- Checking/polishing the clear coat (10%) — a quick but non-negotiable final pass to inspect for leftover tar, catch any swirl marks, and restore gloss.
Scraping and dissolving dominate the clock because they do the heavy lifting. The last slice is small, about a tenth of the job, but skip it and you will be looking at tar streaks and dull patches days later. Treat the clear-coat check as part of the job, and the rims stay sharp long after the tar is gone.
Frequently Asked Questions About Road Tar on Truck Rims
Tar on the rims is part of truck life, especially after a long haul on fresh asphalt. These are the questions owners ask most.
Will dish soap remove road tar from rims?
Dish soap cuts grease well, but on its own it usually is not strong enough to remove road tar. It works as a follow-up rinse once the tar has softened and broken loose. For stubborn black specks, reach for a dedicated tar remover instead of scrubbing harder and risking a scratch.
Can I use WD-40 or adhesive remover on clear-coated rims?
Yes, but treat both with respect. WD-40 and adhesive removers help lift tar, and either can soften the clear coat if you leave it on too long. Test a hidden spot first, wipe quickly, rinse thoroughly, and never spray them on a hot wheel.
Does heat damage the wheel finish?
A little gentle heat helps; too much causes problems. A hair dryer or heat gun loosens tar with ease, but excess heat can bubble or discolor the finish. Keep the nozzle moving, stay a few inches back, and aim for warm rather than scorching.
Can I use a razor blade on alloy wheels?
Only with real caution. A plastic scraper is always safer, but a razor blade held at a shallow angle can lift tar off bare metal. Never drag it across the clear coat, and let heat do most of the work before you reach for any blade.
Does removing tar strip the clear coat?
The tar itself will not strip it, but rough scraping or harsh solvents can over time. A quality tar remover paired with gentle plastic tools keeps the finish intact. Reapply wax or a sealant afterward to restore the protective layer.
How do I prevent tar from sticking in the first place?
Give tar a surface it cannot grab. A fresh coat of wax or ceramic sealant helps, and so does rinsing your rims often after driving on fresh asphalt. Solid hands-on truck maintenance skills help here too.
Stop the Next Coat of Tar Before It Sets
Getting tar off once feels good. Keeping it off is better, and it saves you from scrubbing the same spots every month.
Start with a wheel sealant or ceramic coating. Both build a slick barrier that keeps hot tar from bonding to the metal. Clean the rim, let it dry, apply a thin, even layer, and let it cure. A wheel sealant on bare polished aluminum and a ceramic coating on painted or powder-coated wheels are both good picks.
If your rims have a clear coat, a coat of wax does the same for less money. Wax every few washes and tar wipes off instead of fighting back.
Timing matters too. After driving a freshly paved road, wash the rims soon after. Fresh tar lifts with soap and water; cured tar needs heat and scraping, so a quick rinse after new asphalt beats a weekend of scrubbing later.
After any long haul, walk around the truck and inspect. Look for fresh tar specks, curb rash, and loose lug nuts while you are down there. That habit folds rim care into the rest of your upkeep, alongside fluids, tires, and brakes.
A truck that stays clean under load stays road-ready. Pair your wheel routine with solid wrenching habits; for more on keeping a working truck on the road, see this step-by-step path to diesel success.
Heat It, Scrape It, Check the Clear Coat — Every Time
Removing road tar from truck rims comes down to one rhythm, followed in order. Heat it: warm the tar with a heat gun or hot water until it softens and loses its grip. Scrape it: lift the residue with a plastic scraper or an old credit card, letting the softened tar come off instead of forcing it. Check the clear coat: run your hand and eye over the whole wheel to catch leftover spots, missed edges, or scratches.
The order matters. Gentle heat and plastic tools keep the clear coat intact; metal and brute force dull and damage it. The final inspection protects the wheel long-term by catching small problems before they turn into corrosion or permanent marks.
Take your time, work through all three stages, and finish with a careful look. Keeping rims clean and the finish intact is simpler than it sounds when you heat it, scrape it, and check the clear coat every time.